
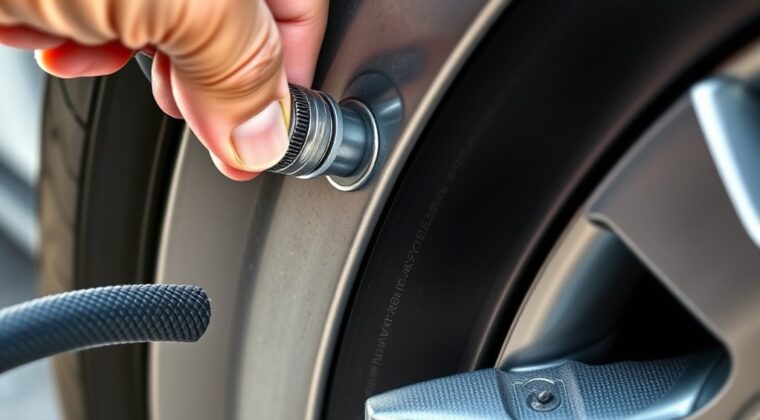
Remove the valve cap, then line up the inflator nozzle with the valve stem and press it on firmly to form a snug seal. Check your vehicle’s recommended PSI first, and inflate the tire only when it’s cold. Watch the gauge closely as you add air, and stop at the target pressure to avoid overinflation. When you’re done, screw the cap back on securely. If you keep going, you’ll see how to verify pressure and spot leaks.
Key Takeaways
- Remove the valve cap and keep it nearby before attaching the inflator.
- Confirm the inflator nozzle fits the valve stem and is clean and undamaged.
- Press the nozzle firmly onto the valve stem to create a snug, air-tight seal.
- Turn on the inflator and monitor the tire pressure closely while filling.
- Stop at the recommended PSI, remove the nozzle, and replace the valve cap securely.
How to Attach a Tire Inflator to a Valve Stem
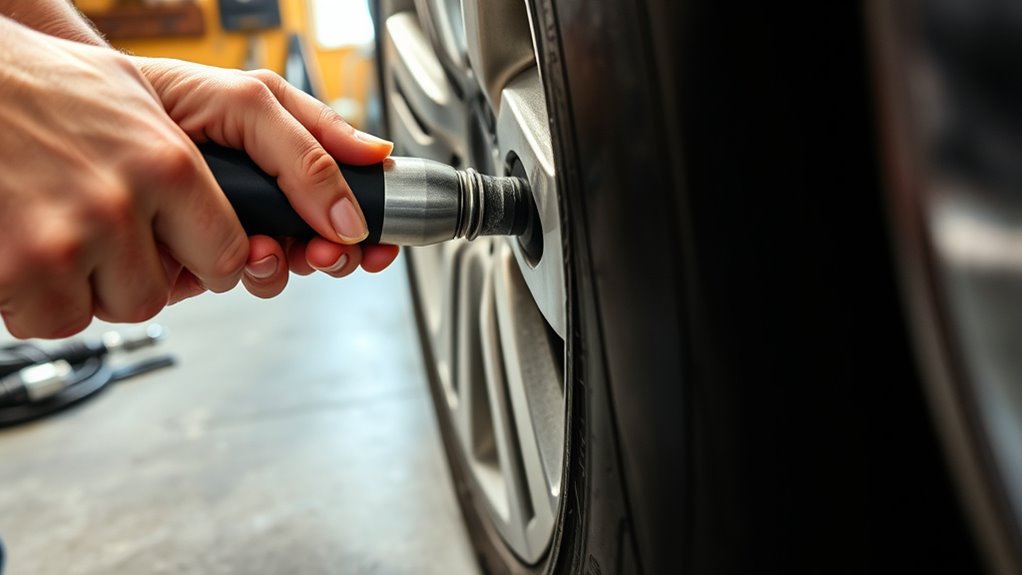
Start by locating the valve stem on the tire, which is the small cylindrical protrusion on the wheel’s edge. Then remove the valve stem cap and set it aside so you don’t lose it.
Align your portable tire inflator with the tire valve stem and press the nozzle straight on until it seats firmly. A secure fit blocks leaks; if you hear a brief hiss, you may need to adjust the angle or pressure.
Once attached, power on the inflator and watch the gauge as air enters the tire. Stop when you reach the desired tire pressure, not when the tire merely feels firm.
After inflation, disconnect the inflator carefully to avoid dumping air. Reinstall the valve cap tightly to protect the stem from dirt and moisture.
Then check your tire pressure with a gauge to confirm accuracy. This process keeps you in control and helps you maintain safe, independent mobility.
Tools You Need for the Job
Before you begin, gather the right tools: a compatible tire inflator or air compressor with a nozzle that fits snugly over the valve stem, a tire pressure gauge to verify pressure as you inflate, and a small screwdriver or pointed object in case you need to depress the valve pin.
Remove the valve stem cap first so the connection stays clean and you don’t trap debris that could cause leaks. Your tire inflator, whether it’s a portable air pump or shop air compressor, should deliver steady airflow and lock on securely.
Remove the valve stem cap first to keep the connection clean and prevent debris-caused leaks.
Keep your tire pressure gauge within reach so you can work efficiently and independently, without guessing. Use the pointed tool only if the valve pin sticks; don’t force it.
Check that all tools are in good condition before you start, because damaged gear can waste air and limit control. With the right tools ready, you can handle inflation safely and on your own terms.
How to Check Tire Pressure
Check your tires when they’re cold, ideally before you drive in the morning, so you get the most accurate pressure reading.
Use a tire pressure gauge, preferably a digital one, since it’s usually easier to read and more precise than an analog gauge.
Remove the valve cap, press the gauge firmly onto the valve stem, and read the pressure right away.
Check Tires When Cold
When the tires are cold—ideally first thing in the morning before you drive—measure the pressure with a tire gauge so heat from driving doesn’t inflate the reading.
Check each tire’s psi against the spec in your owner’s manual or the sticker inside the driver’s door. Remove the valve cap, seat the gauge firmly on the valve stem, and read quickly to prevent air loss. Use a digital gauge if you want precise numbers.
If you’re using a tire inflator, confirm the cold pressure before adding air, then stop at the recommended level.
Recheck monthly; routine pressure checks improve safety and can boost fuel efficiency by up to 3.3%. Cold checks help you keep control, reduce waste, and stay free from preventable tire problems.
Use A Pressure Gauge
Use a tire pressure gauge on cold tires, ideally first thing in the morning before you’ve driven, to get the most accurate reading.
Remove the valve cap, then press the gauge squarely onto the valve stem so no air escapes. Read the tire pressure immediately; digital gauges usually give clearer, more accurate results than analog models.
Check the recommended pressure in your manual or on the driver’s-door sticker, then compare it with your reading.
- Too low means you need to inflate.
- Too high means you should release air.
- Correct pressure supports safer, freer driving.
Regular pressure checks can improve fuel efficiency by up to 3.3% and reduce underinflation risks.
Keep the gauge handy and repeat this step often to stay in control.
How to Set the Right PSI
First, find your vehicle’s recommended PSI in the owner’s manual or on the driver’s door jamb sticker.
Check tire pressure when the tires are cold, then set your inflator to match that target reading.
Most passenger cars need about 30–35 psi, and using a digital gauge can help you verify the setting accurately.
Find Recommended PSI
To set the right PSI, check the recommended tire pressure on the sticker inside the driver’s door or in your vehicle’s owner’s manual. Then make sure the tires are cold before you measure them. Your recommended pressure depends on the vehicle, so don’t guess; compact cars often need about 32 psi, while larger SUVs may need around 35 psi.
Use tire inflators only after you confirm the target, and read the gauge at the valve stem with precision.
- Underinflation raises rolling resistance.
- Correct pressure improves handling and safety.
- Regular checks can cut fuel use and help maintain the right psi.
When adding air, stop at the specified value, then verify against the owner’s manual. This discipline supports efficiency, control, and freedom on the road.
Check Tire Pressure Cold
With the inflator ready, check tire pressure while the tires are cold, ideally before you drive in the morning, so you get an accurate reading.
Use a reliable digital gauge to check tire pressure, then compare the result with the PSI on the door sticker or owner’s manual.
Remove the valve cap, press the gauge firmly onto the valve stem, and keep it square so air doesn’t escape.
If you’re using a portable tire inflator, note the current reading before adding air in your tires.
Set your desired pressure carefully, and avoid over-inflating. Proper inflation lowers rolling resistance and can improve fuel efficiency, so you stay in control and waste less energy.
When the reading matches spec, replace the cap and move on with confidence.
Match Pump To PSI
Set the inflator’s target PSI by checking the vehicle’s owner’s manual or the sticker inside the driver’s door, since that’s the pressure range the tire was designed for. Most passenger vehicles sit around 30 to 35 PSI; SUVs may need up to 40 PSI.
Before you attach your portable air pumps to the valve stem, verify current pressure with a tire gauge so you don’t overinflate.
- Match the pump setting to the exact PSI, not a guess.
- Use auto shut-off if your inflator has it; it stops at the set PSI.
- Recheck after inflation, especially when temperatures drop.
You control the air, and that control protects the tire from blowouts, uneven wear, and needless dependence.
How to Inflate the Tire Safely
Position your vehicle close to the tire inflator so the hose reaches the valve stem without strain, then remove the valve stem cap and keep it clean while you work.
Attach the nozzle firmly to the valve stem; you want a snug seal so air doesn’t escape as you inflate the tire.
Secure the nozzle firmly to the valve stem for a snug seal that keeps air from escaping.
Start the inflator and monitor pressure with a gauge at regular intervals. Read the gauge after each short burst of air, because steady checks keep you in control and protect the tire from damage.
Stay focused, keep your hands clear of moving parts, and let the equipment do the work.
When the pressure reaches the target, stop the flow, disconnect the inflator, and replace the valve stem cap right away.
Finally, inspect the connection for leaks before you drive. If you hear hissing, reseat the nozzle and recheck the pressure.
This method gives you clean, direct control over inflation.
How to Avoid Overinflating
To avoid overinflating, always confirm the vehicle’s recommended tire pressure before you start, using the owner’s manual or the sticker inside the driver’s door as your reference. Set your portable tire inflator to that target, then watch the tire’s air pressure closely as it fills through the valve stem. Use a reliable gauge often; don’t trust guesswork. Stop the instant you reach the desired level, because even a small overshoot can overinflate the tire and compromise handling.
- Inflate when the tire is cold for accurate readings.
- Use inflators with automatic shut-off when possible.
- Inspect your inflator regularly so its readings stay precise.
A well-maintained tool lets you move with confidence and control, not uncertainty. If the inflator or gauge reads poorly, replace or service it before you continue.
Precision keeps your ride balanced, efficient, and free from preventable pressure errors.
Replace the Valve Cap and Recheck Pressure
Once you’ve reached the recommended pressure, screw the valve cap back on securely to keep dirt, moisture, and other debris out of the valve stem. You should replace the valve cap firmly, because a loose cap can allow air leaks and gradual deflation.
Check that the cap threads cleanly onto the valve stem and sits flush; don’t force it if it binds. Then recheck pressure with a reliable gauge to confirm the tire pressure still matches the target. If the reading has shifted, correct it before driving.
Inspect the cap regularly for cracks, stripped threads, or damage, since a worn cap can compromise pressure control and tire health. Keeping the cap installed protects the valve from moisture and contaminants that can cause malfunction.
This simple step helps you maintain safe, independent mobility with less risk and more control.
Frequently Asked Questions
How to Attach Tire Inflator to Tire?
You attach the tire inflator by removing the valve cap, matching the nozzle to the stem, and pressing it on firmly until it seals.
Check tire inflator types and inflator features before you start.
Watch the gauge, target proper pressure, and follow safety tips.
Do maintenance checks on the valve.
Avoid common mistakes like loose fittings or overinflation.
When you finish, shut off power, detach, and replace the cap.
Which Dot Do You Line up With the Valve Stem on a Tire?
You line up the small dot or groove on the inflator head with the valve stem; it’s the key that opens the lock.
Check valve stem alignment, confirm tire inflator compatibility, and press firmly.
Watch pressure gauge accuracy as you inflate.
Follow inflator safety tips, like keeping the stem clean, to avoid common inflator issues.
This precise routine supports tire maintenance importance and helps you drive with confidence, not dependence.
Are Tire Pressure Sensors Attached to the Valve Stem?
Yes, some tire pressure sensors attach to the valve stem, but it depends on the sensor types your vehicle uses.
With direct pressure monitoring, you’ll often find the sensor inside the tire on the valve stem; indirect systems don’t use stem-mounted sensors.
For tire maintenance, follow installation tips and safety precautions so you don’t damage the sensor.
You’ll keep your freedom to drive safely and avoid costly repairs.
How to Connect Air Valve to Tire?
To connect air valve to tire, you remove the cap, press the inflator nozzle onto the valve stem, and lock it firmly.
Choose from Inflator types with a reliable Pressure gauge, then inflate to the psi in your manual.
Follow Tire maintenance tips, practice Valve stem care, and use Safety precautions to avoid Common issues like leaks.
Once set, detach straight off and replace the cap.
Conclusion
By following these steps, you can connect your tire inflator to the valve stem with confidence and keep your tires at the correct PSI. Always check the pressure before you add air, inflate in small increments, and stop before you overfill. Replace the valve cap when you’re done, then recheck the reading to confirm accuracy. With this careful routine, you’ll avoid damage, improve handling, and, in a manner of speaking, keep your vehicle running like clockwork.