
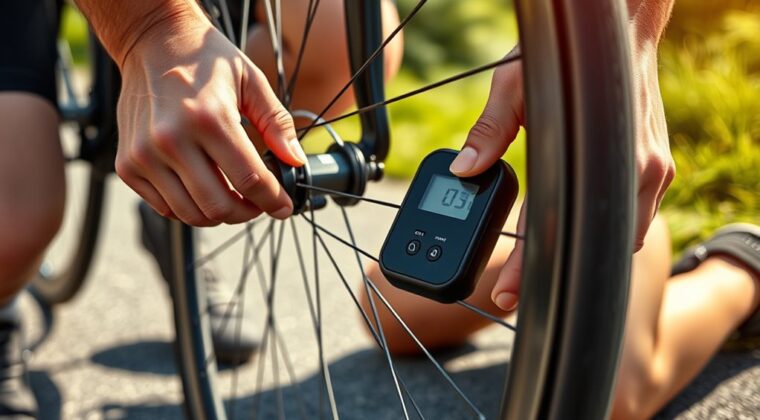
Check the tire sidewall for the recommended PSI, then confirm whether you have a Presta or Schrader valve. If it’s Presta, unscrew the tip or use a Presta-to-Schrader adapter. Attach the tire inflator securely, set the compressor to the low end of the target range, and add air in short bursts while watching the gauge. Stop at the correct pressure, remove the inflator, and seal the valve. A few extra steps can prevent leaks and mistakes.
Key Takeaways
- Check the tire sidewall for the recommended PSI and inspect current pressure before inflating.
- Identify whether the valve is Presta or Schrader, and open the Presta valve tip if needed.
- Use the correct inflator or adapter, then secure the connection tightly to prevent air leaks.
- Inflate slowly in small bursts while watching the gauge to avoid over-inflation.
- Disconnect carefully, close the Presta valve, and check for leaks or pressure loss afterward.
Check Your Tire Pressure First
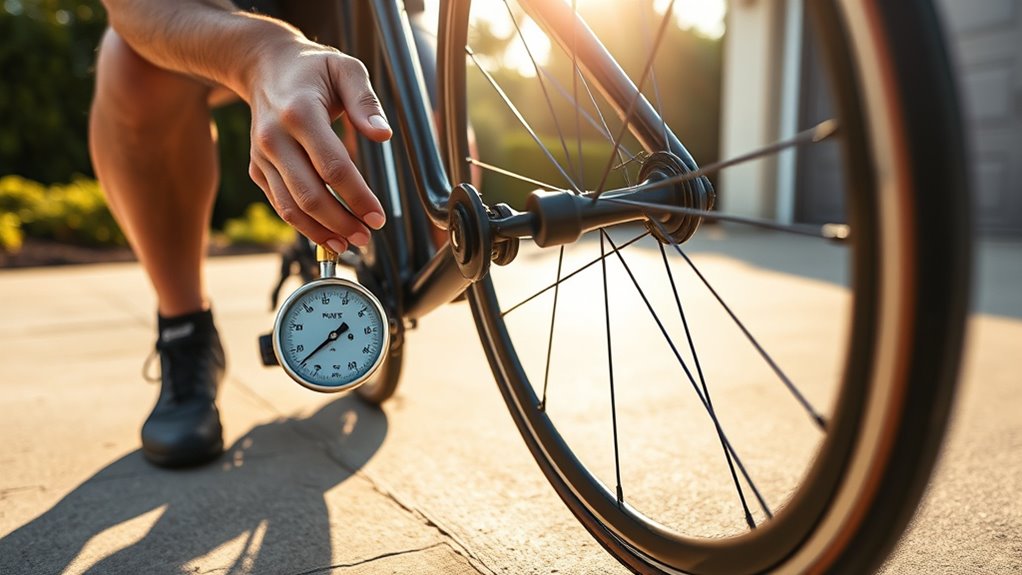
Before you add air, check the tire’s sidewall for the recommended pressure range, usually listed in PSI or bar. Use a gauge for tire pressure checks before inflating, so you know the current value and can compare it with the manufacturer’s recommended tire pressure. This step keeps you from overinflating or underinflating, both of which can hurt handling and efficiency.
Also account for tire width, your weight, and the surfaces you ride on. Wider tires require lower pressure than narrow ones, and that difference matters for grip and comfort. If you ride on rough roads, you may choose a slightly lower setting within the approved range. On smooth pavement, you can stay nearer the higher end.
Recheck pressure regularly, since small losses add up over time. When you start from the correct baseline, you ride with more control, less waste, and more freedom.
Identify Your Valve Type
Locate your valve type before you connect a pump, since bicycle tires usually use either a Presta or Schrader valve. You’ll use that valve type to match the inflator and avoid wasted effort.
A Presta valve is slimmer, with a narrow threaded shaft and a small screw-on tip; you must unscrew the tip before you inflate a Presta. Schrader valves look like car tire valves: wider, cylindrical, and built for city bikes and many utility wheels.
To confirm a Presta valve is open, back off the tip and press it briefly; you should hear a short burst of air. Then read the tire sidewall for pressure specs, because the correct PSI depends on tire size and setup.
If your pump only fits Schrader, don’t force it onto a Presta valve—use the proper adapter or choose a compatible inflator. Matching the valve keeps your inflation process clean, fast, and under your control.
Use a Presta-to-Schrader Adapter
Screw the Presta-to-Schrader adapter onto the open Presta valve until it’s snug and airtight.
Then connect your Schrader pump and inflate the tire to the recommended pressure, checking for leaks as you go.
When you’re done, remove the adapter and close the Presta valve to hold the air in.
Adapter Setup Steps
If your bike uses a Presta valve, make sure you’ve got a Presta-to-Schrader adapter before you start inflating. Unscrew the Presta valve tip fully, then thread the adapter onto the open valve by hand.
Tighten it until it sits snug and straight; don’t force it. A secure adapter lets you connect a Schrader inflator without stressing the valve or wasting effort.
After the adapter is seated, verify that the valve core stays aligned and that no air leaks at the connection. You’re now set to inflate with controlled pressure and clean mechanics.
When you finish, remove the adapter carefully, let any brief air release settle, then screw the Presta tip back down.
Check pressure with a gauge and match the recommended PSI exactly.
Pumping With Adapter
Once the Presta-to-Schrader adapter is firmly attached, connect your Schrader pump and begin inflating the tire with steady, controlled strokes.
Keep the adapter tight on the Presta valve; a loose fit can bleed air and slow your progress. Watch the pressure gauge as you pump so you can reach the recommended pressure without overinflating.
When you inflate a road bike tire, precision matters because the casing and rim depend on exact pressure. Using an adapter gives you freedom to use common pumps, so you’re not locked out by specialized equipment.
After the tire reaches target pressure, stop pumping, unscrew the adapter carefully, and close the Presta valve by threading the tip back down. This keeps pressure loss minimal and preserves ride-ready efficiency.
Set the Compressor Pressure
Check the tire sidewall first so you know the recommended pressure range in PSI or bar.
Then adjust the compressor to the lower end of that range and verify the gauge reads accurately.
This keeps the setting matched to the tire’s specifications and reduces the risk of over-inflation.
Check Tire Pressure
Look at the tire sidewall for the recommended pressure range before you set the compressor, since that PSI or bar rating tells you how much air the tire can safely hold.
When you check tire pressure, read the tire pressure specifications exactly as printed, because they define the recommended tire pressure for safe, efficient riding.
Secure the compressor connection firmly so you don’t lose air or skew the gauge. Then watch the pressure gauge continuously while you inflate; the reading should rise steadily and stop at the target value.
If you see pressure climbing past the limit, pause and release excess air. Precise pressure control protects the tire, improves handling, and keeps you free from avoidable failure on the road.
Adjust Compressor PSI
Set the compressor to the tire’s recommended PSI or bar, matching the pressure printed on the sidewall before you start inflating. Then adjust compressor psi with the control dial until the gauge shows your target.
Keep watching the readout during tire pressure checks so you stay inside the safe operating window and don’t over-inflate. A precise setting gives you control, protects the tire casing, and keeps your ride efficient.
If your compressor has auto shut-off, set it to stop at the preset pressure and let it do the work. Verify gauge accuracy before each use, because a drifting gauge can mislead you.
Recheck the setting if you change tires or conditions, and keep your inflation routine disciplined, accurate, and free from unnecessary pressure.
Match Tire Specifications
With the gauge adjusted, match the compressor pressure to the tire’s specifications on the sidewall before you inflate. Read the listed PSI or bar range, then set the compressor to the lower end first to avoid over-inflation and protect your ride.
If your tire is wider, choose the low side of the range for better comfort and control. Make gradual adjustments as needed, and never exceed the maximum rating printed on the tire. During tire pressure checks, keep your eyes on the gauge so you can correct drift before it matters.
Once the setup is right, match the valve securely and inflate the tire with confidence, knowing you’ve set limits that support performance, safety, and the freedom to roll without unnecessary restraint.
Attach the Tire Inflator Without Leaks
Make sure the valve is fully open before you attach the inflator, since unscrewing the tip helps air flow smoothly and reduces the chance of leaks.
Then seat the hose straight onto the valve stem and lock it firmly so you can attach the tire inflator without leaks.
Seat the hose straight on the valve stem and lock it firmly to prevent leaks.
If you’re working with a Presta valve, thread on a Presta-to-Schrader adapter first; it creates the proper seal and lets the chuck grip correctly.
Keep the connection aligned, because side loading can open tiny gaps and waste pressure.
Once connected, monitor the connection for hissing or wobble, both signs that air is escaping.
If you hear either one, stop and reset the fitting before you continue.
A tight, stable seal gives you control and keeps you from surrendering air to poor hardware.
When you finish, remove the inflator carefully and quickly, then close the valve tightly to preserve the pressure you’ve earned.
Inflate the Bicycle Tire Slowly
Once the inflator is locked on and the seal holds, pump air in gradually while watching the gauge closely. To inflate the bicycle tire slowly, keep your hand on the trigger or lever and make small bursts instead of a hard blast. Read the pressure gauge after each burst and compare it to the PSI printed on the sidewall. Your target pressure should support control and comfort, not brute force.
| Checkpoint | Action | Result |
|---|---|---|
| Start | Add air slowly | Stable fill |
| Gauge | Monitor every burst | Accurate reading |
| Sidewall | Note PSI range | Safe limit |
| Settle | Pause briefly | Pressure evens out |
| Final | Top up if needed | Dialed-in feel |
If you use an air compressor, set it to the tire’s specification before you begin. After a short pause, recheck pressure, since some air may shift or settle. Then verify again before riding, so your wheel stays ready for freer, safer movement.
Stop at the Right PSI
Check the tire sidewall for the specified PSI or bar before you start inflating.
Use a pressure gauge as you pump so you can match the recommended pressure exactly.
Stop as soon as you reach the target PSI to avoid overinflation and possible tire damage.
Check Tire Sidewall PSI
Before you add air, look at the tire sidewall for the recommended PSI range and use that as your baseline. You need to check the pressure range before every inflation, because tire width, rider weight, and surface conditions change the target.
Use these tire pressure checks to keep your setup precise and free from guesswork.
- Read the minimum and maximum number listed.
- Match your tire width to the correct pressure band.
- Adjust lower for wider tires and higher for narrower ones.
- Recheck after a short ride if feel or handling changes.
Don’t treat the maximum number listed as your goal; use it as a ceiling. The right PSI gives you control, comfort, and speed without surrendering safety.
Stop Before Overinflation
With the PSI range in hand, you need to stop at the right pressure instead of pushing past it. Watch the gauge as you inflate and make tire pressure checks part of the process. Aim for the target pressure printed on the sidewall, not the highest number by default.
If you keep going, you risk over-inflating, which can trigger blowouts, cut grip, and speed up wear. Choose a pressure that matches your tire width and riding conditions; wider tires usually perform better at lower PSI. That balance gives you control, comfort, and efficiency.
Once you hit the target pressure, stop, remove the inflator, and seal the valve. Check your tires regularly so you keep your ride free, responsive, and ready.
Remove the Inflator and Seal the Valve
Release the pump head from the valve once you reach the desired tire pressure, then remove it cleanly; a brief hiss of escaping air is normal and shouldn’t noticeably reduce pressure.
If you used an adapter, remove the adapter now so the valve can close freely. The seal guarantees that air stays inside the tire as soon as you disengage the inflator. A brief hiss of air may occur, but you can ignore it if the gauge was correct.
- Disengage the pump head fully before pulling it off.
- Screw the Presta valve tip back down immediately.
- Replace the valve cap if your wheel has one.
- Check the valve seal regularly for secure, consistent retention.
You keep control by sealing the valve at once, which preserves pressure and supports efficient, liberated riding.
Avoid leaving the valve open, since even a small delay can let air escape and reduce performance.
Fix Leaks and Valve Problems
If your tire still loses air after inflation, check the valve for leaks by brushing soapy water around the stem and watching for bubbles. That test shows where escaping air is coming from, so you can act fast. Tighten the valve core if it’s loose, because even a small gap can cause slow loss. Inspect the valve for grit, bent parts, or other damage that blocks a clean seal. For Presta valves, close the tip fully after inflation so air can’t drift out.
| Check | What you see | Fix |
|---|---|---|
| Soapy water | Bubbles | Tighten or replace core |
| Stem | Dirt or damage | Clean or repair |
| Presta tip | Not fully closed | Close it firmly |
| Persistent leak | Ongoing air loss | Use a repair kit |
If the leaking continues, replace the valve core or use a valve repair kit. This keeps your wheel ready, stable, and under your control.
Check Tire Pressure Regularly
Check your tire pressure regularly with a gauge, and compare it to the PSI or bar range printed on the tire sidewall. When you check tire pressure regularly, you protect performance, safety, and tire life. Your tire pressure specifications tell you the approved range, but your ideal tire pressure can shift with tire width, rider weight, and riding conditions.
- Measure pressure before long rides.
- Read the gauge at least once a month.
- Adjust inflation for load and terrain.
- Recheck after leaks or valve service.
Under-inflation raises rolling resistance and wastes energy; over-inflation stiffens the ride and cuts grip. Use a reliable pressure gauge, not guesswork, so you stay in control and ride free.
Under-inflation wastes energy, while over-inflation can reduce grip; a reliable gauge keeps your ride efficient and controlled.
Keep your inflation within the recommended range, then fine-tune slightly for comfort or speed. Consistent checks help you roll farther, corner better, and keep your bike ready for any road, trail, or commute.
Frequently Asked Questions
How to Use a Portable Tire Inflator for a Bike?
Use a portable inflator by matching it to your valve type, then locking the hose on securely.
You’ll check tire pressure on the sidewall, set the target, and watch the gauge as you add air.
Choose among inflator types with the right adapter, stop before overfilling, and disconnect carefully.
For maintenance tips, inspect leaks, reseat the valve, and keep the inflator charged so you stay ready and mobile.
Can You Use a Tire Inflator for a Bike?
Yes, you can use a tire inflator for your bike if you match inflator compatibility to your valve and bicycle tire types.
You’ll need the right nozzle for Presta or Schrader, and you should verify pressure ratings before pumping.
Follow safety precautions: watch the gauge, avoid overinflation, and stop at the sidewall’s recommended psi.
If your inflator has auto shutoff, set it and let it protect your ride.
How to Put Air in a Bicycle Tire With a Pump?
You put air in your bicycle tire by matching the pump to the valve, opening the valve, and locking the pump head on securely.
Use the gauge to watch air pressure importance, then inflate to the PSI on the sidewall.
For bicycle tire maintenance, stop before overfilling and recheck pressure after riding.
In a pump types comparison, floor pumps offer speed, while hand pumps give portability and freedom.
Is There a Portable Air Compressor That Can Inflate Bike Tires?
Yes, you can use a portable air compressor to inflate bike tires.
You’ll find models with built-in gauges, adjustable PSI, and Presta or Schrader nozzles, so you can match your valve exactly.
For Bicycle maintenance tips, check Tire pressure importance before every ride.
Portable inflator advantages include compact size, rechargeable power, and automatic shut-off, giving you precise control and the freedom to maintain your bike anywhere, on your terms.
Conclusion
By now, you know how to inflate your bike tire with a tire inflator safely and accurately. Check the pressure, match the valve, set the compressor, and fill the tire until it reaches the correct PSI. Don’t overinflate; a tire is like a balloon with a limit, and exceeding it can cause damage or failure. Remove the inflator carefully, seal the valve, and recheck pressure often to keep your ride smooth and secure.