
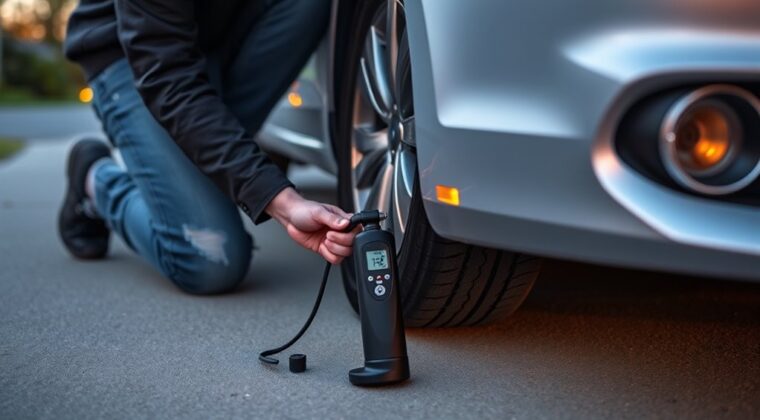
Check your vehicle’s recommended PSI on the door jamb sticker or in the owner’s manual, then park on level ground with the engine off and parking brake set. Inspect the tire for cuts, bulges, or punctures before attaching the inflator hose securely to the valve stem. Set the target pressure, inflate in short bursts, and watch the gauge closely. Stop at the correct PSI, bleed off any excess air, replace the cap, and there’s more to know.
Key Takeaways
- Check the vehicle’s recommended PSI on the door jamb sticker or manual before inflating.
- Park on level ground, engage the parking brake, and turn the engine off for safety.
- Inspect the tire for cuts, bulges, punctures, or sidewall damage before adding air.
- Attach the inflator securely to the valve stem, inflate in short bursts, and monitor the pressure gauge.
- Stop at the recommended PSI, recheck with a gauge, and tighten the valve cap afterward.
Check the Recommended Tire Pressure
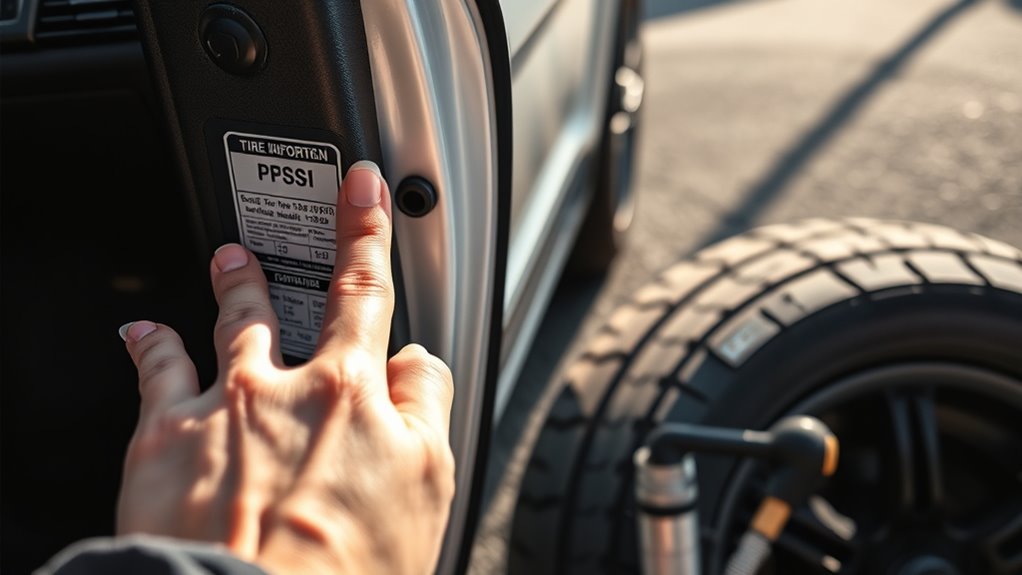
Before you add air, check your vehicle’s recommended tire pressure in the owner’s manual or on the sticker in the driver’s door jamb. This PSI value is the baseline for safe, efficient operation, and it can vary by vehicle type and load.
Use a tire pressure gauge to check your tire pressure only when the tires are cold, because driving heats the air and can inflate readings. Compare the measured pressure with the desired tire pressure listed for your specific tires.
Check tire pressure when tires are cold, since driving can temporarily inflate the readings.
If the pressure is low, you’ll need to inflate your tires to restore proper support, fuel efficiency, and handling. Under-inflation can cut fuel economy by up to 3% for every 1 PSI drop, while over-inflation can cause uneven wear and less traction.
Check your tire pressure about once a month to keep them properly inflated and to extend tire life.
Park Safely on Level Ground
Park your vehicle on a flat, level surface before you inflate the tires.
This keeps the vehicle stable and reduces the risk of rolling while you work.
Engage the parking brake firmly to secure it in place.
Level Parking Spot
Choose a flat, stable parking spot so your car stays secure while you inflate the tires. A level parking spot reduces roll risk and supports safety on the road.
Park on a flat, stable surface, not on inclines or rough terrain, because uneven ground can shift the vehicle and compromise control.
Before you connect the inflator, check the surrounding area for traffic, curbs, debris, and other obstacles to guarantee a safe working environment.
At a gas station, leave extra space from moving vehicles and stay alert.
Tire inflators provide controlled pressure, but they can’t correct a poor setup. Use your judgment, protect your space, and create the conditions you need to work freely and safely.
Engage Parking Brake
Engage the parking brake and turn off the engine before you begin inflating the tires, because this helps keep the vehicle stationary and reduces the risk of unexpected movement.
You should always engage the parking brake as a basic safety measure before any inflation procedure.
Park on a flat surface so you preserve vehicle stability and get more accurate tire pressure readings.
Avoid slopes, loose gravel, or rough terrain, since they can let the car shift and create accidents.
With the engine off, you remove another source of motion and keep your focus on the task.
This simple step gives you control, protects your freedom to work safely, and lets you inflate each tire with confidence.
Check the pressure only after the car’s secure and still.
Inspect the Tire for Damage
Before you inflate the tire, inspect it closely for visible damage such as cuts, bulges, or punctures. You should inspect the tire for damage across the tread, sidewalls, and around the valve stem.
Look for visible damage that could weaken tire integrity or make safe inflation impossible. In the tread, small punctures may still hold air long enough for temporary use, but they need immediate professional repair.
Check the sidewalls for cracks, cuts, or deformities; these often signal internal failure and unsafe inflation conditions. Confirm the valve stem isn’t cracked, bent, or leaking, because even minor leaks can cause rapid air loss after inflation.
If you find significant damage, don’t inflate the tire. Refuse unsafe shortcuts and seek professional repair instead.
Careful inspection protects you from blowouts, preserves control, and lets you move with confidence.
Attach the Tire Inflator
Clean the valve stem first so dirt and debris won’t interfere with a tight seal, then press the inflator hose firmly onto the stem until it clicks into place.
When you attach the tire inflator, keep the valve stem clean and free of debris so you get a reliable seal and reduce air loss. A secure connection matters for effective inflation, especially when you’re working fast and safely.
If you use a clamp-type connector, fully engage the clamp so it can’t pop loose under pressure.
With digital inflators, set the target pressure before you connect it so you can move with precision and control.
After you attach the tire inflator, double-check that the hose sits straight and the fitting won’t wiggle. That final check helps you avoid inefficient inflation, accidental disconnection, and possible equipment damage.
You’re not just filling a tire—you’re taking command of a simple task with accuracy and care.
Set the PSI and Start Inflation
Set the target PSI on the inflator using your vehicle’s recommended pressure, which you can find in the owner’s manual or on the door-jamb sticker, and adjust for temperature if conditions call for it.
On your portable tire inflator, set the desired tire pressure specifications before you begin.
Once you attach the air hose to the valve stem, confirm the connection is locked so air flows without leakage.
Attach the air hose securely to the valve stem so you maintain a tight, leak-free seal.
Power on the unit and let it inflate car tires until it reaches the preset value.
Stay focused and stop the inflator as soon as it hits the target PSI; overinflation can compromise control and cause uneven wear.
After inflation, check the pressure with a reliable gauge, then recheck the pressure if needed to confirm accuracy.
If the reading is correct, tighten the valve cap securely to help prevent air loss.
This process keeps you in command and helps you maintain safe, independent mobility.
Monitor Pressure as You Fill
As the tire fills, watch the pressure gauge continuously so you don’t go past the PSI listed on the driver’s door-jamb sticker. You need to monitor pressure in real time, because even a small overshoot can cause over-inflation, uneven wear, and weaker traction.
Inflate the tire in short bursts, then check the pressure before adding more air. If your inflator has automatic shut-off features, use them, but don’t trust them blindly; keep your eyes on the gauge and your hand near the controls.
The drivers door jamb label gives you the target, and you should treat that number as your desired pressure. Temperature can shift readings, especially if the tires were cold when you started, so recheck after inflation to confirm the final value.
If the gauge shows too much air, release it gradually at the valve stem until you hit the desired pressure. Precision keeps your vehicle responsive and keeps you in control.
Stop at the Recommended PSI
Stop inflating when the tire reaches the PSI listed on your vehicle’s door-jamb sticker or owner’s manual. You set the standard, not guesswork. Use a reliable gauge and check tire pressure after each short burst so you can stop at the recommended PSI without overloading the carcass or reducing traction.
| Checkpoint | Action |
|---|---|
| Spec source | Read door-jamb sticker or manual |
| Tool | Use gauge on valve stem |
| Inflate method | Add air in short bursts |
| Target | Match recommended PSI exactly |
| Finish | Recheck, then tighten valve cap |
If the reading climbs past spec, you’ve overinflated the tire, which can cause uneven wear and raise blowout risk. Keep the process deliberate and mechanical: inflate, pause, measure, and compare. When the gauge shows the correct tire pressure, stop immediately. This disciplined approach protects your tires, preserves handling, and keeps you in command of the road.
Correct Overinflation and Replace the Cap
Check the tire pressure with a gauge after filling so you can confirm it’s at the recommended PSI.
If it’s too high, release excess air by pressing the valve stem’s center in short bursts until you reach the correct level.
Then securely replace the valve cap to keep dirt out and help prevent air loss.
Check Pressure After Filling
Once you’ve filled the tire, use a tire pressure gauge to verify that the pressure matches the recommended PSI listed on your vehicle’s door jamb sticker or in the owner’s manual.
Check pressure after you inflate with the air compressor, because heat from the process can raise the reading briefly. If the tire is above the correct tire pressure, press the valve stem center until the gauge shows target PSI.
Keep your adjustments precise; overinflation reduces grip and can contribute to uneven tire wear. When the reading is right, replace the valve cap tightly to seal the valve and block dirt.
Regularly monitoring pressure gives you control over tire health, improves safety, and extends service life. That discipline supports independent, confident driving every mile.
Release Excess Air
If the gauge shows pressure above the recommended PSI, release a small amount of air by pressing the center of the valve stem with a small tool or your finger.
Use a tire pressure gauge as you release excess air, and stop when you reach the desired pressure. Check the vehicle’s manual or door jamb sticker so you match the specified PSI and support peak performance.
Don’t vent too fast; controlled adjustments keep you from going below target and risking under-inflation.
Once pressure is correct, replace the valve cap to reduce contamination and help maintain the seal.
Secure Valve Cap
Secure the valve cap tightly after inflating the tire to help prevent air loss and keep dirt, moisture, and debris out of the valve stem.
If you overfill, release some air by pressing the center of the valve stem gently until you reach the desired pressure. Then secure the valve cap firmly; a loose or damaged cap can let contamination enter and damage the stem, causing slow leaks.
Check the cap for cracks each time you service the tire, and replace it if it’s compromised. You should check tire pressure regularly because properly inflated tires improve handling, tire life, and fuel efficiency.
After reinstalling the cap, double-check the gauge reading to confirm you’re at the recommended PSI. This small step protects performance and keeps you in control.
Store Your Tire Inflator Properly
Store your tire inflator in a dry, cool place to reduce moisture damage and slow battery degradation.
To store your tire inflator properly, disconnect it, let it cool, and place it in its original case or a protective bag. That shields the housing, keeps accessories organized, and prevents abrasion during transport.
Before storage, confirm the rechargeable battery is fully charged, then follow regular charging, about monthly, to preserve capacity.
Inspect connections and hoses for cracks, kinks, or loose fittings so you catch failures before the next use.
Keep the unit away from extreme temperatures; heat can age seals and cells, while cold can reduce output and make startup unreliable.
Avoid damp garages, direct sun, and trunk locations that trap heat.
When you store it correctly, you protect your equipment, extend service life, and keep your inflation tools ready whenever you need them.
Frequently Asked Questions
How to Inflate a Tire With a Tire Inflator?
You inflate a tire by checking tire pressure, then attaching the inflator to the valve stem and setting the target PSI.
Different inflator types offer digital gauges or manual operation, so match the tool to your needs.
Turn it on, watch the reading, and stop at spec.
Avoid common mistakes like overfilling or leaks.
Use precise inflating techniques, and follow maintenance tips to keep your setup safe, accurate, and ready.
What Is the 4 Psi Rule on Tires?
The 4 PSI rule means your tire pressure can change about 1 PSI for every 10°F air temperature shift, so you should check and adjust it often.
Keep tire pressure within 4 PSI of the placard to cut overinflation risks and prevent underinflation.
A steady gauge accuracy check at the valve stem helps you set inflation frequency correctly.
That’s the rub: disciplined maintenance tips keep you safe and moving free.
What Are the Safety Precautions When Using a Tire Inflator for a Car?
You should park on level ground, set the brake, and shut off the engine before using any inflator.
Check tire pressure with a gauge, inspect for damage, and match the recommended PSI.
Wear safety gear, know your inflator types, and avoid common mistakes like overinflation.
Skip punctured tires, follow maintenance checks, and keep emergency tips ready.
These steps protect tire lifespan and let you move safely, with control.
What Is the 5 Psi Rule?
The 5 PSI rule means you adjust tire pressure by about 5 PSI to offset temperature effects and keep tire maintenance on track.
You should check tire pressure when tires are cool, verify gauge accuracy, and use the valve stem carefully.
In winter, you may add 2–3 PSI; in summer, you may reduce pressure.
Your inflation frequency depends on inflator types, weather, and safety needs.
Conclusion
Now you know how to inflate your car tires safely with a tire inflator. Check the recommended PSI, park on level ground, inspect for damage, and inflate slowly while monitoring pressure. Stop at the correct reading, correct any overinflation, and replace the valve cap securely. Store your inflator properly so it’s ready next time. Remember, an ounce of prevention is worth a pound of cure, and careful maintenance helps keep your tires safe, efficient, and road-ready.