Choose a Home Assistant-compatible Level 2 EV charger by checking three things first: safe electrical capacity, local integration support, and control over charging current. A good setup lets you schedule charging, use cheaper utility windows, prioritize solar surplus, and monitor energy use without depending only on a manufacturer cloud app.
Quick Answer
To add an EV charger to Home Assistant, choose a Level 2 charger with a supported native integration, MQTT, HTTP API, OCPP, or Modbus. Have a licensed electrician confirm panel capacity, permits, breaker size, and wiring. Then connect the charger to your network, add it in Home Assistant, test current limits, and build automations for off-peak charging, solar surplus, and plug-in reminders.
Key Takeaways
- A residential Level 2 charger usually uses 240-volt service and should be sized by a licensed electrician using a real load calculation.
- For Home Assistant, local control is best. Look for native integration support, MQTT, HTTP API, OCPP, or Modbus before you buy.
- Smart scheduling can shift charging to off-peak utility periods and reduce manual charging decisions.
- Solar surplus charging needs reliable solar production data, charger current control, and a fail-safe rule that prevents overloading the home circuit.
- Do not expose charger APIs or MQTT brokers to the public internet. Keep control local, authenticated, and updated.
At a Glance
| Time Required | 30 to 90 minutes for Home Assistant setup after the charger and circuit are installed. Electrical work, permits, and inspection timing vary by location. |
| Difficulty | Moderate for software setup; professional level for new wiring, hardwiring, breaker work, or panel upgrades. |
| Tools Needed | Home Assistant, charger app, Wi-Fi or Ethernet access, MQTT broker or API integration if needed, energy sensors, and electrician-supplied installation tools. |
| Cost | Home Assistant configuration may cost nothing if your hardware is ready. Charger hardware, permits, wiring, breaker work, and panel upgrades vary by home and installer. |
Warning: A Level 2 EV charger can involve 240-volt wiring, continuous electrical load, breaker sizing, grounding, and local inspection. Do not add a new circuit, hardwire a charger, bypass a breaker limit, or modify a service panel unless you are legally qualified to do that work. Hire a licensed electrician for installation and code compliance.
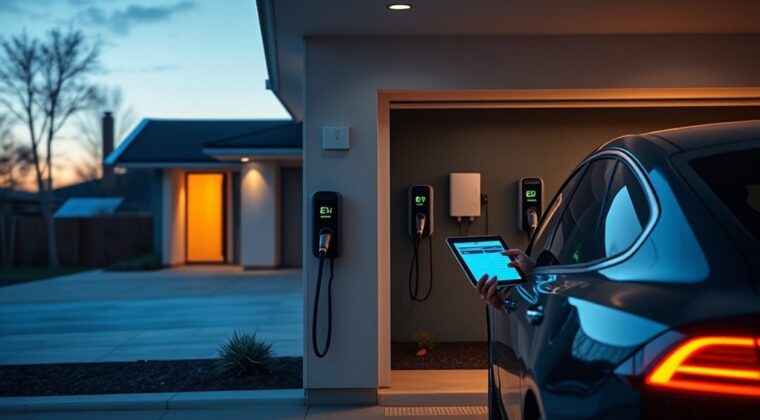
Choose the Right Smart EV Charger
Before you buy, make sure the EV charger fits both your vehicle and your smart home stack. For most homes, that means a Level 2 charger that uses 240-volt residential service and can charge a typical EV overnight. The U.S. Department of Energy’s Alternative Fuels Data Center describes AC Level 2 charging as about 25 miles of range per hour in a typical setup, with actual speed depending on charger power, vehicle limits, battery state, and electrical service.
For Home Assistant, the most important feature is not just app control. It is controllable data. Look for a charger that can expose charging state, power, current limit, session energy, plug state, and error codes through a supported integration. The best options support at least one of these paths:
- Native Home Assistant integration: easiest when the charger brand is directly supported.
- MQTT: useful for local status updates, automations, and fast state changes.
- HTTP or REST API: useful for custom commands, current limits, and dashboards.
- OCPP: common for networked chargers and charge-point management systems.
- Modbus: useful when you want local industrial-style control and energy data.
If you are considering a go-e Charger, the official go-eCharger API v2 documentation confirms that API keys can be read and written through HTTP and MQTT. That makes it a strong candidate for a local-first smart charging setup when the model, firmware, and region match your needs.
Note: “Smart charger” does not always mean “Home Assistant friendly.” Some chargers only work through a cloud app. If you want reliable local automation, verify the integration method before buying.
Check Your Home’s Electrical Capacity
Check your panel and circuit capacity early. A Level 2 EV charger usually needs a dedicated 240-volt branch circuit in a residential installation, but the exact breaker size depends on the charger’s maximum current, wiring method, local code, and your home’s available load capacity.
Do not assume you need a 200 amp service panel, and do not assume your existing panel has enough spare capacity. The correct answer comes from a load calculation. A licensed electrician should review your panel, main service size, existing major loads, wire route, grounding, breaker space, and whether a load management device is needed.
The AFDC notes that many residential Level 2 chargers operate at up to 30 amps and need a dedicated 40 amp circuit to comply with National Electrical Code Article 625 requirements. Larger chargers can need larger circuits, and some homes may be better served by a lower current setting if panel capacity is limited.
Match Charger Output to Real Driving Needs
A higher amp rating is not always better. If you drive 30 to 50 miles per day, a lower current Level 2 setting may refill your battery overnight while reducing panel stress. If you drive long distances daily, share the charger with another EV, or need fast overnight recovery, a higher current setup may be worth the added installation cost.
- Light daily driving: lower current charging may be enough.
- Long commutes: choose a charger and circuit that can recover your daily use overnight.
- Two EVs: consider load sharing or a charger that supports current balancing.
- Solar charging: choose a charger that can adjust current in response to solar surplus.
Plug-In vs Hardwired Installation
A plug-in charger can be easier to replace or move, but the receptacle, breaker, wire, and enclosure still need to be rated for the load and location. A hardwired charger can be cleaner outdoors and may support higher current, depending on the model and local code.
Ask your installer which option fits your charger, wall location, weather exposure, and inspection rules. If the charger is outdoors, confirm the unit’s enclosure rating and whether the plug, receptacle, or hardwired connection is suitable for that environment.
Handle Permits and Local Code
Before you install an EV charger, verify local permit requirements with your building or electrical authority. Many areas require a permit for a new 240-volt circuit, hardwired EVSE, panel changes, or exterior installation. If you live in a condo, townhouse, or HOA community, you may also need association approval.
You also need to confirm that your plan follows local electrical code and applicable EV charging rules. In the United States, EV charger installations commonly reference NEC Article 625, but local amendments and inspection practices can vary.
Permit Requirements
Permits protect you from unsafe wiring, failed inspections, insurance problems, and expensive rework. Confirm the permit path before you buy the charger if your installation may need trenching, panel work, exterior conduit, or a long wire run.
| Step | Action | Result |
| 1 | Check local permit rules | Confirms whether approval is required |
| 2 | Have an electrician perform a load calculation | Confirms safe panel and circuit sizing |
| 3 | File drawings or installation details if required | Supports permit review |
| 4 | Schedule inspection | Verifies code-compliant installation |
Code Compliance
Code compliance is not just paperwork. A charger can draw a continuous load for hours, so wire size, breaker rating, terminations, grounding, enclosure rating, and charger settings must work together. If the charger supports adjustable amperage, the installer should set the limit to match the circuit and document that setting.
If your utility, state, or local program offers rebates, review the rules before installation. Some programs require ENERGY STAR certification, a licensed electrician invoice, a permit record, load management, utility enrollment, or proof that the charger can schedule off-peak charging.
Hire a Qualified EV Charger Installer
A qualified EV charger installer helps keep your charging setup safe, code-compliant, and sized for your electrical system. This is especially important if the charger will be hardwired, installed outdoors, mounted far from the panel, or configured above a basic low-current setting.
Ask the installer these questions before approving the job:
- Will you perform a load calculation before choosing the breaker size?
- Does my panel need a service upgrade, subpanel, or load management device?
- Will the charger be hardwired or plugged into a receptacle?
- Is the installation location rated for weather, heat, and cord reach?
- Who handles the permit and inspection?
- Will you set and label the charger’s maximum current limit?
- Does the work include a warranty and post-installation support?
Do not choose an installer only by the lowest price. A clean installation should include safe cable routing, correct materials, a clear inspection path, and documentation you can keep for insurance, resale, rebates, and future service.
Connect the Charger to Home Assistant
Once the charger is safely installed and powered, connect it to your smart home system. The exact steps depend on the charger model, but the flow is usually the same: update firmware, connect the charger to your local network, enable the integration method, add the charger in Home Assistant, test status reporting, then test safe current control.
Choose the Best Integration Path
Start with the simplest local option your charger supports:
- Native integration: Go to Home Assistant, open Settings, choose Devices & services, and search for the charger brand or integration name.
- MQTT: Use this when the charger can publish status and accept commands through an MQTT broker.
- HTTP API: Use REST sensors, REST commands, or templates when the charger exposes local status and control endpoints.
- OCPP: Use this when the charger is designed for charge-point management and you want structured charger sessions.
- Modbus: Use this when the charger or meter exposes local registers for energy, current, and charging state.
The Home Assistant MQTT documentation explains how to add MQTT, configure a broker, and use MQTT discovery or manual entities. If you use MQTT, the official Mosquitto broker add-on is often the easiest private broker for a Home Assistant setup.
MQTT Setup
MQTT is a good choice when you want fast local status updates. A charger can publish plug status, charging state, power, energy, current limit, and errors. Home Assistant can then use those values as automation triggers.
For a go-e Charger, the official go-e MQTT documentation says MQTT can read and write API keys, but write access must be enabled explicitly on newer firmware. That is useful for automation, but it also means you must secure the broker.
- Use a private broker on your home network, not a public test broker.
- Create strong MQTT credentials for the charger.
- Use read-only mode if you only need monitoring.
- Limit write access to trusted automations.
- Test commands at a low current before allowing full automation.
HTTP API Setup
An HTTP API can work well for dashboards and simple control. For example, the official go-e HTTP API documentation shows local status requests and set commands through API endpoints. In Home Assistant, you can use REST sensors for status and REST commands or template buttons for safe control actions.
Keep HTTP control local. Do not forward the charger API through your router. If remote access is needed, use a secure Home Assistant remote access method instead of exposing the charger directly.
Verify Entities Before Automating
Before you build automations, confirm the charger reports accurate values. Check these entities or equivalent data points:
- Plug connected
- Vehicle charging
- Charging power in watts or kilowatts
- Session energy in kWh
- Current limit in amps
- Charger error state
- Wi-Fi or network status
- RFID or user authorization status, if supported
Then run a short test session. Start charging at a low current, confirm the power reading, stop the session, and make sure Home Assistant sees each state change.
Set Up App Control and Scheduling
Install the charger’s official app first, even if you plan to use Home Assistant for daily control. The app is often needed for firmware updates, Wi-Fi setup, maximum current settings, RFID cards, tariff windows, and factory support.
After the charger is online, decide which system controls scheduling. Avoid conflicting schedules in both the charger app and Home Assistant unless you understand how the charger handles overlapping rules. A clean setup usually has one “source of truth” for start and stop times.
Use the charger app for setup and firmware. Use Home Assistant for rules that depend on your whole home, such as solar output, battery state, utility price windows, calendar events, and arrival detection.
Useful scheduling automations include:
- Start charging only during off-peak utility hours.
- Stop charging before the morning peak rate begins.
- Send a reminder if the car is home but not plugged in.
- Pause charging when the home battery is low.
- Start a top-up before a calendar event or long trip.
- Limit charging current when the oven, dryer, or heat pump is running.
Cut Charging Costs With Smart Scheduling
Smart scheduling helps you avoid expensive charging windows. If your utility offers time-of-use rates, find the off-peak period and add that window to your charger app or Home Assistant automation. Do not copy generic electricity prices from another region; use your actual utility tariff.
A simple off-peak automation can follow this logic:
- If the car is plugged in and the battery needs energy, wait until the off-peak window.
- Start charging at the allowed current limit.
- Stop before the peak period begins or when the target energy is reached.
- Notify you if charging fails, Wi-Fi drops, or the session ends early.
If your vehicle integration reports battery state of charge, you can target a percentage. If it does not, use session energy, departure time, or a fixed charging duration as a practical fallback.
Pro Tip: Build a manual override button in Home Assistant for “charge now.” That gives you fast control when plans change without deleting your normal off-peak automation.
Automate Charging With Solar, Batteries, and Tariffs
Solar surplus charging works best when Home Assistant can see both solar production and whole-home consumption. The charger alone usually does not know whether extra solar power is available. You need data from your inverter, utility meter, energy monitor, or home battery system.
A good PV surplus rule looks at net export, not just solar production. If your panels are producing 7 kW but the house is using 6.5 kW, only about 0.5 kW is available. The charger should raise or lower current based on the true surplus and should stop or fall back when clouds, appliances, or battery rules change the available power.
- Solar-only mode: charge only when export power stays above your chosen threshold.
- Hybrid mode: use solar first, then add grid power if departure time is near.
- Battery-protect mode: pause EV charging when the home battery drops below a reserve level.
- Tariff mode: charge from the grid only during cheaper utility periods.
For homes with a battery, decide which battery has priority: your EV or your home storage battery. Many users prefer to fill the home battery first for evening loads, then send extra solar to the EV after the home battery reaches a safe reserve.
Secure the Charger and Smart Home Network
A smart charger is part of your electrical system and your network. Treat it like a device that deserves strong access control. If someone can write to the charger API, they may be able to change current limits, interrupt charging, or disrupt your schedule.
- Update charger firmware before connecting advanced integrations.
- Use strong app, API, and MQTT credentials.
- Keep MQTT and HTTP control on the local network.
- Do not expose charger ports through router port forwarding.
- Use a guest or IoT network if your router supports it.
- Disable API write access if you only need monitoring.
- Review Home Assistant automations after firmware updates.
If your charger supports RFID, use it when the charger is outdoors, shared, or reachable from a public area. RFID can help prevent unauthorized sessions, but it should not replace safe wiring, proper breaker sizing, or network security.
Fix App, Wi-Fi, and Integration Problems
If the charger app, Wi-Fi, or Home Assistant integration stops working, start with the basics. Confirm the charger has power, the vehicle is plugged in correctly, and the charger is not showing a hardware fault. Then check the network and integration layer.
Wi-Fi Troubleshooting
- Move the router, access point, or mesh node closer to the charger.
- Check whether the charger requires 2.4 GHz Wi-Fi.
- Avoid weak garage signals caused by metal doors, brick, or exterior walls.
- Assign a reserved IP address so Home Assistant can find the charger reliably.
- Restart the charger and router after firmware or network changes.
Home Assistant Troubleshooting
- Confirm the integration is enabled and the charger IP address is correct.
- Check MQTT broker status, username, password, and topic prefix.
- Use Home Assistant logs to find authentication or connection errors.
- Verify the charger app still allows API, MQTT, OCPP, or Modbus access.
- Test one read-only sensor before testing write commands.
- After a charger firmware update, recheck entity names and command formats.
Charging Session Troubleshooting
- If charging will not start, check vehicle charge limits, departure schedules, and plug lock status.
- If charging stops early, check utility schedule rules, solar surplus thresholds, and charger temperature errors.
- If current is lower than expected, check vehicle onboard charger limits and the charger’s configured amp limit.
- If the breaker trips, stop using the charger and call a licensed electrician.
Maintenance and Testing Checklist
After setup, review the system every few months. Smart charging should stay predictable, especially after Home Assistant updates, charger firmware updates, router changes, or utility tariff changes.
- Inspect the cable, plug, holster, and enclosure for heat damage or wear.
- Confirm the charger is still using the correct current limit.
- Review Home Assistant automations for duplicate or conflicting rules.
- Check that off-peak charging still matches your current utility plan.
- Test notifications for failed charging sessions.
- Verify solar surplus rules during both sunny and cloudy conditions.
- Update firmware only after reading release notes and noting current settings.
Frequently Asked Questions
How do I add an EV charger to Home Assistant?
Start by checking whether your charger has a native Home Assistant integration. If it does not, use MQTT, HTTP/REST, OCPP, or Modbus if the charger supports one of those methods. Add the integration under Settings, Devices & services, then verify charger state, power, energy, and current-limit entities before creating automations.
Can I install an EV charger at home myself?
You can usually handle app setup and Home Assistant configuration yourself, but new 240-volt wiring, hardwired EVSE installation, breaker work, panel changes, and permit work should be handled by a licensed electrician. Local rules vary, and unsafe installation can create fire, shock, insurance, and inspection problems.
What type of charger cable does a Nissan Leaf use?
Many 2011–2025 Nissan Leaf models in North America use J1772 for Level 1 and Level 2 AC charging and CHAdeMO for DC fast charging. Newer model years may differ, so check the charge-port labels, owner’s manual, or Nissan documentation for your exact vehicle before buying adapters or cables.
How do I connect my EV charger to Wi-Fi?
Use the charger’s official app to join the charger to your home Wi-Fi network. If connection fails, move the access point closer, check whether the charger requires 2.4 GHz Wi-Fi, reserve the charger’s IP address, and update firmware. After Wi-Fi is stable, add the charger to Home Assistant through its supported integration method.
Do I need MQTT for an EV charger in Home Assistant?
No. MQTT is useful, but it is not the only option. A native integration, HTTP API, REST command, OCPP, or Modbus can also work. Choose MQTT when you want local, fast state updates and your charger supports it securely.
Can Home Assistant charge my EV only from solar?
Yes, if Home Assistant can read solar production, home consumption, and charger current control. The most reliable setup uses net export data, not solar production alone. Add a fallback rule for clouds, high home loads, low battery reserve, and upcoming departure times.
Why does my charger show a lower speed than expected?
Charging speed can be limited by the charger’s amp setting, the circuit size, the vehicle’s onboard AC charger, battery temperature, battery state of charge, utility schedule rules, or Home Assistant automations. Check the charger setting first, then compare it with the vehicle’s maximum AC charging rate.
Conclusion
A strong Home Assistant EV charger setup starts with safe electrical planning and ends with reliable local automation. Choose a charger that supports your vehicle, your circuit, and your preferred integration method. Have a licensed electrician confirm the wiring, permits, and load capacity. Then use Home Assistant to monitor charging, schedule off-peak sessions, react to solar surplus, protect your home battery, and alert you when something fails. With the right setup, home charging becomes safer, cheaper, and easier to control.
Sources
- U.S. Department of Energy Alternative Fuels Data Center: Electric Vehicle Charging Stations — supports charging levels, Level 2 range estimates, connector terminology, and common residential circuit guidance.
- Home Assistant MQTT Integration Documentation — supports MQTT setup, broker configuration, discovery, and Home Assistant integration guidance.
- go-eCharger API v2 Documentation — supports the statement that go-e API keys can be read and written through HTTP and MQTT.
- go-e HTTP API Documentation — supports local HTTP status and set command guidance.
- go-e MQTT Documentation — supports MQTT read/write behavior, setup notes, and broker security cautions.
