
Cleaning your EV charging cable is a simple home maintenance task, but it needs a safety-first approach. The cable, connector shell, plug body, and strain-relief areas can collect dust, road grit, moisture, and salt. A gentle wipe-down helps keep the cable easier to handle and may reduce dirt-related connection problems, but it will not repair a damaged cable. This guide covers the Level 1 and Level 2 cables most home charging setups use; public DC fast-charging cables are typically maintained by the station operator, not the driver.
By Marcus J. Holloway, Founder & EV Specialist · Last updated: September 7, 2026
Quick Answer
To clean an EV charging cable safely, stop the charging session, unplug both ends, inspect for damage, then wipe the cable jacket with a microfiber cloth dampened with distilled water or mild soap. Keep liquids out of the connector pins, dry everything fully, and do not use the cable if you see cracks, exposed wire, melting, or corrosion.
Key Takeaways
- Always stop charging and unplug the cable before cleaning it.
- Use a damp microfiber cloth on the cable jacket, not on the connector pins.
- Avoid rubbing alcohol, WD-40, bleach, solvents, pressure washers, metal picks, and toothpicks.
- Let the cable dry completely before plugging it back in.
- Replace or professionally inspect any cable with exposed wire, melted plastic, loose pins, burn marks, or recurring overheating.
At a Glance
| Time Required | 10 to 20 minutes, plus drying time |
| Difficulty | Easy, as long as the cable is unplugged and undamaged |
| Tools Needed | Microfiber cloths, distilled water, mild dish soap, soft nylon brush, low-pressure air bulb or dry brush for connector debris |
| Cost | $0 to $10 if you already have cloths and mild soap |
Warning: Never clean an EV charging cable while it is plugged into the vehicle, wall outlet, or charging station. Do not use a cable that has exposed wire, cracked insulation, melted plastic, a burnt smell, loose pins, or recurring overheating.
Why Keeping Your EV Charging Cable Clean Matters
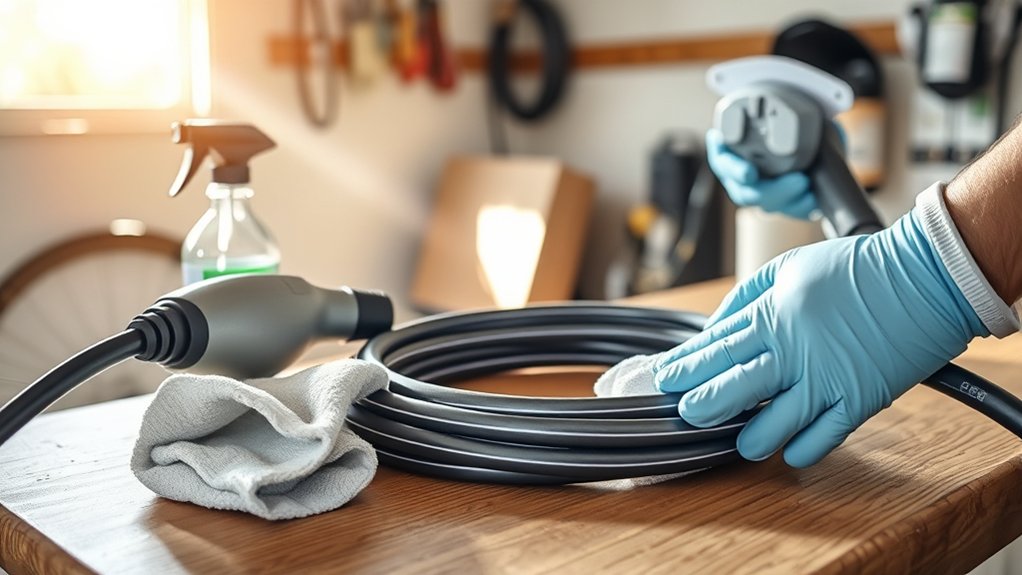
Keeping your EV charging cable clean matters because the cable spends time near garage floors, driveways, rain, dust, leaves, road salt, and tire grit. Dirt on the cable jacket is usually harmless at first, but heavy buildup can make the cable harder to handle, trap moisture, and hide early damage.
The connector end deserves extra care. Modern EV charging connectors are designed around safety and communication standards, such as SAE J1772, but that does not mean the pins should be scraped, soaked, sprayed, or treated like a normal plastic handle. In North America, most new EVs sold since the mid-2020s use the smaller NACS connector, now standardized as SAE J3400, while J1772 remains common on older Level 2 cables and adapters — the cleaning approach below applies to both shapes. Clean the outside gently, keep moisture out of the contact area, and inspect the connector before every deeper cleaning.
A clean cable also makes damage easier to spot. Cracks, swelling, cuts, shiny worn spots, burn marks, or a loose connector shell can all point to a cable that needs replacement or professional inspection.
Before You Start: Safety Checklist
Before you clean the cable, take a minute to make the setup safe. This is especially important if the cable was just used outdoors, dragged through mud, or felt warm after charging.
- Stop the charging session first: Use the vehicle screen, charger app, or station controls if needed.
- Unplug both ends: Disconnect from the vehicle and from the outlet or wall charger when the design allows it.
- Let it cool: If the cable or plug feels hot, do not clean it right away. Let it cool and inspect for damage.
- Check for visible damage: Look for cuts, crushed areas, cracked insulation, exposed wire, melted plastic, loose pins, corrosion, or burn marks.
- Work in a dry area: Choose a garage, covered porch, or dry driveway spot away from standing water.
Note: Cleaning is maintenance, not repair. If the cable is damaged, stop using it and contact the charger manufacturer, vehicle maker, or a licensed electrician.
Essential Supplies for Cleaning Your EV Charging Cable Effectively
You only need gentle cleaning supplies. Harsh chemicals can weaken rubber, plastic, labels, and insulation over time, so keep the process simple.
| Supply | Purpose |
|---|---|
| Soft, lint-free microfiber cloth | Wipes the cable jacket without scratching the connector shell |
| Distilled water | Dampens the cloth without leaving mineral spots |
| Mild dish soap | Helps remove grime from the cable exterior |
| Soft nylon brush | Loosens dried dirt on the outer connector shell and strain-relief area |
| Dry detailing brush or low-pressure air bulb | Removes loose dry debris near the connector opening without adding liquid |
| Separate dry cloth | Dries the cable fully before storage or reuse |
Do not use bleach, solvents, abrasive pads, metal brushes, rubbing alcohol, WD-40, silicone spray, pressure washers, or steam cleaners. These can damage plastic, leave residue, or push moisture into areas that should stay dry.
What You Can and Cannot Clean
Not every part of the charging cable should be cleaned the same way. The cable jacket can handle a damp cloth, but connector contacts need dry-only care.
| Part | Safe Cleaning Method |
|---|---|
| Cable jacket | Damp microfiber cloth with distilled water or mild soap |
| Connector outer shell | Damp cloth on the outside only, then dry fully |
| Strain relief near plug ends | Soft brush and damp cloth, without bending the cable sharply |
| Connector pins and contact openings | Dry brush or low-pressure air only. Do not add liquid or scrape contacts. |
| Vehicle charging port | Follow your vehicle manual. Do not spray cleaner or insert hard tools. |
Step-by-Step Guide to Cleaning the Cable Exterior
Follow this order to clean the cable without forcing water or debris into the wrong places.
1. Gather the Recommended Cleaning Supplies
Set out two microfiber cloths, distilled water, mild dish soap, a soft nylon brush, and a dry detailing brush. Keep one cloth damp and one cloth dry. The damp cloth should feel lightly moist, not wet enough to drip.
2. Wipe the Cable Jacket
Start at one end of the cable and wipe toward the other end with the damp cloth. Use light pressure and support the cable with your other hand so you do not pull hard on the strain-relief areas.
For mud, road salt, or dried grime, mix a drop of mild dish soap into a small bowl of distilled water. Dampen the cloth with the mixture, wipe the dirty area, then wipe again with a clean cloth dampened with plain distilled water.
3. Remove Stubborn Dirt Without Scraping
Use a soft nylon brush on the cable jacket, plug handle, and outer connector shell. Brush gently around seams and textured plastic. Do not use a knife, screwdriver, metal pick, toothpick, or abrasive pad.
If the stain does not come off with mild soap and gentle brushing, leave it alone. A cosmetic mark is safer than damaged insulation.
4. Keep the Connector Contacts Dry
Look into the connector opening from a safe angle without touching the pins. If you see loose dry debris, use a dry detailing brush or short, gentle bursts from a low-pressure air bulb. Keep the connector pointed downward so loosened debris can fall out.
Never pour water, soap, alcohol, WD-40, or contact cleaner into the connector unless the charger manufacturer specifically tells you to use a listed product and method for that connector. Some manufacturers do publish an approved alcohol-based method for their own equipment — for example, Tesla’s own service documentation describes spraying isopropyl alcohol into a connector pointed downward and brushing the pins with a non-metallic brush — but that’s a manufacturer-specific procedure for a specific connector, not a general home rule. Check your charger’s manual or manufacturer support site before trying it yourself.
5. Dry the Cable Completely
Use a separate dry microfiber cloth to wipe the full cable length, plug body, connector shell, and strain-relief areas. Let the cable air-dry in a clean indoor or covered area before plugging it back in.
Do not reconnect the cable while water is visible on the plug, connector, cable jacket, outlet, or vehicle charge port.
Pro Tip: Clean the cable while it is loosely laid out in a straight line or large curve. This makes it easier to spot cuts, flat spots, swelling, or areas that were crushed under a tire or garage door.
How to Dry and Store Your EV Charging Cable Safely
After cleaning, proper drying and storage help protect the cable from moisture, sharp bends, abrasion, and strain. Use a soft, dry cloth to wipe down the cable from end to end. Pay close attention to the plug body, connector handle, and strain-relief areas because water can sit in seams.
Store the cable in a cool, dry location away from direct sunlight, standing water, sharp tools, heavy boxes, and chemicals. If the connector has a dust cap or holster, use it after the connector is dry.
When coiling the cable, use large, loose loops. Tight coils and sharp bends can stress the internal conductors over time. A wall hook, cable hanger, or protective storage bag can prevent tangling and keep the connector off the floor.
If you use a portable Level 1 or Level 2 cable, check the plug blades and adapter before storage. If anything looks discolored, pitted, bent, loose, or heat-damaged, stop using it until it has been inspected.
Common Mistakes to Avoid While Cleaning Your EV Cable
Most cleaning problems come from using too much liquid, the wrong chemical, or a tool that is too hard. Avoid these mistakes:
- Cleaning while plugged in: Always unplug first to reduce shock risk and protect the equipment.
- Soaking the cable: Use a damp cloth, not a bucket, hose, pressure washer, or steam cleaner.
- Spraying cleaner into the connector: Moisture and residue can interfere with contact surfaces.
- Using WD-40 or oil-based products: These can leave residue and attract more dirt.
- Using rubbing alcohol in the port: It can dry some plastics and may not be approved by your vehicle or charger maker.
- Scraping with a toothpick or metal tool: You can bend, scratch, or contaminate the contacts.
- Ignoring heat marks: Discoloration, melting, or a burnt smell is not a cleaning issue. It is a safety issue.
Troubleshooting: If Cleaning Fails
If cleaning your EV charging cable does not solve a charging issue, do not keep trying random cleaners. Charging problems can come from the cable, wall outlet, breaker, charger unit, vehicle charge port, software, or charging station — see our guides on why EV charging stops mid-session and common EV charger error codes for a deeper breakdown.
Common Cable Problems
Look for these signs before you use the cable again:
- Cracked, cut, swollen, or flattened insulation.
- Fraying near the connector or plug body.
- Loose connector shell, loose pins, or rattling parts.
- Rust, green corrosion, dirt packed into the connector, or damaged contact areas.
- Melted plastic, dark marks, sparking, repeated breaker trips, or a burnt smell.
- Intermittent charging, charging errors, or charging that stops when the cable is moved.
If any of these signs appear, stop using the cable. A dirty cable can be cleaned, but a damaged cable should be replaced (see our roundup of EV charger replacement parts) or inspected by a qualified professional.
Inspect Connections Thoroughly
Inspect both plug ends in good light. The connector should fit firmly, the latch should move normally, and the cable should not feel loose where it enters the handle. Do not force the connector into the vehicle port if it feels misaligned or gritty.
| Inspection Focus | What to Do |
|---|---|
| Plug blades or wall plug | Check for heat discoloration, bends, looseness, or pitting |
| Vehicle connector | Check the outer shell, latch, and contact openings without scraping pins |
| Cable length | Look for cuts, crushed spots, exposed wire, swelling, or worn insulation |
| Charging unit | Check for error lights, overheating, cracked housing, or loose outlet fit |
| Vehicle port | Follow the vehicle manual and contact service if pins look damaged or dirty inside |
Seek Professional Assistance
Call the charger manufacturer, vehicle maker, or a licensed electrician if the cable overheats, trips a breaker more than once (see our guide on why an EV charger trips a GFCI outlet), smells burnt, sparks, shows melted plastic, or causes repeated charging errors. These are not normal cleaning problems.
If the issue happens only at one public station, report it in the charging network app or to the station owner. In one study of public DC fast-charging stations in the Greater Bay Area, only about 72% of the connectors tested were fully functional, and broken connectors and charge-initiation failures were among the contributing causes — so reporting damaged equipment helps other drivers too.
How Often Should You Clean Your Charging Cable?
How often you clean the cable depends on where you charge and how dirty the cable gets. A garage-kept cable may need only occasional wiping, while an outdoor cable may need more frequent attention during rain, snow, pollen season, or road-salt months.
| Environment | Recommended Cleaning Frequency |
|---|---|
| Indoor garage, clean floor | Every 6 to 12 months, plus quick visual checks |
| Outdoor driveway, normal use | Every 2 to 3 months |
| Rainy or muddy conditions | Wipe and dry after dirty use |
| Road salt, coastal air, or dusty job sites | Monthly during heavy exposure |
| Public or shared charging cable | Inspect before each use. Report damage instead of trying to repair it. |
Additional Maintenance Tips for Longer Cable Life
Good cable care is not only about cleaning. How you handle and store the cable matters just as much.
- Use the cable holder: Keep the connector off the ground and out of puddles.
- Avoid sharp bends: Do not kink the cable or wrap it tightly around the charger body.
- Do not drive over it: A crushed cable can have hidden internal damage.
- Keep it away from chemicals: Gasoline, oil, brake cleaner, solvents, and strong detergents can damage cable materials.
- Check outlet fit: A plug that feels loose in the outlet can create heat and should be checked by a licensed electrician.
- Use listed charging equipment: For home charging, choose equipment certified by a recognized testing lab. OSHA maintains a list of Nationally Recognized Testing Laboratories.
- Follow fire-safety guidance: The National Fire Protection Association provides EV safety information for owners and emergency planning.
Tips for Safely Cleaning Connectors and Probes
The connector is the part of the cable that needs the most caution. The outer handle and shell can be wiped, but the contact openings should stay dry unless your charger maker gives a specific approved method.
- Unplug first: Never clean the connector while connected to the vehicle or power source.
- Use dry methods near pins: A dry soft brush or low-pressure air bulb is safer than liquid.
- Keep the connector pointed down: This helps loose grit fall out instead of moving deeper inside.
- Do not scrape contacts: Scratches can increase wear and may affect fit.
- Do not add lubricant: Charging connectors are not normal hinges or locks. Oil-based products can attract dirt and leave residue.
- Check the latch: Make sure it moves smoothly and locks as designed.
If you see corrosion, bent contacts, heat marks, or damaged plastic inside the connector, stop using the cable and ask the manufacturer or a qualified technician for guidance.
After Cleaning: Test Before Normal Use
Once the cable is dry, reconnect it carefully and start a normal charging session. Stay nearby for the first few minutes. Watch for charger errors, unusual clicking, heat, smell, or charging interruptions.
A slight warmth during charging can be normal, but the plug, connector, or cable should not become hot to the touch. If it does, stop charging and get the system checked.
Frequently Asked Questions
How do I clean an EV cable?
Stop the charging session, unplug the cable, inspect it for damage, then wipe the cable jacket with a microfiber cloth dampened with distilled water or mild soap. Use a dry cloth afterward and let the cable dry fully before plugging it back in.
Can I put rubbing alcohol in my charging port to clean it?
No. Do not pour or spray rubbing alcohol into an EV charging port or cable connector. It can leave residue, affect some plastics, and move moisture where it does not belong. Use dry methods only near connector pins unless your vehicle or charger manual gives a specific approved method.
Can I use WD-40 to clean a charging port?
No. WD-40 and similar products can leave oily residue that attracts dirt and may interfere with clean electrical contact. Keep lubricants, oils, and sprays away from EV charging connectors unless the charger manufacturer specifically approves a product.
Can I clean my charging port with a toothpick?
No. A toothpick can break, splinter, or push debris deeper into the connector. It can also bend or scratch sensitive contact areas. Use a dry soft brush or low-pressure air bulb, and contact service if debris is stuck inside the port.
Can I hose off my EV charging cable?
No. Do not hose, soak, pressure-wash, or steam-clean the cable. Use a damp cloth on the cable jacket and keep liquids away from connector pins, outlets, and the vehicle charging port.
When should I replace an EV charging cable instead of cleaning it?
Replace it or get professional help if you see exposed wire, cracks, swelling, melted plastic, burn marks, corrosion, loose pins, a burnt smell, sparking, repeated breaker trips, or charging that stops when the cable moves.
Does a dirty EV charging port slow down charging?
It can. Heavy dirt, corrosion, or moisture at the contact points adds resistance and can interfere with the communication pins that negotiate charging speed, which may show up as slower charging, intermittent connection, or an error message. A light cleaning of the outer connector and a dry check of the pins is a reasonable first step before assuming a bigger fault.
Is it ever OK to use isopropyl alcohol on an EV charging connector?
Sometimes, but only when your vehicle or charger manufacturer says so for your specific connector. Some manufacturers publish an approved isopropyl-alcohol method for their own equipment, but using alcohol on a connector without that guidance risks leaving moisture or residue in the wrong place. When in doubt, stick to dry brushing or a low-pressure air bulb.
Conclusion
Keeping your EV charging cable clean helps prevent dirt buildup, makes damage easier to spot, and supports a safer charging routine. The safest method is simple: unplug first, wipe the cable jacket with a lightly damp microfiber cloth, keep liquids out of the connector, dry everything fully, and store the cable in loose loops. If you see damage, heat marks, exposed wire, or corrosion, do not clean and reuse it. Stop using the cable until it has been inspected or replaced.
Sources
- SAE International: SAE J1772 Conductive Charge Coupler — supports connector and charging-system safety context.
- National Fire Protection Association: Electric Vehicle Safety Information — supports general EV fire and electrical-safety awareness.
- OSHA: Current List of Nationally Recognized Testing Laboratories — supports the advice to use safety-certified charging equipment.
- U.S. DOE Alternative Fuels Data Center: Charging Electric Vehicles at Home — supports home charging context and charging equipment overview.
- Reliability of Open Public Electric Vehicle Direct Current Fast Chargers — supports the importance of connector condition and reporting damaged public charging equipment.

