A cracked EV charging port is not always a DIY repair. If the damage is limited to the outer plastic door, hinge cover, or cosmetic trim, you may be able to inspect it, clean it, and protect the area temporarily at home. If the charge inlet, pins, latch, seal, wiring, orange high-voltage cables, or dashboard charging system is affected, stop charging and schedule professional EV service.
Quick Answer
You can handle only a cosmetic crack on the EV charge-port door or outer trim at home. Do not glue, probe, or keep using a cracked inlet, damaged pins, wet connector, overheated area, exposed wire, or loose charging socket. Stop charging and contact a certified EV technician for any electrical or structural damage.
Key Takeaways
- Cosmetic door or trim cracks are different from damage to the actual charge inlet.
- Do not charge if you see bent pins, melting, burn marks, corrosion, moisture, exposed wiring, or repeated charging faults.
- Do not use a multimeter on charge-port pins unless you are trained and following the vehicle maker’s service procedure.
- Adhesive is only a temporary option for non-electrical outer plastic, never for contacts, seals, latches, or the inlet body.
- Use the exact OEM part for your VIN if the door, gasket, inlet, or harness needs replacement.
At a Glance
| Time Required | 10 to 20 minutes for a safe visual inspection; professional replacement time varies by vehicle. |
| Difficulty | Owner inspection is easy; charge-inlet, wiring, or high-voltage service is technician-only. |
| Tools Needed | Flashlight, phone camera, dry microfiber cloth, owner’s manual, low-pressure compressed air, and the vehicle app or dashboard status screen. |
| Cost | Basic inspection is usually free. Cosmetic supplies may cost under $30. OEM port, door, gasket, or harness replacement depends on your vehicle and labor rate. |
Warning: Do not charge the vehicle if the crack reaches the inlet body, pins, wiring, gasket, latch, or any orange high-voltage cable. Also stop if you see melting, burn marks, moisture, corrosion, smoke, a hot-plastic smell, buzzing, arcing, or dashboard charging errors. High-voltage parts can remain energized even after the car is turned off.
Assessing the Damage: What to Look For
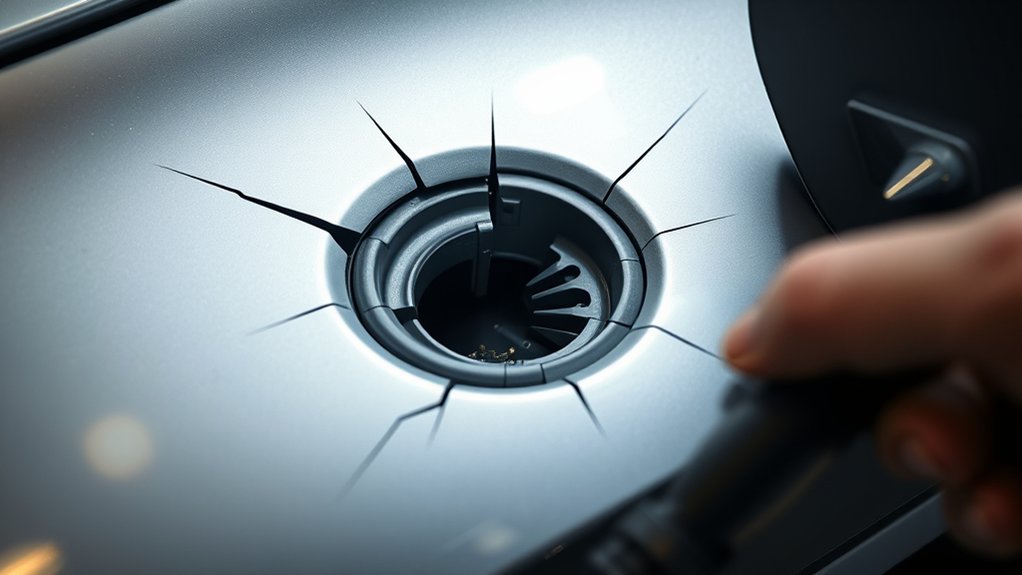
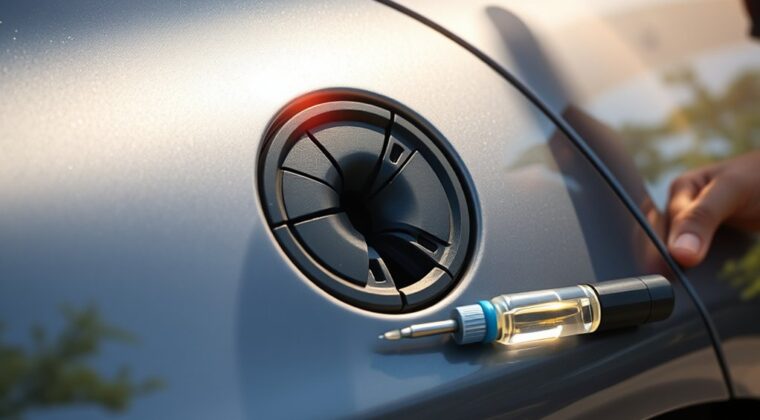
Start by deciding what part is actually cracked. A charge-port door, painted flap, hinge trim, or cosmetic surround is usually low risk if it still closes and keeps weather out. The actual charge inlet is different. That is the socket where the connector locks in and where power and communication contacts sit.
Use a flashlight and look without touching the pins. Check for broken plastic around the inlet, bent or recessed contacts, missing rubber seals, a loose latch, water inside the port, green or white corrosion, dark heat marks, melted plastic, or exposed copper. If any of those signs are present, do not connect a charger.
Treat the charge inlet as an electrical part, not a simple plastic trim piece. Cosmetic cracks can sometimes be stabilized, but damaged contacts, wiring, seals, or latch parts need OEM service.
Is It Cosmetic or Electrical Damage?
The safest way to decide your next step is to sort the crack into one of these groups.
| Damage You See | Safe Home Action | When to Call a Pro |
| Small crack in the port door or painted flap | Inspect, clean, photograph, and keep it dry. A temporary outer-plastic repair may be acceptable. | Call service if the door no longer latches or leaves the inlet exposed to rain. |
| Cracked plastic trim around the port | Check that the inlet is solid and the connector locks normally. | Call service if the trim affects the latch, drain path, gasket, or connector alignment. |
| Crack in the actual inlet body | Do not charge. Do not glue it. | Schedule OEM inspection and likely inlet replacement. |
| Bent pins, corrosion, moisture, burn marks, or melted plastic | Do not insert a connector. Do not scrape with metal tools. | Call a certified EV technician before charging again. |
| Exposed wiring or orange cable damage | Stay away from the damaged area and do not charge. | Arrange towing or mobile EV service if the vehicle cannot be safely driven. |
Immediate Steps to Fix Your Cracked Port Safely
Before you think about glue, tools, or replacement parts, make the area safe and confirm the damage type.
1. Stop Charging and Power Down
End the charging session from the charger, vehicle screen, or app. Unplug the charging connector only if it releases normally. Do not force it. Put the vehicle in Park, set the parking brake, turn the vehicle off, and move the key or phone key away from the vehicle.
If you use a portable Level 1 or Level 2 cord, unplug it from the wall after the session stops. If you have a hardwired wall charger, do not open the charger or the vehicle inlet. The vehicle charge port and the wall EVSE are separate systems.
2. Inspect Without Probing
Use a flashlight and your phone camera. Take clear photos from straight on and from the side. Look for cracks, water, dirt, corrosion, broken latch parts, missing seals, and contact damage. Do not place a screwdriver, metal pick, or multimeter probe into the charge-port pins.
Compare the port shape and connector type with your owner’s manual. Many North American EVs use J1772 for AC charging, CCS for AC plus DC fast charging, or J3400, also known as NACS, depending on the model and year.
3. Clean Only Dry, Loose Debris
If the inlet is dry and the only issue is dust or loose grit, wipe the outer trim with a dry microfiber cloth. You may use short bursts of low-pressure compressed air to move dry debris away from the opening. Keep the nozzle back from the contacts.
Do not spray water, solvent, lubricant, contact cleaner, or silicone spray into the inlet. Do not use cotton swabs that can leave fibers behind. If the port is wet, corroded, or sticky, stop and have it inspected.
4. Decide Whether a Home Repair Is Allowed
A home repair is only reasonable when the crack is on non-electrical outer plastic and the port still closes, locks, drains, and lines up correctly. If the crack touches the inlet body, gasket, latch, pin area, or wiring path, do not repair it at home.
Pro Tip: Photograph the crack before and after each step. If the vehicle is still under warranty or insurance may cover impact damage, those photos can help the service advisor decide whether the door, trim, inlet, or harness needs replacement.
Gathering Essential Tools for Your Repair
Use simple inspection tools unless you are a trained EV technician. The goal at home is to identify safe cosmetic damage, not to diagnose high-voltage wiring.
Owner-Safe Tool Checklist
- Flashlight: Helps you see cracks, seals, contacts, and moisture without touching the inlet.
- Phone camera: Lets you zoom in and document the damage for service or warranty support.
- Dry microfiber cloth: Safe for wiping outer trim and the charge-port door.
- Low-pressure compressed air: Useful for dry dust only, held away from pins and seals.
- Owner’s manual: Confirms normal latch behavior, port-door operation, and charging warnings for your model.
- Vehicle app or dashboard screen: Helps check whether the vehicle reports charging errors after a safe visual inspection.
Technician-Only Tools
High-voltage gloves, insulated meters, scan tools, trim removal tools, service disconnect tools, and socket sets may be needed for a real charge-inlet repair. Those tools should be used by someone trained on EV high-voltage systems and the exact OEM procedure for your vehicle.
| Tool Type | Who Should Use It | Why |
| Flashlight and camera | Owner | Safe visual inspection and documentation. |
| Dry cloth and low-pressure air | Owner | For outer trim and dry debris only. |
| Multimeter or insulation tester | Trained technician | Incorrect probing can create shock, arc, or component damage. |
| Jack, socket set, trim tools | Trained technician or advanced DIYer using OEM instructions | Some inlet assemblies require fender liner, trim, or harness access. |
| High-voltage PPE | Certified EV technician | Required for many high-voltage service procedures. |
Selecting the Best Adhesive for Cosmetic Repairs
Adhesive can only help when the crack is on a non-electrical plastic part, such as the outer port door or surrounding trim. It cannot make a damaged charge inlet safe. It cannot repair pins, wiring, seals, locking hardware, or any part that carries charging current.
If your owner’s manual does not prohibit cosmetic repair and the damage is far from the inlet, choose an automotive-grade plastic epoxy or plastic repair adhesive that cures fully, resists water, and stays out of the port opening. Apply it only to the outside trim surface. Keep it away from contacts, rubber seals, drain holes, hinges, latch parts, and the connector path.
Clean the outer plastic with a dry cloth before applying adhesive. Let the adhesive cure for the full time listed by the manufacturer before driving in rain or washing the vehicle. After curing, confirm that the port door opens, closes, and latches without rubbing or pushing the inlet out of alignment.
Note: A cosmetic adhesive repair should be treated as temporary. If the crack spreads, the door stops sealing, or the connector no longer seats smoothly, replace the damaged OEM part.
Stay Safe: Essential Precautions Before You Start
EV charging parts can involve low-voltage control circuits, high-voltage charging paths, communication pins, seals, and locking hardware. That is why the safest home process is visual inspection only.
Before inspecting, turn the vehicle off, place it in Park, set the parking brake, end the charging session, and move the key or phone key away from the vehicle. The National Highway Traffic Safety Administration advises responders to avoid orange high-voltage cabling and areas marked as high-voltage risks. Use that same caution as an owner.
Do not disconnect the high-voltage battery unless you are trained, equipped, and following the exact service procedure for your model. Do not remove charge-port panels if that exposes wiring. Do not continue charging after a crash, flood, saltwater exposure, fire, smoke, burning smell, unusual heat, or repeated charging faults.
Test Your Repair to Ensure a Secure Connection
Only test the port after you confirm the damage is cosmetic, the inlet is dry, the pins look normal, and no warning signs are present. Use normal vehicle behavior, not electrical probing.
- Check alignment first: The connector should slide in smoothly without force.
- Listen for the latch: The plug should lock or hold as it normally does for your vehicle.
- Watch the vehicle screen or app: Confirm the car recognizes the charger and starts charging normally.
- Check for warnings: Stop if you see a charging fault, reduced charging message, service warning, or repeated connection failure.
- Touch only outer trim: After a few minutes, the surrounding trim should not smell hot or feel unusually warm. Do not touch contacts or damaged areas.
- Disconnect normally: End the session and confirm the connector releases without sticking.
If anything feels different from normal, stop and book service. A loose port can cause poor contact, heat, or charging interruptions.
When to Call a Pro?
Call a certified EV technician when the damage goes beyond a cosmetic cover or trim crack. You should also call service if the vehicle is under warranty, the crack came from an impact, or you are not sure whether the inlet body is damaged.
Professional service is the right choice when you see exposed wiring, orange cable damage, bent pins, melted plastic, burn marks, water inside the inlet, corrosion, a broken latch, a port that moves when you insert the connector, or repeated dashboard charging errors. A technician can inspect the charge inlet, seals, harness, locking actuator, control circuits, and diagnostic trouble codes using the correct OEM procedure.
Use VIN-specific parts. The correct replacement may be a charge-port door, hinge, gasket, trim bezel, inlet assembly, locking actuator, or wiring harness. A part number from another model or trim may not fit your connector type or wiring layout.
Top Common Mistakes in EV Charging Port Repairs
These mistakes can turn a small cosmetic problem into a charging fault or safety issue.
- Charging through visible damage: Do not “try it once” if the inlet, pins, wiring, heat marks, or water are involved.
- Forcing the connector: A plug that no longer seats smoothly may be warning you about alignment or latch damage.
- Using glue inside the port: Adhesive can block seals, drain paths, pins, or locking parts.
- Scraping corrosion with metal tools: This can damage contacts and create an electrical hazard.
- Spraying cleaners into the inlet: Liquids can worsen moisture and conductivity problems.
- Using random replacement parts: Charge-port parts must match the vehicle, connector type, model year, and VIN.
- Probing pins with a multimeter: Electrical testing belongs to trained technicians using the correct test points.
- Ignoring the door seal: A cracked door or bad gasket can allow rain and road grime into the inlet over time.
How to Maintain Your Charging Port for Longevity
Good habits help prevent cracks, moisture problems, and loose connections.
- Support the cable: Avoid letting a heavy charging cable hang at a sharp angle from the port.
- Insert the connector straight: Do not twist, lift, or force the plug.
- Keep the door closed: Close the charge-port door whenever the vehicle is not charging.
- Keep it dry: After heavy rain, snow, or car washing, check that the door area drains and closes normally.
- Use the correct adapter: Only use adapters approved for your vehicle and charging network.
- Store portable cords correctly: Avoid tight bends, kinks, or pulling on the connector handle.
- Inspect after impact: If the port area was bumped by a garage wall, charging cable, shopping cart, or road debris, inspect it before the next session.
- Schedule service for repeat faults: Repeated charging errors can point to a port, cable, EVSE, or onboard charging issue.
Frequently Asked Questions
Can a damaged EV charger port be fixed?
Yes, but the repair depends on the damage. A cracked outer door or trim may be repaired or replaced as a cosmetic part. A damaged charge inlet, pins, latch, seal, wiring, or harness should be inspected and repaired by a certified EV technician.
Is it worth fixing a charging port?
Yes. A damaged port can cause poor charging, water intrusion, overheating, or connection faults. Fixing a small door or trim issue early can prevent bigger damage, while a damaged inlet should be repaired before you charge again.
How much does a broken EV charging port cost to fix?
The cost depends on your vehicle, connector type, part availability, labor rate, and whether the damage is limited to a door, trim piece, inlet assembly, actuator, or harness. Ask for a VIN-based quote from the dealer or a qualified EV repair shop.
Can I replace an EV charging port myself?
Most owners should not replace the charge inlet themselves. Replacement can involve trim removal, locking actuators, seals, wiring, control circuits, and high-voltage safety steps. A cracked door or outer trim is much more DIY-friendly than the actual inlet.
Can I keep charging if only the port door is cracked?
Maybe, but only if the inlet is dry, undamaged, firmly mounted, and the connector seats normally. If the cracked door no longer keeps rain and debris away from the inlet, replace the door or have it serviced soon.
Should I use epoxy on a cracked EV charging port?
Use epoxy only on non-electrical outer plastic and only where it will not touch the inlet, pins, seals, latch, hinge, or drain path. Never use epoxy to repair a cracked inlet body or damaged connector area.
Conclusion
Fixing a cracked EV charging port at home is safe only when the problem is cosmetic and outside the electrical inlet. You can inspect the area, clean dry debris, protect a minor outer-trim crack, and document the damage. You should not charge, glue, probe, or force anything if the inlet, pins, seals, latch, wiring, heat marks, moisture, or warning messages are involved. In those cases, professional EV service is the safer and cheaper path in the long run.
Sources
- NHTSA Interim Guidance for Electric and Hybrid-Electric Vehicles Equipped With High-Voltage Batteries — high-voltage shock, fire, and damaged EV safety precautions.
- NHTSA Towing and Recovery Guidance for High-Voltage Battery Vehicles — damaged EV handling, delayed fire risk, and service-center notification guidance.
- U.S. Department of Energy AFDC: Electric Vehicle Charging Stations — EVSE terminology, Level 1, Level 2, DC fast charging, CCS, and J3400 context.
- U.S. Department of Energy AFDC: EV Safety Training Resources — EV responder and safety training resources.
- SAE J3400 Recommended Practice — North American Charging System standard reference.
- SAE J1772 Conductive Charge Coupler Standard — J1772 connector and charge-coupler standard reference.
