
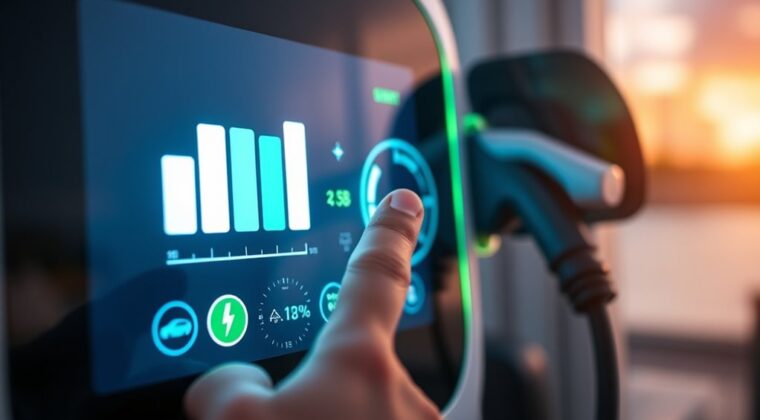
You can read an EV charging display by checking the status first: Available, Idle, Preparing, Charging, Finishing, or Error. During Charging, kW shows the current speed, kWh shows total energy delivered, and battery percentage tracks progress. Cost and time estimates update as the session changes, so small kW swings are normal. If you see an error, unplug, wait, and retry. Different chargers show different layouts, and the details get clearer from here.
How EV Charger Screens Work
EV charger screens show you exactly what the unit is doing at each stage of the session, from “Available” and “Preparing” to “Charging,” “Finishing,” or “Error.”
You’ll usually see core metrics such as kW for current charging speed, kWh for total energy delivered, % for state of charge, time for session duration, and cost for the running total.
You read these fields to verify charging status and confirm your charging station is working as expected. Icons often guide you through plug-in and payment steps without relying on language, which helps you act independently.
The kW value can rise and fall during a session; that variation is normal because the battery management system adjusts output to protect battery health.
If the screen shows an error, treat it as a diagnostic signal tied to communication, authorization, or heat limits, and follow the station’s instructions before retrying.
What The 5 Screen States Mean
Once you know the display layout, you can use the charger’s five main states to track the session at a glance:
Available means the unit’s free, and you can plug in.
Available means the unit’s free, and you can plug in.
Preparing means the charger and your vehicle are talking, so wait for the handshake to finish.
Charging means energy is flowing into the battery charge, and the screen shows live session data.
Finishing means power has stopped, and the display summarizes what you received and what it cost.
Error means the charger detected a fault; follow the code or warning before trying again.
Read these states as control signals, not guesswork. They tell you when to connect, when to hold, and when to intervene.
When you understand them, you move through public charging with less friction and more autonomy.
How To Read kW, kWh, And
You can read kW as the charging rate, which shows how fast power is flowing into the battery at that moment.
Track kWh to see how much energy the session has delivered, since that value usually drives billing and helps you estimate total consumption.
Check the % display to monitor state of charge, compare progress against your target, and anticipate the taper that starts near 80%.
Understanding kW Output
At the charging station, the kW reading shows your current charging speed: higher numbers mean the battery is taking in energy faster, while kWh tracks the total amount delivered over the session for billing and energy use.
You read kW to judge how hard the charger is pushing power into your pack. Early in the session, the rate may start lower, then climb, then taper as your state of charge rises.
Expect fluctuations; the battery management system may adjust output for temperature and protection. When you’re above about 80%, the charge rate often drops as the battery nears fully charged.
Watch the percentage display alongside kW so you can see how much energy you’ve added and how close you’re to freedom from range anxiety.
Tracking kWh Usage
As the session continues, the kWh counter shows how much energy the charger has delivered in total, which is what matters for usage tracking and billing.
kW tells you the current charging speed, while kWh tells you the accumulated energy added to the battery over time.
Watch kWh to estimate cost and compare sessions across different chargers. A higher kW shortens the charging session duration, but only kWh records the full energy transfer.
Use both values together to judge whether your EV is charging efficiently and to plan your next stop with confidence.
The display may also show state of charge percentage, yet kWh remains the clearest measure of delivered power.
When you understand this readout, you can charge on your terms and avoid guesswork.
Monitoring Charge Percentage
The percentage display shows the battery’s state of charge, so it’s the quickest way to see how much energy remains and how much the session has added. You can use this percentage to decide when to stop charge or keep going toward a target level.
Unlike kW, which shows live charging speed, percentage tells you progress toward full capacity. Watch it alongside kWh and elapsed time to judge efficiency and plan future sessions. If the percentage rises slowly, that doesn’t always mean a fault; kW can fluctuate as the battery management system protects battery health and adjusts power flow.
Treat the readout as your command center: it gives you clear, practical control over your energy, helping you charge with confidence and move freely.
How To Read Charge Time And Cost
When you check the charge time on an EV display, you’re usually seeing an estimate of how long it will take the battery to reach full charge based on the current charging rate in kW and the battery’s capacity in kWh.
For Electric cars, that number tells you how close you’re to reclaiming range with one charger. Watch the percentage and the green circle together: they show whether the session is accelerating toward completion or staying steady.
Cost often appears as a running total, and the station may bill you per kWh, per minute, or per hour. Use that rate with your expected charging duration to estimate what you’ll pay before you unplug.
A summary screen may appear at the end, listing total energy delivered and final cost. Read it to verify the session, compare stations, and keep your charging expenses transparent and under your control.
Why The Charger Screen Updates
Your charger screen updates because the station and vehicle are constantly exchanging data during the session. These real time updates show you what’s happening now, not what happened minutes ago. That’s charger feedback importance in practice: you can verify status, pace, and energy flow without guessing.
- Status changes like Available, Charging, or Error
- kW, kWh, and battery percentage refresh continuously
- Estimated time and cost adjust as conditions change
- Power may dip when the battery management system protects the pack
- On-screen prompts help you reconnect if the session stalls
This ongoing display supports user experience enhancement by keeping you informed and in control. You can track progress, plan your departure, and budget with precision.
When the screen shifts, it’s usually responding to battery temperature, state of charge, or station logic. Read the numbers as live operational data, and you’ll understand your session’s behavior more clearly.
What Charging Errors And Warnings Mean
Charging errors and warnings tell you exactly why a session isn’t proceeding as expected, so read them as diagnostic messages, not just alerts.
Charging errors and warnings reveal why a session stalls, so treat them as diagnostic clues, not mere alerts.
Use Charging Troubleshooting Tips to isolate the fault fast:
- Communication Error means the link between charger and vehicle dropped, so unplug, wait 10 seconds, then reconnect.
- Authorization Failed points to rejected payment; try another card or app.
- Session Timeout means you’ve hit the charger’s limit, so end the session and restart.
- Ground Fault is critical because it signals possible leakage; inspect the connector for moisture and switch chargers immediately.
- Over Temperature means the unit or cable is too hot; wait 10–15 minutes or move to a different stall.
To avoid Common User Mistakes, check the connector seating, payment validity, and session limits before restarting.
These Error Prevention Strategies help you charge with confidence, keep control of the process, and stay free from avoidable delays.
Which Charger Messages Are Normal
Normal charger messages help you confirm that everything’s working as expected: “Available” or “Idle” means the unit is free, while “Preparing” shows the charger and vehicle are establishing communication.
In normal charging conditions, you’ll then see live metrics that let you verify progress without guesswork.
- kW shows charging speed in real time.
- kWh shows total energy delivered to your battery.
- The battery percentage tells you how far the session has advanced.
- Fluctuating kW values are normal; they show the battery management system adjusting output.
- Brief screen flicker causes during initialization can happen and usually aren’t a problem.
When you see “Finishing,” the session’s ending, and the display may summarize energy use and cost.
Stay focused on interpreting fluctuating values correctly: they often reflect optimization, not failure. If the display returns to idle after completion, your charge is done and you can disconnect confidently.
Why Charger Screens Look Different
You’ll see charger state labels and screen metrics vary because manufacturers choose different layouts, data fields, and update rates.
One display may show only charging status and power, while another adds kWh, estimated time remaining, cost, and battery state of charge.
Icons and language also differ, but universal symbols and color codes still help you interpret normal operation, warnings, and errors.
Charger State Labels
- Available: ready to plug in
- Preparing: handshake in progress
- Charging: power is moving
- Finishing: session summary
- Error: stop and inspect
When you recognize these labels, you can navigate any charger quickly and with confidence.
Screen Metrics Vary
EV charger screens don’t all present the same data, because manufacturers choose different layouts, metrics, and display styles. You may see kW, kWh, battery percentage, charging duration, or session cost, and each reading tells you something distinct about the session.
Some units also show status indicators such as Available, Preparing, Charging, Finishing, or Error, so you can track progress without guesswork. Because screen layouts and metric variations differ by charger type and manufacturer, you should confirm what each number means before acting.
A simple display can be as useful as a rich user interface if you read it correctly. When a charger reports an error, treat it as a prompt to check the connection or payment path, then continue charging with confidence and autonomy.
Icons And Language
Beyond the numbers, charger screens also vary in icons and language support, which can make two units look completely different even when they’re doing the same job. You’ll need icon recognition strategies to read them fast and stay in control.
Watch for:
- plug = connection status
- lightning bolt = charging active
- dollar sign = cost shown
- globe or flag = language preference settings
- checkmark or exclamation point = universal symbol importance for success or warnings
Manufacturers choose different layouts, so don’t expect the same screen order every time. Older chargers may skip language menus, so learn the standard symbols before you plug in.
Once you can decode these marks, you’ll move confidently across stations, read status at a glance, and use the charger on your terms.
How To Fix A Confusing Charger Screen
If the charger screen stays on “Preparing” for more than 2 minutes, unplug the connector, wait 10 seconds, and reconnect to reset the session.
Use these charger troubleshooting tips to cut through display clarity issues and restore control.
If you see “Communication error,” treat it as a lost link: disconnect, pause, and retry the plug-in sequence.
When the screen says “Authorization failed,” check your payment method, then try a different card or app.
If kW remains at 0 while charging, inspect the connector for moisture and move to another station; that pattern can signal a ground fault.
If you smell burning or hear unusual sounds, stop immediately, unplug, and get professional help.
You don’t need to accept a confusing interface as normal.
These common error solutions let you act fast, protect your vehicle, and keep charging independent, readable, and under your command.
Frequently Asked Questions
How to Read a Battery Charger Display?
You read the display by checking battery charge indicators, charging status symbols, and voltage level readings first; then you track kW, kWh, % SOC, time, and cost so you know exactly what’s happening.
How to Understand EV Charging?
You understand EV charging by watching kW, kWh, %, and status lights; 80% of drivers rely on dashboards. You’ll gauge charging standards, protect battery health, and practice charging etiquette, while interpreting errors, delays, and speed changes.
How to Read the Output of a Charger?
You read the charger by checking charging indicators for kW, kWh, %, time, and cost; then you verify voltage levels, monitor current flow, and note any errors so you can adjust charging safely and efficiently.
How to Read a Tesla Charging Screen?
You read your Tesla charging screen like a dashboard compass: check Charging status, kW, % battery, time remaining, and kWh delivered. Use Screen navigation for alerts, and follow Tesla charging tips to keep your charging free and precise.
Conclusion
You’ve learned that a charger screen can look simple and still mean a lot. One moment it shows steady kW, kWh, and time; the next, it flashes warnings, errors, or a paused state. That contrast is the point: calm numbers often mean normal charging, while sudden changes demand attention. Read the display, compare the message to the charger’s behavior, and you’ll know when to wait, when to act, and when to plug in with confidence.