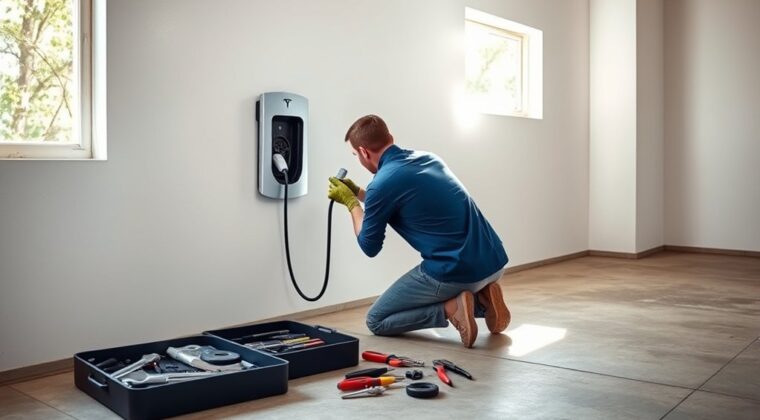
A Tesla Wall Connector that stops charging can be frustrating, but it is not a device you should open up and repair like a basic household appliance. The safest approach is to troubleshoot the visible symptoms, check the breaker, read the light code, confirm Wi-Fi and app setup, and then involve Tesla support or a qualified electrician if the fault points to wiring, grounding, heat, water, or internal damage.
Quick Answer
You can safely troubleshoot a Tesla Wall Connector at home, but you should not disassemble, modify, or repair its internal parts. Start with the light code, breaker status, app settings, Wi-Fi connection, cable condition, and visible damage. If you see red fault lights, overheating, water ingress, damaged wiring, or repeated trips, stop using it and call Tesla or a licensed electrician.
Key Takeaways
- A Tesla Wall Connector is not user serviceable, so internal repairs, relay replacement, cable splicing, and tampering should be left to Tesla or a qualified electrician.
- The light bar is your best first clue: no lights, blue lights, solid red, and red blink patterns each point to different causes.
- A 60 amp breaker can support up to 48 amp output, but lower breaker sizes require lower output settings during commissioning.
- Wi-Fi matters because Tesla uses it for firmware updates, remote diagnostics, access controls, and app features.
- If you see heat damage, burn marks, a frayed cable, water inside the handle, repeated breaker trips, or a fault that returns after a safe power cycle, stop charging and get professional help.
At a Glance
| Time Required | 10–30 minutes for safe owner-level checks; longer if Tesla support or an electrician is needed |
| Difficulty | Easy for visual checks and app troubleshooting; professional only for wiring, voltage, terminal, grounding, or internal faults |
| Tools Needed | Phone with Tesla app or Tesla One app access, Wall Connector Quickstart Guide, Wi-Fi password, flashlight, and photos of the label and light code |
| Cost | Free for basic checks; electrician service varies by area; Tesla’s U.S. shop listed a Wall Connector at $535 at the time this guide was checked, before tax and installation |
Warning: Tesla’s safety information says the Wall Connector is not user serviceable and should not be disassembled, repaired, tampered with, or modified. Owner-level troubleshooting should stay outside the unit. If the issue involves wiring, grounding, terminal torque, voltage testing, heat damage, water ingress, or internal parts, stop and contact Tesla or a qualified electrician.
Identify Common Issues With Your Tesla Wall Connector
Start by looking at what the Wall Connector is doing without opening the unit. The light bar, breaker status, cable condition, app messages, and vehicle charging screen usually tell you whether the problem is simple or needs professional service.
Common signs include:
- No lights: The Wall Connector may not be receiving power, or the breaker may be off or tripped.
- Solid blue: The Wall Connector is connected to the vehicle, but the vehicle has not requested charging yet.
- Pulsing blue: The Wall Connector is trying to communicate with the vehicle.
- Solid red: Charging is disabled because of an internal fault.
- One red blink: The unit has detected a ground fault circuit interruption.
- Two red blinks: The unit has detected a ground assurance fault or high ground resistance.
- Three red blinks: The Wall Connector has detected high temperature and may limit or disable charging.
- Six red blinks: The unit has detected overvoltage or poor grid quality.
- Seven red blinks: The vehicle has drawn too much current.
Also check for physical warning signs. Burn marks, a melted smell, cracked housing, frayed cable insulation, a damaged handle, moisture inside the connector, or repeated breaker trips are not normal. Do not keep testing the charger if you see these signs.
Note: Before contacting Tesla or an electrician, take a photo of the side label, the part number, the serial number, the breaker size if you know it, and the exact light pattern. Tesla says Wall Connectors can be identified by the part number on the side label.
Safe Troubleshooting Steps for Your Tesla Wall Connector
Use this sequence before assuming the Wall Connector needs replacement. These steps do not require opening the device or touching internal wiring.
- Stop using the Wall Connector if you see damage. Do not charge if the cable, handle, faceplate, housing, or nearby wiring looks cracked, burned, wet, frayed, or melted.
- Check the vehicle first. Make sure the vehicle is awake, plugged in fully, and not blocked by scheduled charging, charge limit settings, access control, or a vehicle-side fault.
- Read the light code. Count red blinks carefully. Red blink codes repeat after a short pause, so watch a full cycle before deciding what it means.
- Check the breaker from the panel. If the breaker is tripped, reset it once only if there are no burn marks, wet conditions, or obvious damage. If it trips again, stop and call an electrician.
- Try a safe power cycle only when conditions are dry and undamaged. Turn the circuit breaker off, wait at least 5 seconds, then turn it back on. If a solid red or repeating red fault returns, record the fault and contact support.
- Open the Tesla app or Tesla diagnostic flow. If your Wall Connector is registered, check device status, charging history, alerts, and available troubleshooting tools.
- Confirm Wi-Fi and firmware status. A Wall Connector connected to local Wi-Fi can receive firmware updates and support remote diagnostics.
- Escalate when the fault points to wiring or the unit itself. Ground faults, ground assurance faults, high temperature, overvoltage, no power at the unit, and repeated breaker trips should be checked by a qualified electrician or Tesla support.
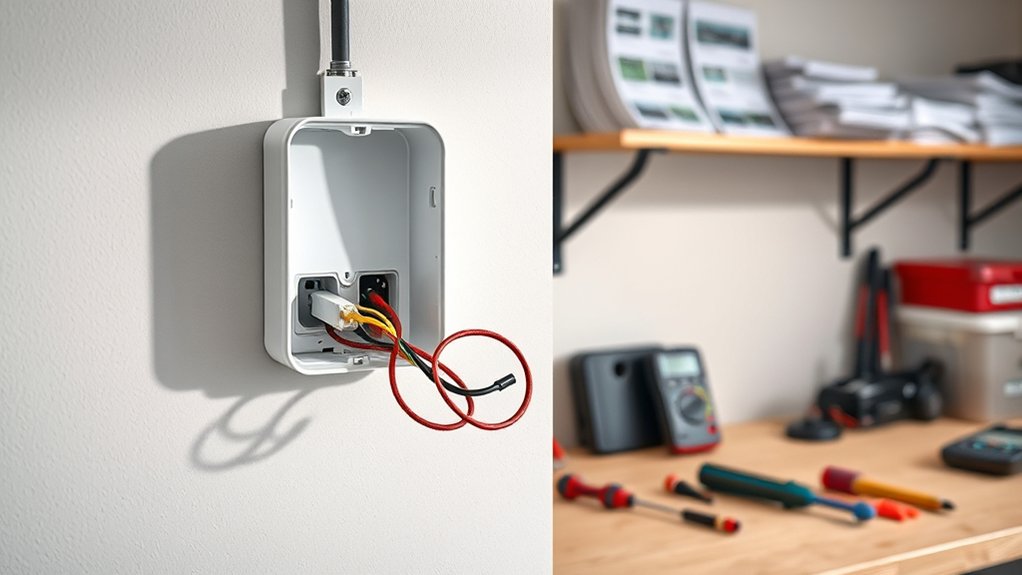
Do not remove the faceplate or wirebox cover unless you are trained and qualified to work on electrical systems. A multimeter can be part of professional diagnosis, but voltage checks at terminals should be performed by an electrician, not by a general homeowner following an online guide.
Tesla Wall Connector Light Codes and What They Mean
The light bar is the fastest way to narrow down the problem. Use the table below as a practical starting point, then follow Tesla’s official Diagnose flow or contact an electrician when the remedy involves wiring or voltage checks.
| Light pattern | Likely meaning | Safe next step |
|---|---|---|
| No lights | Power supply issue or charging disabled | Check for an outage or tripped breaker. If power should be present, have an electrician verify voltage and wiring. |
| Solid green | Ready to charge | Plug in and check vehicle settings if charging still does not begin. |
| Streaming green | Charging in progress | No repair needed if charging speed matches the breaker, vehicle, and settings. |
| Solid blue | Connected to vehicle, but vehicle has not requested charging | Check scheduled charging, charge limit, access control, and vehicle status. |
| Pulsing blue | Communicating with vehicle | Wait briefly. If it does not progress, unplug and replug once, then check the app. |
| Solid red | Internal fault; charging disabled | Power cycle at the breaker once. If solid red remains, record the part number and serial number and contact Tesla Energy. |
| 1 red blink | Ground fault circuit interruption | Inspect the handle, cable, Wall Connector, and charge port for damage or water. Have an electrician check the branch circuit. |
| 2 red blinks | Ground assurance fault or high ground resistance | Stop charging and have an electrician verify grounding and bonding. |
| 3 red blinks | High temperature detected | Let the unit cool. Check Wi-Fi and firmware. If it returns, an electrician should verify conductor size and terminal torque. |
| 6 red blinks | Overvoltage or poor grid quality | Have an electrician verify supply voltage and panel conditions. |
| 7 red blinks | Vehicle overcurrent detected | Reduce the vehicle charge current. If it returns, contact Tesla or the vehicle manufacturer. |
Set Up Wi-Fi and Firmware for Your Wall Connector
Wi-Fi is not just a convenience feature. Tesla uses it for firmware updates, app features, remote diagnostics, access controls, charging stats, and registration. Tesla states that Wall Connector is compatible with 2.4 GHz password-protected Wi-Fi networks.
For current setup, use the Tesla app or Tesla One app flow rather than relying only on the older browser address method:
- Have the Quickstart Guide ready. It includes the QR code and credentials needed for setup. Do not throw it away.
- Prepare the Wall Connector for setup. If needed, press and hold the charge handle button for about 5 seconds until the light pulses green.
- Scan the QR code. Use the Tesla One app for installer commissioning or follow the Tesla app setup flow if you are registering the Wall Connector to your account.
- Enter the breaker size and output setting. The breaker size must match the actual circuit. A 60 amp breaker supports up to 48 amp output, while lower breaker sizes require lower output limits.
- Connect to 2.4 GHz Wi-Fi. Choose your home network, enter the password, and confirm that the Wi-Fi and internet status show connected.
- Register the Wall Connector. Registration lets you use Tesla app features such as charging history, scheduling, access controls, and troubleshooting tools.
- Check for software updates. If Wi-Fi is not available, Tesla provides an offline firmware update route through the Wall Connector access point and the 192.168.92.1 update or service page.
Pro Tip: If the Wall Connector recently lost Wi-Fi, moved networks, or changed owners, fix registration and Wi-Fi before replacing hardware. Many charging issues come from setup, access control, scheduled charging, or firmware status rather than a failed unit.
Should You Fix or Replace Your Wall Connector?
For a Tesla Wall Connector, “fix” should usually mean safe troubleshooting, support diagnosis, wiring correction by a qualified electrician, or replacement of the unit. It should not mean opening the Wall Connector and replacing internal parts yourself.
Replacement is usually the safer route when the unit is damaged, internally faulted, out of warranty, repeatedly overheating, or showing signs of burned components. Electrical repair may make sense only when the problem is outside the Wall Connector, such as a breaker issue, incorrect commissioning, loose supply wiring, poor grounding, wrong conductor size, water intrusion at conduit fittings, or a panel-side problem. Those checks belong to a qualified electrician.
Cost Considerations
A new Wall Connector can cost less than repeated service calls, but installation and electrical corrections can add to the total. Tesla’s U.S. shop listed the Wall Connector at $535 at the time this guide was checked, before taxes, accessories, permits, or electrician labor. Prices can change, so confirm the current amount on the Tesla Wall Connector shop page.
Also check warranty before paying for a replacement. Tesla lists normal residential Wall Connector coverage as 48 months from the invoice date and normal commercial coverage as 12 months. Unauthorized repair, alteration, modification, improper installation, or improper maintenance can affect warranty coverage, so contact Tesla before attempting anything beyond basic troubleshooting.
Safety Risks
The biggest risk is not the cost of a replacement. It is heat, arcing, shock, fire, vehicle damage, or a warranty problem caused by an unsafe repair. The Wall Connector can deliver up to 48 amps on a properly configured 60 amp circuit, so small wiring or terminal problems can create serious heat under load.
| Issue | Risk level | Best action |
|---|---|---|
| Burn marks, melted smell, or hot faceplate | High | Stop using it and call Tesla or an electrician. |
| Repeated breaker trips | High | Do not keep resetting. Have the circuit checked. |
| Ground fault or ground assurance fault | High | Inspect for visible damage, then have grounding and bonding checked. |
| Lost Wi-Fi or registration | Low to medium | Reconnect through the Tesla app or Tesla One app. |
| Vehicle not requesting charge | Low to medium | Check schedule, charge limit, access control, and vehicle settings. |
Essential Safety Tips for Tesla Wall Connector Troubleshooting
Before doing any troubleshooting, keep the work at the correct level. You can check the app, breaker position, cable condition, handle condition, light pattern, vehicle settings, and Wi-Fi status. You should not open the unit, touch terminals, splice the charging cable, replace internal parts, or bypass faults.
Follow these safety rules:
- Turn off charging before inspecting the handle or cable. Unplug from the vehicle and inspect only the outside surfaces.
- Never use a visibly damaged Wall Connector. Tesla warns not to use the Wall Connector if it appears defective, cracked, frayed, broken, damaged, or fails to operate.
- Do not spray water into the control box or handle. Moisture can trigger faults and can create shock or corrosion risks.
- Do not troubleshoot during extreme weather or a power outage. Tesla’s support page warns against troubleshooting during those conditions.
- Do not keep resetting a tripped breaker. A breaker that trips again is a warning sign, not an inconvenience to override.
- Do not use third-party internal parts. Unauthorized repair or modification can create safety and warranty problems.
- Use a trained electrician for electrical testing. Voltage readings, terminal torque, conductor sizing, grounding, and panel work are not safe owner-level tasks.
A Wall Connector fault is not just a charging inconvenience. Red lights, heat, damaged insulation, water ingress, or repeated breaker trips can point to shock, fire, or equipment-damage risks.
When to Seek Professional Help for Your Tesla Wall Connector
Call Tesla support or a qualified electrician when the problem goes beyond app setup or visible inspection. This is especially important when the Wall Connector shows a red fault that returns after a safe power cycle.
Call Tesla Support When
- The Wall Connector shows a solid red internal fault after a breaker power cycle.
- You need help using the Tesla Diagnose flow.
- The Wall Connector is under warranty or you are unsure about warranty coverage.
- The app shows a device alert you cannot resolve.
- You need help with registration, access control, or firmware update issues.
- The unit appears defective, damaged, or failed without a clear electrical cause.
Call an Electrician When
- The breaker trips repeatedly.
- The Wall Connector has no lights even though the panel appears powered.
- You see one, two, three, or six red blinks.
- The cable, handle, faceplate, wirebox area, conduit, or breaker feels hot.
- You see burn marks, discoloration, melted plastic, buzzing, or a hot electrical smell.
- The installation may have the wrong breaker, wrong conductor size, poor grounding, loose terminals, or water entry.
- You need voltage readings, terminal torque checks, grounding checks, or panel work.
When you call, provide the exact light pattern, when it happens, the vehicle model, the breaker size if known, whether Wi-Fi is connected, photos of visible damage, and the part number and serial number from the side label.
Set Up WiFi for Your Wall Connector
If your Wall Connector charges but does not show app data, does not update firmware, or does not appear in your Tesla account, the issue may be Wi-Fi or registration rather than a failed charger.
Use this owner-safe setup checklist:
- Make sure your router is on and the Wall Connector is within range.
- Use a 2.4 GHz password-protected Wi-Fi network.
- Keep the vehicle unplugged during commissioning unless Tesla’s app instructions tell you otherwise.
- Scan the QR code from the Quickstart Guide or the back of the Wall Connector when the app asks for it.
- Enter the correct breaker size and installation country during commissioning.
- Register the Wall Connector to the correct Tesla account email.
- Confirm the app shows the Wall Connector online after setup.
If the Wall Connector cannot connect to Wi-Fi, move your router or mesh node closer, check that the 2.4 GHz network is enabled, remove special characters from the Wi-Fi name if setup keeps failing, and try again through the app. If Wi-Fi is not possible, Tesla provides an offline firmware update process, but most owners should use the app-based setup first.
Frequently Asked Questions
Can a Tesla Wall Charger be repaired?
A Tesla Wall Connector can sometimes be restored through safe troubleshooting, app setup, firmware updates, or electrical corrections by a qualified electrician. However, Tesla says the Wall Connector is not user serviceable, so you should not disassemble it, replace internal parts, splice cables, or modify the unit yourself.
How long do Tesla Wall Connectors last?
Tesla does not publish one simple lifespan for every installation. Life depends on installation quality, weather exposure, usage, power quality, firmware updates, and physical care. Tesla’s charging equipment warranty covers Wall Connector manufacturing defects for 48 months under normal residential use and 12 months under normal commercial use, subject to the warranty terms.
Can a Porsche Macan use Tesla chargers?
It depends on which Tesla charger you mean. For a Tesla Wall Connector at home, the vehicle must have a compatible inlet or an approved AC adapter rated for that use. For Tesla Superchargers, Tesla says select sites are open to NACS-equipped vehicles or CCS1 vehicles using a NACS DC adapter provided by Tesla or the vehicle manufacturer. Porsche is listed among supported manufacturers, but you should confirm compatibility in the Tesla app or your Porsche charging guidance before relying on a station.
Why did my Tesla Wall Charger stop working?
Common causes include a tripped breaker, no power to the unit, scheduled charging, access control settings, vehicle-side charging limits, lost Wi-Fi, firmware issues, ground faults, high ground resistance, overheating, overvoltage, or internal faults. Read the light code first, then use the Tesla app or Diagnose flow to narrow the cause.
Is it safe to reset a Tesla Wall Connector breaker?
A single breaker power cycle can be part of safe troubleshooting if the area is dry and there is no visible damage, burning smell, heat, or water ingress. Turn the breaker off, wait at least 5 seconds, then turn it back on. If the fault returns or the breaker trips again, stop and call a qualified electrician or Tesla support.
What does one red blink mean on a Tesla Wall Connector?
One red blink means the Wall Connector detected a ground fault circuit interruption and disabled charging. Inspect the handle, cable, Wall Connector, and vehicle charge port for visible damage or water. If you do not find an obvious external cause, have an electrician check the branch circuit and grounding.
Conclusion
Repairing a Tesla Wall Connector safely starts with knowing what not to repair yourself. You can check the light code, breaker status, vehicle settings, app alerts, Wi-Fi connection, firmware status, and visible damage. You should not open, modify, splice, or replace internal parts in the Wall Connector. If the problem involves red fault lights, heat, damaged cable insulation, water ingress, grounding, terminal torque, voltage, or repeated breaker trips, stop using the charger and contact Tesla or a qualified electrician. That approach protects your home, your vehicle, your warranty, and your safety.
Sources
- Tesla Wall Connector Support — Wall Connector output, compatibility, app features, installation resources, and warranty overview.
- Tesla Wall Connector Troubleshooting — status lights, Diagnose flow, Wi-Fi registration, and offline firmware update guidance.
- Tesla Important Safety Information — safety warnings, non-user-serviceable repair warning, grounding, damage, and installation cautions.
- Tesla Wall Connector Fault Codes — no-light, solid red, red-blink, ground fault, high-temperature, overvoltage, and overcurrent meanings.
- Tesla Circuit Breaker Rating / Maximum Output — breaker sizes, maximum output amperage, conductor notes, and grounding requirements.
- Tesla Supercharging Other EVs — non-Tesla Supercharger access, NACS/CCS adapter requirements, Porsche support listing, and adapter safety limits.
