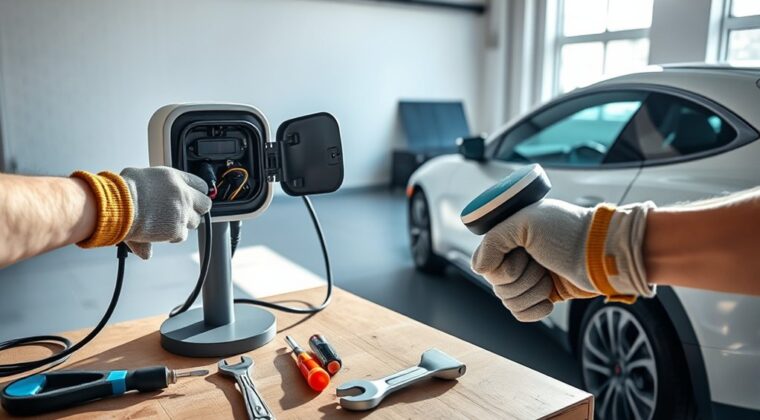
Replacing an EV charger can be simple when you are swapping a plug-in unit on an existing, compatible outlet, but it becomes electrical work when the charger is hardwired or the circuit needs changes. Before you remove anything, confirm the charger type, shut off power at the breaker, verify the circuit is dead, and check whether your local code requires a permit or licensed electrician.
Quick Answer
To replace an EV charger, first identify whether it is plug-in or hardwired. Turn off the breaker, verify the circuit is dead, remove the old unit, mount the new safety-certified EVSE, connect it exactly as the manual requires, and test it. Hire a licensed electrician for hardwired work, new circuits, load calculations, or permits.
Key Takeaways
- Do not assume every EV charger replacement is DIY-safe. Plug-in swaps are different from hardwired replacements.
- Match the new charger to the existing circuit, breaker, wiring, outlet, vehicle connector, and manufacturer instructions.
- Use safety-certified equipment and follow local code, permit, inspection, and NEC Article 625 requirements.
- Test the charger with the built-in test/reset function, status lights, app, and a short monitored charging session.
At a Glance
| Time Required | 30–90 minutes for a compatible plug-in swap; longer for hardwired work, permits, panel work, or a new circuit |
| Difficulty | Easy for a like-for-like plug-in replacement; advanced and electrician-recommended for hardwired chargers |
| Tools Needed | Voltage tester, insulated screwdrivers, socket set, drill, level, wire stripper, torque screwdriver, manufacturer manual, mounting hardware, and PPE |
| Cost | Small supplies may cost little for a compatible plug-in swap; professional hardwired work, permits, or circuit changes can cost much more |
Warning: EV chargers use high current and may be connected to 240-volt circuits. If the charger is hardwired, the breaker size changes, the wiring looks damaged, the outlet is loose or scorched, or you are unsure how to verify the circuit is off, stop and call a licensed electrician.
Why Replacing Your EV Charger Matters
Replacing your EV charger, also called electric vehicle supply equipment or EVSE, can improve charging speed, reliability, safety features, and daily convenience. A newer unit may offer app scheduling, charging history, power sharing, better cable storage, and clearer fault indicators.
The biggest benefit is not just speed. A correct replacement helps match the charger to your home’s electrical capacity, your vehicle’s onboard charger, and your local code requirements. The U.S. Department of Energy’s Alternative Fuels Data Center notes that home EV charging commonly uses Level 1 or Level 2 equipment, and that Level 2 equipment is often installed for faster home charging.
A replacement is also a good time to fix weak mounting, cable strain, weather exposure, loose connections, or an outdated plug-in setup. If the old charger has overheated, tripped breakers, shown error lights, or charged inconsistently, treat the replacement as a safety inspection, not just a hardware swap.
Before You Replace Your EV Charger
Before buying or installing the new charger, confirm that the replacement fits your vehicle, circuit, and location. Do not choose a charger based only on the highest advertised amperage.
- Charger type: Check whether the old unit is plug-in or hardwired. Plug-in units connect to a receptacle, while hardwired units connect directly to branch-circuit conductors.
- Vehicle connector: Many non-Tesla EVs in North America use J1772 for Level 1 and Level 2 AC charging, while newer vehicles may use J3400/NACS. Adapters may work in some cases, but they must be approved for the charger and vehicle.
- Circuit rating: Match the charger’s maximum output to the breaker and wiring. EV charging is a continuous load, so the circuit must be sized correctly.
- Outlet type: If the unit is plug-in, match the plug to the receptacle, such as NEMA 14-50 or NEMA 6-50. Do not use travel adapters or extension cords for a permanent setup.
- Indoor or outdoor rating: Outdoor chargers need weather-rated equipment and proper covers, seals, and mounting.
- Safety certification: Choose safety-certified equipment. AFDC recommends safety-certified charging equipment, including products tested by a nationally recognized testing laboratory.
- Smart features: If you want off-peak scheduling, load sharing, charging history, or utility programs, choose a connected charger that supports those features.
Note: A 48-amp charger is not a drop-in replacement for every older Level 2 unit. The breaker, wire size, installation method, and manufacturer settings must all support the charger’s output.
Plug-In vs Hardwired Replacement
A plug-in EV charger is usually the simplest replacement if the existing receptacle is in good condition, the new charger uses the same plug, and the circuit rating matches the charger setting. You still need to inspect the outlet, cable path, breaker, and mounting area before use.
A hardwired EV charger is more permanent and often preferred for higher-output chargers or outdoor installations. It can reduce plug and receptacle wear, but replacement usually requires opening the unit, handling conductors, using torque specifications, and meeting local electrical code. That work should be done by a licensed electrician unless you are legally allowed and qualified to perform it.
Home Level 2 charging normally uses 240-volt residential service, but charger output can vary. AFDC explains that Level 2 charging equipment may range from lower-power units up to higher-output equipment, and many residential units require a dedicated circuit sized for the continuous load.
When to Call a Licensed Electrician
Call a licensed electrician before replacing the charger if any of these apply:
- The old charger is hardwired.
- You need a new breaker, new circuit, panel upgrade, subpanel, conduit, or receptacle.
- The breaker trips, the outlet feels warm, or the plug shows discoloration.
- The existing wiring size is unknown.
- The charger will be outdoors or in a wet location.
- Your local building department requires a permit or inspection.
- You want to increase the charging amperage.
Charging installations must comply with local and state codes and regulations. AFDC also notes that permits may be required and that NEC Article 625 contains key requirements for EV charging equipment.
Gather Your Tools and Materials
For a simple plug-in replacement, gather the new charger, the manufacturer’s manual, insulated screwdrivers, a socket set, a level, drill, mounting hardware, a non-contact voltage tester, and a plug-in receptacle tester if appropriate for the outlet type.
For hardwired work, a qualified installer may also need a multimeter, torque screwdriver, wire strippers, conduit fittings, strain relief, weatherproof fittings, wire connectors approved for the conductor type, and permit paperwork.
Do not reuse damaged mounting hardware, scorched receptacles, cracked conduit, loose wire connectors, or old anchors that no longer hold firmly. EV charger cables are heavy, and poor mounting can strain the wiring over time.
How to Replace an EV Charger Step by Step
Step 1: Read Both Manuals
Start with the old charger manual, if you have it, and the new charger manual. Look for amperage settings, breaker requirements, torque values, mounting height, indoor/outdoor limitations, Wi-Fi setup, and testing steps.
If the manual conflicts with general advice online, follow the manufacturer’s manual and local code.
Step 2: Turn Off Power at the Breaker
Turn off the breaker that feeds the charger. If other people are home, place a clear note on the panel so no one turns the breaker back on while you work.
For hardwired work, a professional may use lockout/tagout practices and verify the circuit with a meter. Never rely on the charger’s display being dark as proof that the circuit is safe.
Step 3: Verify the Circuit Is Dead
Use a proper tester to confirm power is off before touching conductors or terminals. Test the tester on a known live source first, verify the charger circuit is off, then test the tester again.
If you cannot confidently verify the circuit is dead, stop and call an electrician.
Step 4: Document the Existing Installation
Take clear photos of the old charger, wall mounting, wiring compartment, conduit entry, plug, receptacle, breaker label, and any dip-switch or software amperage setting. These photos help you compare the old and new setup and can help an electrician troubleshoot later.
Step 5: Remove the Old Charger
For a plug-in charger, unplug the unit after the circuit is off, remove the cable from its holder, and unscrew the charger from the wall bracket. Inspect the plug and receptacle for heat marks, looseness, or cracks.
For a hardwired charger, the electrician will open the wiring compartment, confirm power is off, disconnect the conductors, remove strain relief or conduit fittings as needed, and then remove the charger from the wall. Wire colors and conductor labels should be documented before anything is disconnected.
Step 6: Inspect the Mounting Location
Check the wall surface, anchors, conduit, receptacle box, and cable path. The charger should be close enough to the vehicle charge port that the cable reaches without stretching or crossing a walkway.
If the old unit was outdoors, confirm that water did not enter the box or conduit. Replace damaged covers, seals, fittings, or boxes before installing the new charger.
Step 7: Mount the New Charger
Hold the mounting bracket level, mark the holes, and fasten the bracket into studs, masonry, or anchors rated for the charger weight. Do not rely on weak drywall anchors unless the manufacturer allows them and the weight rating is adequate.
Leave enough space around the charger for airflow, cable storage, and safe plug access. Follow the manufacturer’s clearance and height requirements.
Step 8: Connect or Plug In the New Charger
For a plug-in replacement, plug the charger directly into the matching receptacle only after the unit is mounted and the cable is supported. Do not use an extension cord, multi-outlet adapter, or undersized adapter.
For a hardwired replacement, the installer should connect conductors exactly as the manual shows, use the correct terminals, tighten to the specified torque, install strain relief, and close the wiring compartment before power is restored.
Step 9: Set the Correct Amperage
Many Level 2 chargers let you set output amperage through dip switches, an app, or installer settings. Set the charger output to match the circuit, not the highest number the charger can advertise.
For example, a charger set too high for the breaker and wire can overheat the circuit or trip the breaker. If you do not know the correct setting, have an electrician confirm it.
Step 10: Restore Power and Run a First Test
Turn the breaker back on after the charger is mounted, closed, and connected. Watch the charger’s status light or display. Follow the manual’s startup steps, app pairing steps, and test/reset procedure.
Plug in the vehicle and run a short charging session while you stay nearby. Confirm the vehicle shows charging, the charger reports normal status, and the plug, cable, receptacle, and breaker area do not become hot, buzz, smell, or show faults.
Pro Tip: For the first week after replacement, check the plug, receptacle, and charger body after 15–30 minutes of charging. Warm can be normal, but hot surfaces, burning smells, buzzing, or discoloration mean you should stop using the charger and call an electrician.
Electrical Compliance and Permits
EV charging equipment is treated as a continuous electrical load, so the circuit must be sized correctly. The safest approach is to check the charger manual, local code, and the authority having jurisdiction before you install or replace hardwired equipment.
Do not assume your old charger’s circuit can support a higher-output replacement. A new charger may need a different breaker, conductor size, conduit, disconnect, GFCI protection, or hardwired connection method.
Use ground-fault protection and other safety devices required by the charger manual and local code. Avoid adding a specific device, such as a Type B RCD, unless the manufacturer, local code, or electrician requires it for your installation type and region.
When choosing equipment, AFDC recommends checking certification and safety testing. ENERGY STAR-certified chargers are tested for operational safety by a nationally recognized testing laboratory and can reduce standby energy use compared with similar products.
How to Test Your New EV Charger
After installation, test the charger in stages instead of starting with a full overnight charge.
- Check the status display: Confirm the charger powers on without a fault code.
- Use the built-in test/reset: If the charger or breaker has a test function, use it exactly as the manual describes.
- Pair the app: Connect Wi-Fi or cellular features if the charger uses smart scheduling or power reports.
- Start a short charge: Plug in the EV and confirm the vehicle and charger both show active charging.
- Watch the first session: Monitor for heat, smells, sounds, flickering lights, app faults, or breaker trips.
- Confirm scheduled charging: If you use off-peak rates, test the schedule before relying on it overnight.
If the charger fails a test, do not bypass safety settings. Check the manual first, then contact the manufacturer or a licensed electrician.
Troubleshooting Common EV Charger Issues
If your new EV charger does not work correctly, start with the simplest checks and stop immediately if you see heat damage or electrical warning signs.
- No lights or display: Confirm the breaker is on. If the breaker will not stay on, stop using the charger and call an electrician.
- Breaker trips during charging: The charger output may be set too high, the circuit may be overloaded, or the breaker may be faulty.
- GFCI or ground-fault trip: Moisture, damaged cable insulation, incompatible protection devices, or an internal fault may be present.
- Vehicle does not charge: Check the connector latch, vehicle charge schedule, battery charge limit, app settings, and charger status code.
- Charging is slower than expected: The vehicle’s onboard charger, battery temperature, charger amperage setting, or utility load-sharing program may limit speed.
- Plug or outlet gets hot: Stop charging. Heat at a receptacle can signal loose contacts, worn hardware, or an overloaded connection.
- Wi-Fi or app problems: Move the router closer, reconnect the charger, update firmware, and confirm the charger still works locally without the app.
How to Maintain Your EV Charger for Optimal Performance
EV charger maintenance is simple, but it matters because the cable and connector are handled often and carry high current.
Monthly Checks
- Inspect the cable for cuts, kinks, crushed spots, or exposed insulation.
- Check the connector for dirt, bent pins, cracks, or moisture.
- Make sure the charger is firmly mounted and the cable holder supports the cable.
- Clean the housing with a damp cloth and mild detergent. Do not pressure-wash the charger.
Seasonal Checks
- Check outdoor seals, covers, and conduit entries after heavy rain, snow, or freezing weather.
- Clear leaves, dust, spider webs, and debris from the area around the charger.
- Review charging history for unusual slowdowns, interruptions, or fault patterns.
- Install firmware updates from the manufacturer if your charger supports them.
Annual Checks
Schedule a professional inspection if the charger is hardwired, outdoors, used heavily, or installed on an older electrical panel. AFDC’s operation and maintenance guidance recommends storing charging cables securely, checking parts periodically, and keeping equipment clean.
Frequently Asked Questions
Can I replace an EV charger myself?
You may be able to replace a plug-in EV charger yourself if the existing receptacle, breaker, circuit, and new charger are fully compatible. Hardwired chargers, new circuits, breaker changes, damaged wiring, outdoor wiring, and permit-required work should be handled by a licensed electrician.
Do I need a permit to replace an EV charger?
You may need a permit if the replacement involves hardwiring, a new circuit, panel work, a breaker change, outdoor wiring, or a higher amperage setting. Permit rules vary by city and state, so check your local building department before starting.
Is a hardwired EV charger better than a plug-in charger?
A hardwired charger can be better for outdoor installations, higher-output charging, and long-term durability because it removes plug and receptacle wear. A plug-in charger can be easier to replace or take with you, but the receptacle must be rated, installed, and maintained correctly.
What type of charger cable does a Nissan Leaf use?
In North America, most Nissan Leaf models use a J1772 connector for Level 1 and Level 2 AC charging. Many Leaf models also use CHAdeMO for DC fast charging. Always verify your model year, market, and owner’s manual before buying a charger or adapter.
What charger does the Chevrolet Equinox EV use?
Most current North American Chevrolet Equinox EV models use J1772 for Level 1 and Level 2 AC charging and CCS1 for DC fast charging. Because automakers are moving toward J3400/NACS, check your exact model year and approved adapter guidance before buying a charger.
What kind of charger does the Hyundai Kona Electric use?
In North America, the Hyundai Kona Electric commonly uses J1772 for Level 1 and Level 2 AC charging and CCS1 for DC fast charging. In Europe and some other markets, connector types can differ, so verify your regional model before buying equipment.
Conclusion
Replacing an EV charger is safest when you treat it as an electrical compatibility check first and a hardware swap second. A like-for-like plug-in replacement can be straightforward, but hardwired units, higher amperage settings, damaged wiring, outdoor installations, and permit-required work belong with a licensed electrician. Match the charger to the circuit, follow the manual, test the first charging session, and keep the cable and connector clean for reliable long-term charging.
Sources
- U.S. Department of Energy AFDC: Charging Electric Vehicles at Home — home Level 1/Level 2 charging, safety-certified equipment, electrician guidance, permits, and NEC Article 625.
- U.S. Department of Energy AFDC: Electric Vehicle Charging Stations — charging levels, connector terminology, Level 2 voltage, power range, and J1772/J3400 overview.
- U.S. Department of Energy AFDC: Procurement and Installation for EV Charging Infrastructure — certification, permitting, licensed electrical contractors, and ENERGY STAR guidance.
- U.S. Department of Energy AFDC: Operation and Maintenance for EV Charging Infrastructure — cable storage, cleaning, periodic checks, maintenance costs, and troubleshooting considerations.
- ENERGY STAR Certified EV Chargers Product Finder — certified EVSE product verification.
