To connect your EV charger to home Wi-Fi, use the charger manufacturer’s app, keep your phone close to the unit, and join the charger to the correct home network. For many smart chargers, that means choosing a password-protected 2.4GHz Wi-Fi network, entering the password exactly, and waiting for the app or charger status light to confirm the connection.
Quick Answer
Open your EV charger app, select your charger, choose Wi-Fi or connectivity settings, then connect to your home’s 2.4GHz network if your model requires it. Enter the password exactly, keep the app open, and wait for the app, network icon, or charger status light to confirm that the charger is online.
Key Takeaways
- Most smart EV chargers connect through the manufacturer’s app, but the exact steps vary by brand and model.
- Use a strong, password-protected 2.4GHz Wi-Fi network when your charger requires it; many chargers do not connect to 5GHz networks.
- Strong signal at the charger location matters more than high internet speed.
- Wi-Fi is not always required for basic charging, but it usually enables scheduling, firmware updates, alerts, energy reports, and remote control.
- If setup fails, restart the charger and router, recheck the password, move closer to the charger, and verify the app permissions.
At a Glance
| Time Required | 5 to 15 minutes for most app-based setups |
| Difficulty | Easy if the charger is already installed and powered |
| Tools Needed | Phone, charger app, Wi-Fi password, charger QR code or serial number if required |
| Cost | Usually free; a Wi-Fi extender or access point may cost extra if the garage signal is weak |
Warning: Wi-Fi setup should only require the charger app and your router settings. Do not open the charger, electrical panel, breaker, or junction box to fix a Wi-Fi issue. If the charger is not powered or was not installed correctly, stop and contact a qualified electrician or the charger manufacturer.
Prep Your Charger and Router
Before you start the Wi-Fi setup, make sure the EV charger is installed, powered on, and ready to be added in its app. Also update the charger app on your phone so you are using the latest setup flow.
Gather the details you may need before you begin:
- Your home Wi-Fi network name, also called the SSID.
- Your exact Wi-Fi password, including uppercase letters, numbers, and symbols.
- The charger’s QR code, serial number, or setup code if your app asks for it.
- Your charger account login.
- Bluetooth, camera, and location permissions enabled on your phone if the app requests them.
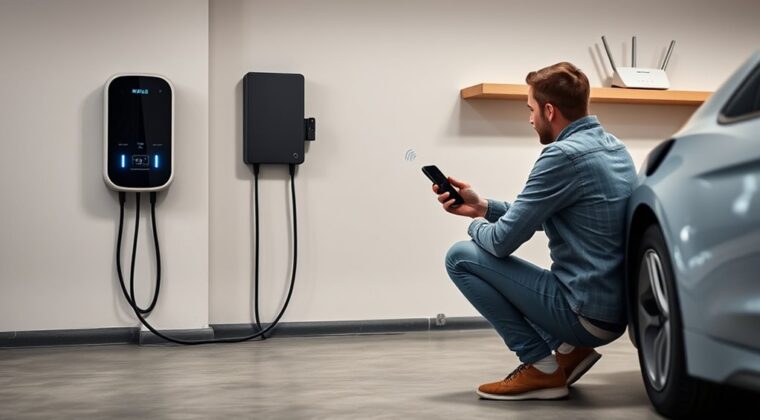
Place your phone close to the charger during setup. Many apps use Bluetooth, a QR code, or a temporary local connection to identify the charger before handing it off to Wi-Fi. The exact process depends on your charger model, so follow the app prompts and the manufacturer’s manual if they differ from general instructions.
Pro Tip: If your garage has weak Wi-Fi, test the signal with your phone while standing beside the charger. If your phone drops bars, loads slowly, or switches to cellular data, the charger may also struggle to stay online.
Check Your Wi-Fi Network Requirements
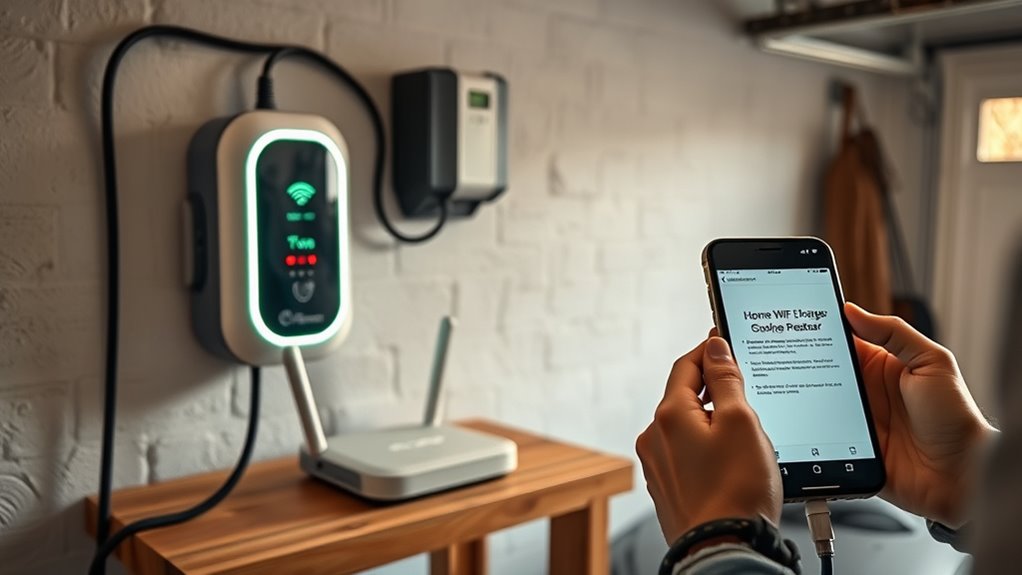
Most home smart chargers work best on a simple, secure home Wi-Fi network. Many models require or prefer 2.4GHz Wi-Fi because it reaches farther through walls and garage doors than 5GHz. Some newer routers combine 2.4GHz and 5GHz under one network name, which can confuse setup for chargers that need a dedicated 2.4GHz connection.
Before pairing, check these network settings:
- 2.4GHz enabled: Confirm your router is broadcasting a 2.4GHz network if your charger requires it.
- Password protected: Use WPA2 Personal or WPA3 Personal security, not an open network.
- No captive portal: Chargers usually cannot accept hotel-style web login pages or public Wi-Fi terms screens.
- Strong password: Avoid simple passwords, default router passwords, or anything easy to guess.
- Stable coverage: Keep the router, mesh node, extender, or access point close enough to the garage for a steady signal.
If your router uses one shared name for both bands and setup fails, temporarily create a separate 2.4GHz network name in the router app, such as “HomeGarage24,” then connect the charger to that network. You can also use a mesh node or extender near the garage if the charger is far from the main router.
Open the Charger Setup in the App
Open the charger app and sign in to the account that will manage the charger. Look for a menu labeled Add Charger, My Charger, Wall Connector, Device Setup, Connectivity, Wi-Fi, or Network Settings. The names vary by brand, but the goal is the same: select the charger, send it your Wi-Fi details, and confirm that it joined your home network.
Select Your Charger Device
Choose your specific charger from the app’s device list. If the app asks for a QR code, scan the code from the quick-start guide, charger label, or installation paperwork. If it asks for manual entry, type the serial number or setup code carefully.
Keep your phone near the charger while the app identifies it. Do not walk back to the router during this step. A stable phone-to-charger connection helps the setup finish without timing out.
Enter the Wi-Fi Setup Screen
Once the app finds the charger, open the Wi-Fi setup or connectivity screen. The app may scan nearby networks and show your home network in a list. Select the correct 2.4GHz network if your charger requires 2.4GHz.
- Tap your charger in the app.
- Open Wi-Fi, Connectivity, or Network Settings.
- Select your home Wi-Fi network.
- Enter the Wi-Fi password exactly.
- Keep the app open until it confirms the setup.
Do not rely on a universal light color. Some chargers show a pulsing light when ready, while others use a solid light, app message, checkmark, or network icon. Use your charger’s app and manual as the final source for what each indicator means.
Enter Your WiFi Details and Connect
Type your Wi-Fi password slowly and check every character before you submit it. Wi-Fi passwords are case-sensitive, so “GarageHome7!” and “garagehome7!” are not the same password.
After you submit the password, give the charger time to connect. Some apps finish quickly, while others may need a minute or two to register the charger, confirm internet access, and sync with the cloud account.
A successful connection usually appears in one or more of these ways:
- The app shows a success message.
- A Wi-Fi or network icon appears beside the charger name.
- The charger status changes to online, connected, or ready.
- The charger light changes according to the manufacturer’s setup guide.
- The app allows smart features such as schedules, charging history, access controls, or alerts.
Note: If the charger works for basic charging but the app says it is offline, the wiring may be fine. The problem is usually Wi-Fi signal, password entry, router settings, app permissions, or account pairing.
Secure Your Charger on Your Home Network
A connected EV charger is part of your home network, so treat it like any other smart device. Use a strong Wi-Fi password and avoid old security modes such as WEP or unsecured open Wi-Fi. If your router supports it, WPA3 Personal is best, while WPA2 Personal is still widely supported.
For better security and cleaner network management, consider these steps:
- Keep your router firmware updated.
- Change the router’s default admin password.
- Use a unique Wi-Fi password that is not reused elsewhere.
- Put smart home devices on a guest or IoT network if your router supports it.
- Disable router features you do not use, especially remote management.
- Keep the charger app and charger firmware updated.
Wi-Fi security matters because smart charging features can include schedules, usage history, account access, remote start/stop, and notifications. A secure network helps protect those features from unwanted access.
Troubleshoot Charger WiFi Connection Problems
If your EV charger will not connect or will not stay connected to Wi-Fi, start with the basics. Restart the charger using the manufacturer’s recommended method, restart the router, reopen the charger app, and try the setup again while standing close to the charger.
| Problem | Likely Cause | Fix |
| Network does not appear | 2.4GHz is off, SSID is hidden, or signal is weak | Enable 2.4GHz, unhide the SSID during setup, or move a mesh node/extender closer |
| Password rejected | Wrong password or case mismatch | Retype the password manually and verify uppercase, lowercase, spaces, and symbols |
| Setup freezes or times out | Phone moved too far away, app permissions blocked, or Bluetooth dropped | Stand near the charger, enable Bluetooth and permissions, then restart the app |
| Charger connects, then drops offline | Weak garage Wi-Fi or router roaming issues | Improve signal, add a closer access point, or use a dedicated 2.4GHz SSID |
| App cannot find charger | Charger is not in setup mode or already linked to another account | Use the manufacturer’s reset or transfer process and confirm account ownership |
| Public or apartment Wi-Fi will not work | Captive portal, device limits, or network isolation | Ask the property manager for supported device setup or use a private router/network if allowed |
If the charger app shows an error code, write it down before resetting anything. Error codes help support teams identify whether the issue is Wi-Fi, account pairing, firmware, charger hardware, or electrical installation.
Keep Your Charger Connected
After the charger is online, keep the connection stable so smart charging works when you need it. A reliable connection helps the charger receive firmware updates, send alerts, track energy use, and follow charging schedules.
- Keep the charger within strong Wi-Fi range.
- Update the charger app when updates are available.
- Allow charger firmware updates through the app or manufacturer portal.
- Restart the router if multiple smart devices start dropping offline.
- Check app alerts for offline warnings or failed schedule events.
- Move a mesh node, extender, or access point closer to the garage if disconnects repeat.
If your charger still drops offline after signal improvements, contact the charger manufacturer with the charger model, app version, router model, error code, and the steps you already tried.
Frequently Asked Questions
How do I connect my EV charger to my Wi-Fi?
Open the charger manufacturer’s app, select your charger, go to Wi-Fi or connectivity settings, choose your home network, and enter the Wi-Fi password exactly. Keep your phone close to the charger until the app confirms the connection.
How do I connect an EV charger to my house?
Connecting the charger to your house is different from connecting it to Wi-Fi. A Level 2 home charger usually needs a compatible 240V circuit, proper breaker sizing, and installation that follows the charger manual and local electrical code. Once the charger is safely installed and powered, you can connect it to Wi-Fi through the app.
Do EV chargers need a Wi-Fi connection?
Many home EV chargers can still deliver power without Wi-Fi, but smart features may not work. Without Wi-Fi, you may lose remote monitoring, scheduling through the charger app, firmware updates, charging history, alerts, access controls, and utility-rate features.
Can I connect my EV charger to 5GHz Wi-Fi?
Only if your charger model supports 5GHz. Many smart chargers require a 2.4GHz password-protected Wi-Fi network, so check the manual before setup. If setup fails on a combined router network, create or enable a separate 2.4GHz SSID and try again.
Why will my charger not stay connected to Wi-Fi?
The most common causes are weak garage signal, wrong Wi-Fi band, password changes, router firmware issues, mesh roaming problems, or app/account pairing errors. Start by checking signal strength beside the charger, restarting the router and charger, and reconnecting through the charger app.
What EV charger does Volvo recommend?
Volvo charger recommendations can vary by country, model year, dealer program, and utility partnership. Check your Volvo owner resources, local Volvo retailer, and charger compatibility information before buying. For any EV, choose a properly listed Level 2 charger that matches your vehicle, electrical panel capacity, plug type, and installation plan.
Conclusion
Connecting your EV charger to home Wi-Fi is usually a simple app-based setup: prepare the charger, choose the right network, enter the password carefully, and confirm the charger is online. The most reliable results come from a strong 2.4GHz signal, current app and firmware updates, and secure router settings. If setup fails, troubleshoot methodically before assuming the charger itself is faulty.
Sources
- Tesla Support: Installing a Wall Connector — backs up app commissioning, QR code setup, Wi-Fi connection, 2.4GHz compatibility, and firmware update guidance.
- U.S. Department of Energy Alternative Fuels Data Center: Electric Vehicle Charging Stations — backs up Level 1, Level 2, DC fast charging, 240V residential Level 2 charging, connector terminology, and charging equipment context.
- Federal Trade Commission: How To Secure Your Home Wi-Fi Network — backs up WPA2/WPA3, router updates, password security, guest networks, and router security guidance.
- ChargePoint Home Flex — manufacturer product reference for a common smart home Level 2 EV charger.
