What’s in This Article
Most EV owners assume home charging means a garage outlet. If your car lives in the driveway, that assumption costs you range and convenience every day. A properly installed outdoor EV charger fixes the problem, and the process is more manageable than it looks when you follow the right steps.
Quick Answer
Yes, you can install an EV charger outside your home. Choose a weatherproof Level 2 unit with a Type 4X enclosure, verify your panel supports a dedicated 240V circuit, pull the required permits, and hire a licensed electrician to complete the wiring. Mount the charger in a sheltered location, manage the cable safely, and inspect it regularly after storms.
Key Takeaways
- Choose a Level 2 charger (240V) with a NEMA Type 4X weatherproof enclosure for any outdoor installation.
- Verify your home’s electrical panel can support a dedicated 240V circuit before you buy any equipment.
- Pull all permits and hire a licensed electrician — skipping either step risks fines, failed inspections, and safety hazards.
- Mount the charger close to your panel to cut conduit runs and reduce installation costs.
- Inspect the unit, cable, and enclosure regularly, especially after severe weather, to catch damage early.
Before You Begin
A successful outdoor EV charger install starts before you buy anything. Gather this information first so nothing surprises you mid-project.
Estimated time: 2–4 weeks for permits and electrician scheduling; 4–8 hours for the electrical installation itself.
You’ll need:
- Your vehicle’s connector type (J1772 or NACS/SAE J3400)
- Your home’s electrical service capacity (check the main breaker label on your panel)
- A weatherproof Level 2 charger rated for outdoor use (look for NEMA Type 4X)
- A licensed electrician with experience in EV supply equipment (EVSE) installation
- Local permit application forms (available from your municipality’s building department)
- Conduit, mounting hardware, and a disconnect switch if your local code requires one
Why Install an Outdoor EV Charger?
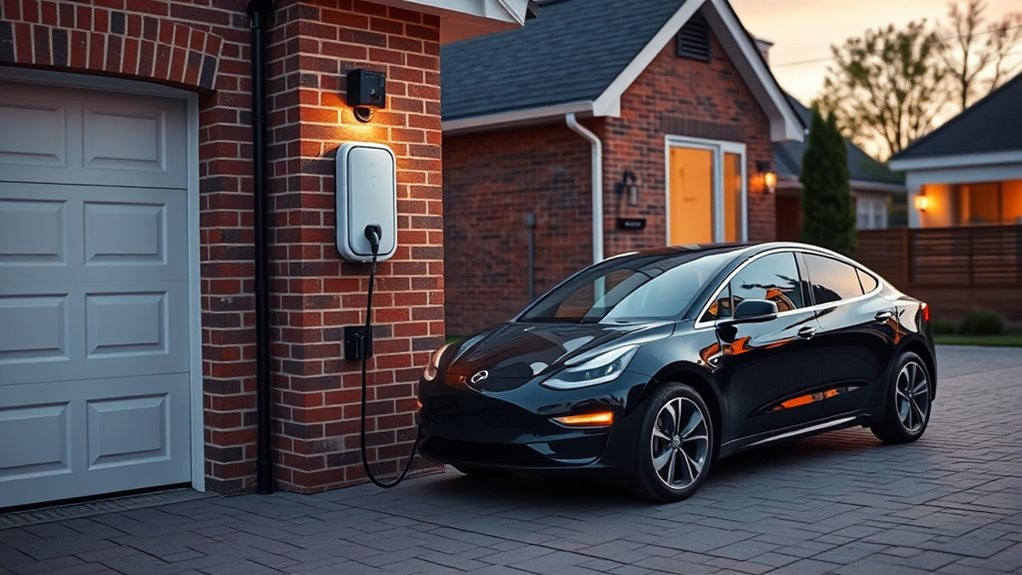
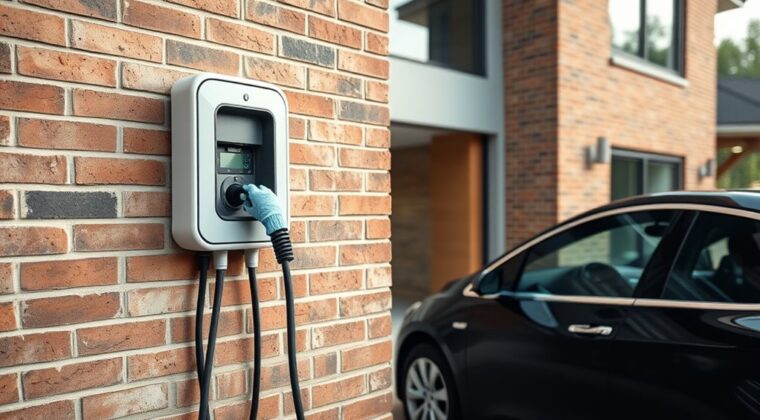
If you have a driveway, installing an outdoor EV charger makes home charging far more convenient without requiring garage space. You can mount the charger beside your home’s electrical panel, which shortens conduit runs and cuts labor and material costs.
That placement lets you build a practical charging station right where your vehicle already parks, so you’re not tethered to a garage. A charger with a Type 4X enclosure handles rain, dust, and temperatures from -40°F to 122°F, so it keeps working through harsh climates.
You can choose wall-mounted, post, or pedestal hardware to match your site layout and preserve access. If you share a driveway, smart access controls let you monitor usage and restrict entry to authorized users.
Is an Outdoor EV Charger Safe?
An outdoor EV charger is safe when you choose a unit with an outdoor-use rating and a licensed electrician installs it correctly.
Verify the unit carries a weatherproof enclosure rating of Type 4X so rain, snow, and debris can’t reach internal components. The charger also needs to tolerate your local climate. Some models, like the FLO Home G5, operate from -40°F to 122°F, which covers most North American conditions.
Use a hardwired circuit instead of a plug-in setup whenever possible. Hardwired connections reduce exposed connection points and lower electrical risk. A licensed electrician should make all final connections, confirm correct grounding, and size the breaker to code.
After installation, inspect the charger regularly for damage, corrosion, or loose fittings. Follow the manufacturer’s maintenance schedule, because long-term safety depends on consistent upkeep, not just correct installation.
How to Choose an Outdoor EV Charger
Start with a weatherproof unit rated for exterior exposure (Type 4X) so it handles rain, snow, dust, and temperature swings without failing.
Choose a Level 2 charger with 240V output. You’ll charge significantly faster than with a 120V Level 1 outlet, which keeps your vehicle ready for daily use.
Confirm the charger matches your vehicle’s connector type, whether J1772 or NACS (SAE J3400), before you buy. Incompatible hardware wastes money and delays your install.
Look for adjustable amperage settings and energy usage tracking. Those features let you fine-tune charge speed and monitor kilowatt-hour consumption over time.
For any outdoor install, prefer hardwired equipment when local code allows, because hardwired units improve safety and make compliance easier. Then schedule professional installation with a licensed electrician who can mount the unit correctly and confirm all wiring meets local regulations.
Plan the Power for Outdoor Charging
Assess your panel capacity first. Confirm it can support a 240V Level 2 charger without overloading. Match the charger output to your available service and choose a location close to the panel to reduce cable runs and installation cost.
Have a licensed electrician verify the load calculation, add a dedicated circuit if needed, and confirm the install meets local code and permit requirements. Per the National Electrical Code (NEC) Article 625, all EV supply equipment (EVSE) circuits must include ground-fault circuit interrupter (GFCI) protection.
Pro tip: Size your breaker at 50A and run 6-gauge wire to get a safe 40A continuous charge rate, since the NEC 80% rule caps continuous loads at 80% of breaker capacity.
How to Assess Your Home’s Power Needs
Confirm whether your vehicle needs a Level 1 (120V) or Level 2 (240V) setup before you buy anything. Level 2 is the better home option for most drivers because it charges significantly faster.
Check your vehicle’s charging requirements and note the amperage draw, usually 16 to 80 amps, so your electrical panel can support the load without tripping breakers. Verify your home’s total service capacity and add a dedicated circuit or schedule a panel upgrade if needed.
Measure the run from the panel to the charging point. Longer routes require heavier conductors and raise installation costs. Confirm local permit and weatherproofing rules for outdoor equipment before you purchase a charger.
How to Match Charger Output to Your Home
Match the charger output to your EV’s actual demand. A setup that’s too small charges slowly. One that’s oversized can exceed your panel’s safe load. Base your choice on battery capacity, daily miles driven, and any future EVs you might own. Use 240V for efficient charging and verify your panel’s capacity before you pick an amperage.
| Output | Use Case | Circuit |
|---|---|---|
| 3.7 kW | Light daily driving | 16A |
| 7.4 kW | Most homes | 32A |
| 19.2 kW | Fast, future-ready (U.S. max) | 80A |
Note: The maximum Level 2 output on standard U.S. residential single-phase 240V service is 19.2 kW (80A × 240V). Outputs above that require three-phase power, which is common in Europe but not standard in U.S. homes.
Most Level 2 home installations require a total home service of at least 100A. Match your breakers, conductors, and enclosure ratings to local code standards.
Get Permits and Hire an Installer
Check your local permit rules before you start. Outdoor EV charger work often requires electrical and building approvals. Hire a licensed electrician who understands load calculations, safety standards, and site-specific requirements. Make sure the installation passes all required code inspections and keep clear records for future reference.
Check Local Permit Rules
Verify local permit requirements and zoning rules before any work begins. Many municipalities require electrical approvals before an EV charger install can start. Confirm regulations on setbacks, placement, and inspection timing. A licensed electrician can prepare compliant plans and submit them if your jurisdiction requires it.
| Item | Why it matters | Action |
|---|---|---|
| Permit | Prevents violations | Apply before work |
| Zoning | Controls placement | Verify site rules |
| Inspection | Confirms compliance | Schedule promptly |
Permits may require drawings, fees, and inspections, so budget for added time and cost. Skipping approvals risks fines, safety citations, and delays when you sell your home.
The federal Alternative Fuel Vehicle Refueling Property Credit (Section 30C, IRS Form 8911) may cover up to 30% of your EV charger and installation costs, capped at $1,000 for personal use through December 31, 2032. Consult a tax professional to confirm your eligibility.
Hire a Licensed Electrician
A licensed electrician makes sure your EV charger installation meets local electrical codes, safety rules, and permit requirements. That reduces the risk of hazards, fines, and inspection delays.
When you hire a licensed electrician, you get someone who assesses your panel, calculates the load, and identifies any upgrades before the charger goes in. They’ll secure permits, recommend the right outlet option (such as a NEMA 14-50 for plug-in installs), and select the best outdoor placement for weatherproofing and access.
Expect to pay between $200 and $1,000 for installation labor, depending on your panel’s location, conduit length, and whether you need a panel upgrade. The charger unit itself typically adds $300 to $800 or more. This professional oversight protects you from DIY liability and keeps your setup efficient and code-compliant.
- Verify permit documentation
- Confirm panel capacity
- Match charger to load
- Plan outdoor placement
- Document installation records
Verify Code Compliance
Verify your local building and electrical codes before work starts and get all required permits and inspections lined up so the installation stays legal and code-compliant.
Start early, because local codes vary by jurisdiction and can dictate conduit type, grounding requirements, disconnect placement, and outdoor enclosure ratings. Apply for all permits before work begins, including any electrical permits your municipality requires.
A licensed electrician should review the site, run load calculations, and install the charger to code. Choose a unit rated for outdoor use and matched to applicable electrical standards. After installation, schedule all required inspections and keep records of permits, approvals, and completed work. These records protect you if local rules change or you sell your home.
Secure Access and the Charging Cable
Secure access starts with a charger that supports lockable hardware and user authentication, so only authorized users can operate it. Pair that with a weatherproof charging cable rated for outdoor duty, because exposure to rain, UV light, and temperature swings degrades unrated cables over time.
Use proper cable management with clips or covers to keep the charging cable off walkways and preserve a clean installation.
- Verify lock engagement before each session
- Choose cable jackets marked for outdoor exposure
- Route slack to avoid strain at the connector
- Inspect for cuts, abrasion, or moisture ingress
- Add motion-activated lighting for safer nighttime use
Controlling access and managing cable wear keeps your charger reliable and reduces the risk of damage or unauthorized use.
Check the cable regularly, especially after storms, and replace it at the first sign of damage. That habit keeps your station functional, safe, and ready when you need it.
Avoid Common Outdoor EV Charger Mistakes
Outdoor EV charger installations go wrong when you treat weather, routing, and compliance as afterthoughts.
Warning: Never run a charging cord under a garage door or across a walkway as a permanent fix. Those shortcuts create fire hazards, trip risks, and likely violate your local electrical code.
Start with a charger rated for outdoor use (Type 4X) and have a licensed electrician install it to meet local electrical codes. That choice protects your system from rain, dust, and corrosion while reducing your liability.
Evaluate EV charging options that fit your panel capacity, mounting location, and access needs. Document the circuit and disconnect path so anyone who services the unit later can work safely.
After installation, inspect the enclosure, conduit, and cable for wear, especially after storms or extended heat. If your HOA has visibility rules, choose an unobtrusive location and finish that preserves curb appeal.
Frequently Asked Questions
Can I install an EV charger outside my house?
Yes. You can install an EV charger outside if you choose a unit with a Type 4X outdoor weatherproof rating and meet your local electrical code. You’ll need a dedicated 240V circuit, the right permits, and a licensed electrician to handle the final connections and pass inspection.
Do I need a permit to install an outdoor EV charger?
In most jurisdictions, yes. Outdoor EV charger installation involves new electrical circuits and typically requires an electrical permit and a building inspection. Contact your local building department before any work begins to confirm the rules in your area.
Can I install an EV charger without a driveway?
Yes. You can install a charger at an alternative outdoor location such as a carport, a post at a parking pad, or an exterior wall near where you park. You’ll still need to meet all electrical requirements, route the cable safely, and pull the necessary permits.
What connector type does my EV need?
Most EVs in North America use a J1772 connector for Level 1 and Level 2 AC charging. Many newer models and all Tesla vehicles use the NACS connector (SAE J3400). Check your owner’s manual or look at your vehicle’s charging port to confirm the type before buying a charger or adapter.
How much does it cost to install an outdoor EV charger?
Labor typically runs between $200 and $1,000, depending on conduit length, panel location, and whether you need a panel upgrade. The charger unit adds $300 to $800 or more. The federal Alternative Fuel Vehicle Refueling Property Credit (Section 30C, IRS Form 8911) may cover up to 30% of equipment and installation costs. Confirm eligibility with a tax professional.
Safety Disclaimer: This article is for informational purposes only and does not constitute professional electrical or safety advice. EV charger installation involves high-voltage electrical work. Always hire a licensed electrician and comply with local building codes before starting any installation.
Get three things right and an outdoor EV charger becomes a straightforward long-term investment: a Type 4X-rated Level 2 unit, a correctly sized dedicated circuit, and a licensed electrician to complete the wiring. Keep the cable managed, the enclosure sealed, and your permit records on file. Those steps give you reliable outdoor charging that handles any weather and holds up to any inspection.
References
- Electric Vehicle Charging Infrastructure — U.S. Department of Energy, Alternative Fuels Data Center
- NFPA 70: National Electrical Code, Article 625 — Electric Vehicle Charging System — National Fire Protection Association
- SAE J1772: AC Level 1 and Level 2 EV Charging Coupler Standard — SAE International
- SAE J3400: North American Charging Standard (NACS) — SAE International
