

To start an EV charging session correctly, choose a compatible station, confirm the charger number, check the connector, and make sure your payment method is ready before you plug in. Then connect the cable firmly, start the session through the app, RFID card, payment terminal, QR code, or Plug and Charge system, and wait until the charger, app, or vehicle screen confirms power is flowing.
Quick Answer
To start an EV charging session, park close enough for the cable to reach, match the connector to your vehicle, authenticate with the app, card, RFID, QR code, or Plug and Charge, then insert the connector until it locks. Confirm the station shows “charging” before you walk away.
Key Takeaways
- Check the station ID in the app before you start, because choosing the wrong charger number is a common reason sessions fail.
- Match your vehicle to the right connector: J1772 for most AC Level 2 charging, CCS1 or J3400/NACS for many DC fast chargers, and CHAdeMO for some older EVs.
- Do not assume the charger’s advertised kW is what your car will receive; the vehicle, battery temperature, and state of charge limit the real charging speed.
- Stop the session in the app, screen, or vehicle first, then wait for the connector to unlock before removing it.
At a Glance
| Time Required | 2–5 minutes to start the session; charging time varies by charger speed, battery size, and state of charge. |
| Difficulty | Easy once you know your connector type and payment method. |
| Tools Needed | Charging app, RFID card, contactless card, QR code access, or Plug and Charge account; adapter if your vehicle requires one. |
| Cost | Varies by network, location, kWh price, session fee, idle fee, and membership plan. |
How Do You Start an EV Charging Session?
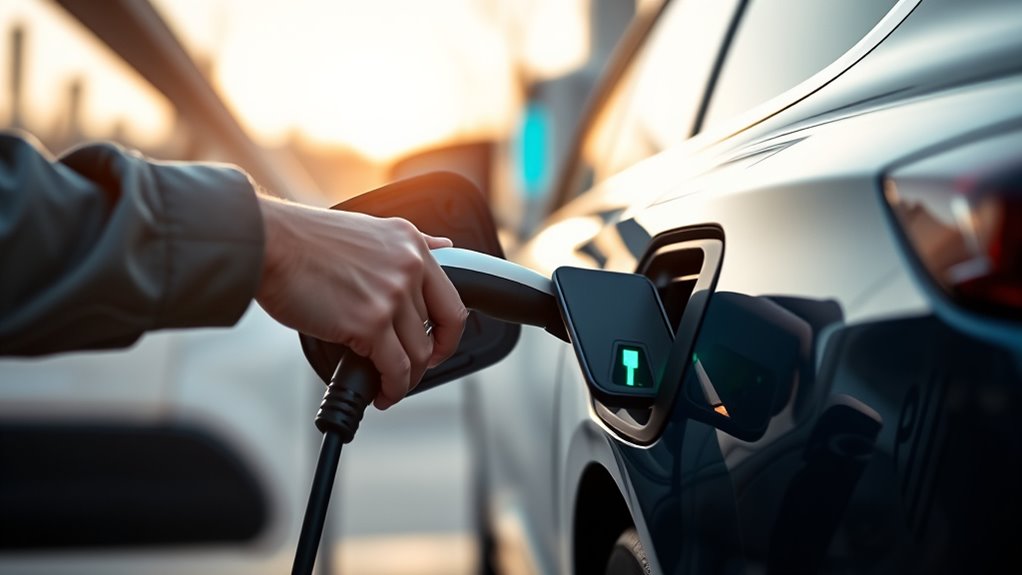
To start an EV charging session, first find a station that works with your vehicle’s connector and charging speed. The Alternative Fuels Data Center Station Locator can help you find nearby charging stations, filter by connector, and plan a route.
When you arrive, check the charger number in the app against the number printed on the physical unit. This matters because a station site may have several chargers, and choosing the wrong one can start a session on another cable.
- Park so your charge port is close enough for the cable to reach without stretching.
- Confirm the connector type, charger number, price, and payment method.
- Authenticate with the app, RFID card, contactless card, QR code, or Plug and Charge if your vehicle and network support it.
- Insert the connector firmly until it clicks or locks.
- Tap Start Charging or follow the charger screen prompts.
- Wait until the app, charger screen, or vehicle dashboard shows that charging has started.
Warning: Do not use a charger if the cable is frayed, the connector is cracked, the plug is burned, the screen shows a serious fault, or water is pooling around damaged equipment. Choose another charger and report the issue to the network operator.
After charging starts, check the live charging speed and estimated finish time. If the charger never switches from “preparing” to “charging,” stop the session, reseat the connector, and try again. If it still fails, move to a different charger and report the fault.
Choose a Compatible Public Charger
A compatible public charger must match your vehicle’s plug, your desired charging speed, and your payment access. For most drivers, compatibility comes down to four connector families: J1772, CCS1, J3400/NACS, and CHAdeMO.
The U.S. Department of Energy’s AFDC explains that Level 1 and Level 2 charging commonly use J1772 on non-Tesla vehicles, while DC fast charging uses systems such as CCS, CHAdeMO, and J3400/NACS. The Joint Office of Energy and Transportation notes that J3400 is based on the North American Charging Standard and is being adopted across more vehicles and stations.
Find Supported Connectors
Check your owner’s manual, charging-port label, or in-car charging menu to confirm which connector your EV uses. Then filter the station map for that connector before you drive there.
| Connector | Common Use |
| J1772 | AC Level 1 and Level 2 charging for many non-Tesla EVs and plug-in hybrids. |
| CCS1 | DC fast charging for many non-Tesla EVs in North America. |
| J3400/NACS | Tesla-style connector used for AC and DC charging, with broader North American adoption underway. |
| CHAdeMO | Legacy DC fast charging on some older EVs, especially certain Japanese models. |
If you need an adapter, use only one approved for your vehicle and the charger type. Not every adapter supports DC fast charging, and some charging networks restrict which adapters are allowed.
Match Network and Payment
Before you plug in, check which network runs the station. Common public networks may require a mobile app, RFID card, account login, QR-code scan, credit card, debit card, or contactless payment.
For federally funded public chargers covered by 23 CFR Part 680, payment rules require secure payment options and do not allow mandatory membership when the charger is not permanently free. Still, payment options can vary by site, so it is smart to check before you arrive.
Pro Tip: Open the charging app before you park. Confirm the charger number, price, connector, and status while you can still move to another stall easily.
Check Plug Type, Speed, and Payment
Before starting a charging session, verify three things: the plug fits your EV, the charger speed fits your plan, and your payment method works at that station.
Verify Connector Type
Look at the charger cable and your vehicle inlet before you connect. A J1772 connector will not fit a CCS DC fast-charge port by itself, and a CCS1 plug will not fit a J3400/NACS inlet without the correct approved adapter.
Some chargers have more than one cable, but that does not always mean two vehicles can charge at once. AFDC defines a charging port as the part of the charger that charges one vehicle at a time, even if multiple connectors are available on that same port.
Match Charging Speed
Charging speed depends on both the station and the vehicle. According to the AFDC electric vehicle charging guidance, AC Level 2 equipment can range from 2.9 to 19.2 kW, while DC fast charging equipment can reach much higher power and may be rated up to 500 kW.
Your EV may still charge slower than the station’s advertised number. The real rate depends on the vehicle’s maximum intake, battery temperature, current state of charge, cable limits, charger load sharing, and whether another driver is using the same power cabinet.
Note: DC fast charging usually slows as the battery gets fuller. A session from 10% to 60% may be much faster than a session from 80% to 100%.
Confirm Payment Method
Use the station screen or app to review the price, idle fee, parking rules, and payment method before you start. Some stations charge by kWh, some charge by minute where allowed, and some add a session fee or idle fee after charging ends.
| Check | What to Do |
| Station ID | Match the number in the app to the number on the charger. |
| Plug type | Confirm J1772, CCS1, J3400/NACS, CHAdeMO, or approved adapter compatibility. |
| Speed | Choose Level 2 for longer parking or DC fast charging for road-trip stops. |
| Payment | Prepare the app, RFID card, contactless card, QR code, or Plug and Charge account. |
| Fees | Review energy price, session fee, parking fee, and idle fee before starting. |
Plug In and Start Charging
Once you have confirmed the correct charger, plug the connector into your vehicle’s charging port. Push it in straight and firmly until you hear or feel the latch engage. Many vehicles lock the connector during charging, especially during DC fast charging.
Next, follow the station’s start sequence. Some stations ask you to authenticate before plugging in, while others ask you to plug in first and then tap Start Charging. Follow the order shown on the screen.
- Open the network app or wake the charger screen.
- Select the exact charger number or scan the QR code on the unit.
- Choose or confirm your payment method.
- Plug in the connector and wait for the vehicle to detect it.
- Tap Start Charging or approve the session on the terminal.
- Watch for a “charging,” “energy delivered,” “kW,” or “time remaining” message.
If the session does not start within a few minutes, do not keep forcing the connector. Stop the attempt in the app or on the charger, unplug if it is unlocked, inspect for a simple seating issue, and try again once. If it fails again, move to another charger.
Use the App to Track Your Charge
Use the station’s app, your vehicle app, or the charger screen to track your charge. A normal active session usually shows battery percentage, kWh delivered, current charging speed, estimated time remaining, and total cost so far.
Check the session shortly after it begins. If the displayed charging speed is far lower than expected, the cause may be battery temperature, a high state of charge, charger power sharing, a station limit, or a vehicle setting.
Keep an eye on notifications. Many networks alert you when charging slows, stops, reaches your target, or begins charging idle fees. If you are at a busy fast charger, plan to return before the session ends so another driver can use the stall.
Stop Charging Safely
To stop charging safely, end the session before removing the connector. Pulling on a locked plug can damage the cable, latch, or vehicle charge port.
- Tap Stop or End Session in the app, on the charger screen, or in the vehicle.
- Wait for the charger to show that the session has ended.
- Wait for the connector to unlock. You may hear a click from the vehicle charge port.
- Press the connector release button if your plug has one.
- Pull the connector straight out without twisting.
- Return the cable to its holster and close your vehicle’s charge-port door.
- Check the receipt, final kWh, and total cost in the app.
If the connector stays locked, check your vehicle app, key fob, dashboard menu, or owner’s manual for the charge-port release. Many vehicles also have an emergency release cable inside the trunk or cargo area. If the charger will not end the session, call the network support number printed on the charger.
Fix Common Charging Problems
If charging does not start, begin with the simple causes: wrong charger number, weak connector seating, failed payment, app error, vehicle charge limit, or station fault. Most public charging problems can be solved by restarting the session once or moving to a different charger.
| Problem | Best Fix |
| Session will not start | Confirm the charger number, reseat the connector, and restart the session once. |
| Payment fails | Try another approved method, such as app wallet, RFID card, contactless card, QR code, phone, or SMS option if available. |
| Charging is slower than expected | Check battery percentage, battery temperature, charger rating, and whether the station is sharing power. |
| Connector will not unlock | End the session first, unlock the vehicle, check the vehicle app, then use the manual release only if the owner’s manual allows it. |
| Station shows a fault | Do not keep retrying. Move to another charger and report the fault through the app or support number. |
When a charger fails, take a quick photo of the station ID and error message if it is safe to do so. This makes it easier for customer support to identify the broken unit.
EV Charging Etiquette
Good charging etiquette keeps public stations easier for everyone to use. Move your vehicle when charging is finished, especially at DC fast chargers. Return the cable to the holster, avoid blocking a charger you are not using, and do not unplug another vehicle unless the station or driver clearly allows it.
If your EV only needs a short top-up, stop when you have enough range to continue. Charging from 80% to 100% can take much longer than the earlier part of the session, and other drivers may be waiting.
Frequently Asked Questions
What is the 80/20 rule for EV charging?
The 80/20 rule means keeping the battery roughly between 20% and 80% for regular daily use when that fits your driving needs. It is a general battery-care habit, not a law. For road trips, cold weather, towing, or long rural routes, charging above 80% may be the right choice.
How do you use an EV charging station for the first time?
Find a compatible station, park close enough for the cable to reach, confirm the charger number, choose your payment method, plug in firmly, start the session, and wait for the charger or vehicle to show that power is flowing. Stay nearby for the first minute in case the session fails.
Are electric cars safe for pacemakers?
Many people with pacemakers use EVs, but you should follow your cardiologist’s and device manufacturer’s guidance. As a cautious habit, avoid leaning against high-power charging cabinets or wrapping charging cables near your chest. If you feel symptoms near charging equipment, move away and seek medical advice.
How do you charge an EV correctly?
Use the correct connector, keep your payment method ready, start the session in the order shown by the charger, and monitor the session until power is flowing. For daily use, set a practical charge limit in your vehicle app. For trips, charge enough to reach your next stop with a safe range buffer.
Why did my EV charging session stop early?
A session may stop early because of a station fault, payment timeout, connector lock issue, vehicle charge limit, battery temperature, power sharing, or network communication problem. Check the app and charger screen for the exact message before restarting.
Should you plug in before or after paying?
Follow the charger’s on-screen order. Some networks want you to authenticate first, while others want the connector plugged into the vehicle before you approve payment. If you do the steps out of order and the session fails, cancel and restart from the first prompt.
Conclusion
Starting an EV charging session is simple when you follow the right order: choose a compatible charger, confirm the station ID, match the connector, authenticate payment, plug in firmly, and verify that power is flowing. Use the app or charger screen to monitor progress, then stop the session before unplugging. If something fails, check the connector, payment method, app status, and station error message before moving to another charger.
Sources
- U.S. Department of Energy Alternative Fuels Data Center — Electric Vehicle Charging Stations — supports charging levels, connector types, port terminology, and charging speed guidance.
- Alternative Fuels Data Center Station Locator — supports using a station locator to find compatible public chargers.
- Joint Office of Energy and Transportation — SAE J3400 Charging Connector — supports J3400/NACS, CCS1, CHAdeMO, and adapter context.
- 23 CFR Part 680 — National Electric Vehicle Infrastructure Standards and Requirements — supports payment, connector, public access, and power requirements for applicable federally funded chargers.

