
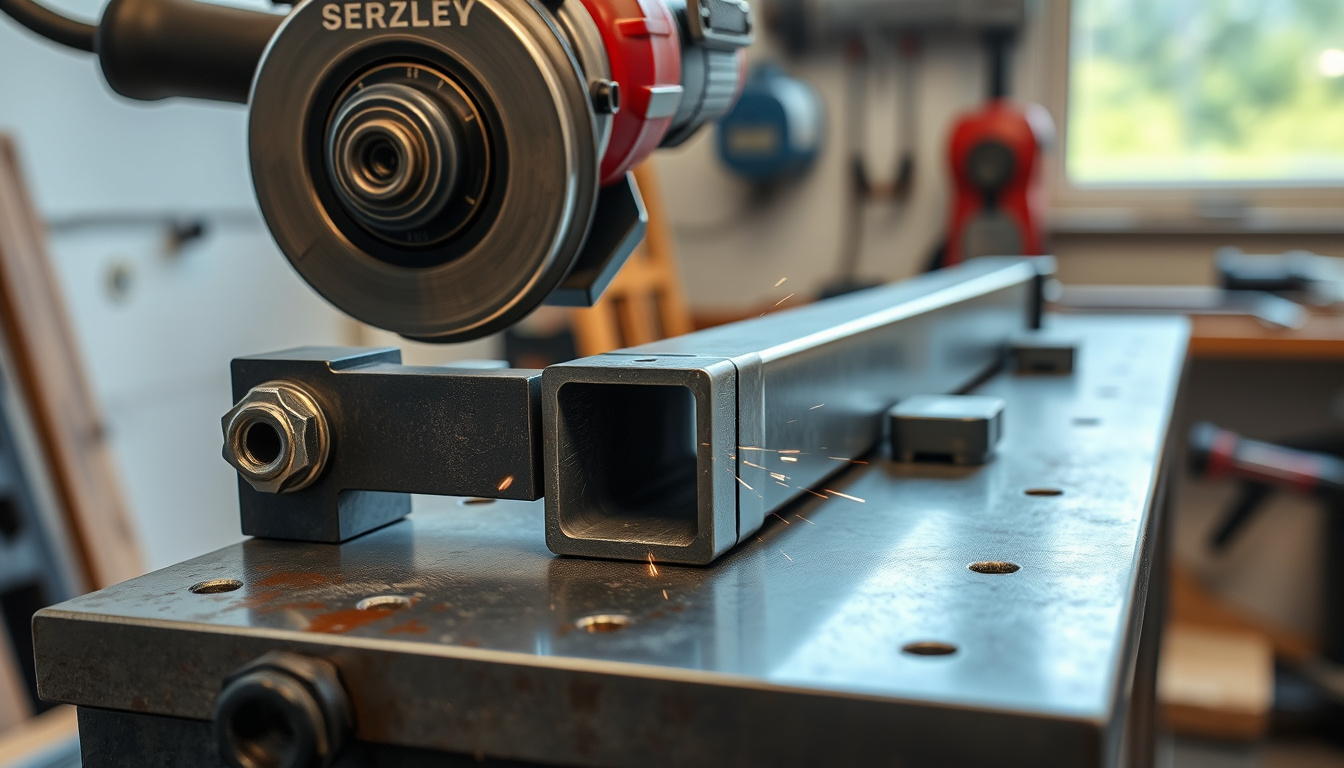
An angle grinder is fast, but it is easy to get a cut that wanders, chips the edge, or takes extra cleanup. A simple workshop setup can make an angle grinder feel far more “tool-like” for straight metal cutting and repeatable work.
This guide explains a practical way to control the grinder’s cutting line using a do-it-yourself angle guide, plus the blades and safety practices that make the difference between a rough cut and a clean, accurate one.
🔧 What this “angle grinder cutting trick” actually does
Instead of trying to hold a grinder perfectly by hand, the approach adds mechanical guidance so the wheel follows a defined path. The goal is to reduce:
- Side-to-side drift that causes crooked cuts
- Uneven depth from changing pressure
- Wobble and chipping at the start and exit of the cut
Depending on your setup, the “trick” usually involves combining a cutting wheel with a DIY guide or fixture that keeps the grinder aligned to a marked line.
🧰 Materials and tools you may need
Exact materials vary by design, but a typical DIY guide build uses parts that can be clamped or bolted and positioned reliably.
Common parts
- Metal guide base (plate or angle iron) to reference the work
- Stop blocks or rails to control cut start/stop points
- Clamp hardware so the work cannot move mid-cut
- Adjustable markers or a straight edge for alignment to your layout line
- Fasteners (bolts, nuts, washers) for a rigid build
Tools
- Measuring and marking tools (tape, square)
- Drill and bits (for making mounting holes)
- Wrenches and clamps
- Optional: a vise for repeatability
Tip: Prioritize stiffness. The most precise guide in the world fails if it flexes while the wheel contacts the metal.
⚙️ Choose the right cutting wheel (accuracy starts here)
The wheel type strongly affects cut quality and control. For metal cutting, look for wheels intended for your material.
Good options by material
- Steel (mild steel, rebar, channel, angle iron): thin cut-off wheels
- Stainless and harder alloys: wheels rated for stainless/hard metals
- Aluminum: use wheels rated for non-ferrous materials
Avoid: using a wheel for a material it is not rated for. That increases breakage risk and can make the cut wander.
Wheel condition checklist
- No chips or cracks along the rim
- Correct speed rating for your grinder
- Wheel seated properly and the guard is installed
🧱 Build a simple, repeatable cutting guide
The most useful DIY guides share three features: a reference surface, alignment to your layout line, and a rigid stop.
1) Create a stable reference
Use a base that contacts the workpiece so the part sits the same way every time.
- For flat bar: reference on one face and one edge
- For pipe: consider a cradle or two contact points so the pipe cannot roll
- For box sections: reference inside edges consistently
2) Align to your cut line
Choose a method that keeps the cutting path centered on your marking line. Options include:
- Reference notch: a narrow notch the wheel passes near
- Straight-edge alignment: a ruler or guide bar set at the exact offset
- Test cut adjustment: do a short cut on scrap and adjust the guide position
Accuracy note: Cutting wheels remove material. Plan for the kerf so the final dimension lands where you need it.
3) Add a rigid stop for consistent lengths
A stop block lets you cut multiple pieces to the same length without re-measuring each time.
- Set the stop so your cut ends at the same point every run
- Use clamps that do not interfere with wheel clearance
🧠 How to use the setup for clean, straight cuts
Once the guide is built and clamped, the technique matters.
Step-by-step workflow
- Mark the workpiece using a square and a centerline or edge reference.
- Secure the work with clamps or a vise so it cannot shift.
- Set the guide and verify alignment to the layout line.
- Do a quick test on scrap to confirm kerf and wheel placement.
- Start the cut gently to avoid grabbing at the first contact.
- Maintain steady pressure and let the wheel do the work. Forcing it increases heat and binding.
- Finish cleanly without twisting out of the guide path.
- Deburr and inspect and adjust the guide if needed for future cuts.
Common practices for better edges
- Use light passes when cutting thicker sections to prevent wheel binding
- Keep the guard in place and clear of metal
- Avoid overheating by not lingering in one spot
- Support the offcut so it does not pinch the wheel
⚠️ Safety essentials (do not skip)
Modifying how you cut with an angle grinder changes how forces act on the wheel. Safety is non-negotiable.
Personal protective equipment
- Eye protection (safety glasses plus face protection if needed)
- Hearing protection
- Cut-resistant gloves
- Respiratory protection for dust and metal particles
- Proper clothing without loose sleeves or dangling items
Tool and setup checks
- Confirm the wheel type and rating match the material
- Verify the guard is installed and positioned correctly
- Ensure clamps do not contact the wheel
- Keep hands and body positions out of the wheel plane
- Work in a stable area and remove trip hazards
Stop immediately if the wheel sounds wrong, vibrates heavily, or binds unexpectedly.
🧩 Pitfalls and how to avoid them
1) The guide flexes
If the guide plate or rails bend, the cut will drift. Use thicker stock and fewer unsupported spans.
2) Wrong wheel or worn wheel
A dull wheel increases heat and makes tracking inconsistent. Replace damaged or heavily worn wheels.
3) The workpiece moves
Even a perfect guide will produce a crooked cut if the metal shifts. Improve clamping and add support for offcuts.
4) Binding from unsupported material
When the kerf closes, the wheel can pinch. Support both sides of the cut and plan how the scrap will fall away.
5) Over-aggressive cutting pressure
Forcing the wheel causes snagging, accelerates wear, and can increase the chance of kickback. Use a steady pace.
✅ Best use cases for this grinder cutting improvement
This controlled approach is especially helpful when you need:
- Repeatable lengths for brackets, supports, and frames
- Straighter straight cuts on bar stock or angle iron
- Cleaner edges before welding or final fitting
- More consistent fit-up where parts must align well
It is less suitable when you need complex curves, freeform trimming, or cutting in awkward orientations where the guide cannot reference the part safely.
📝 Quick checklist before your next cut
- Wheel matches the material and is in good condition
- Guard is installed and unobstructed
- Workpiece is clamped and supported on both sides
- Guide alignment is verified to the layout line
- Test on scrap for kerf and offset confirmation
- Steady cutting pace and no forcing
- Deburr and inspect after the cut
❓ FAQ
Can I use this method with any angle grinder?
What is the best way to get the exact final length?
Will a cutting guide reduce sparks and chipping?
What should I do if the cut line drifts even with a guide?
Is it safe to clamp near the cutting path?
🎯 Final takeaway
A precise angle grinder cut is not only about skill. It is about controlling the wheel’s path. By adding a rigid DIY alignment guide, choosing the correct cutting wheel, and using safe clamping and steady technique, you can turn a handheld tool into a far more accurate cutting setup for metal fabrication and workshop DIY projects.