
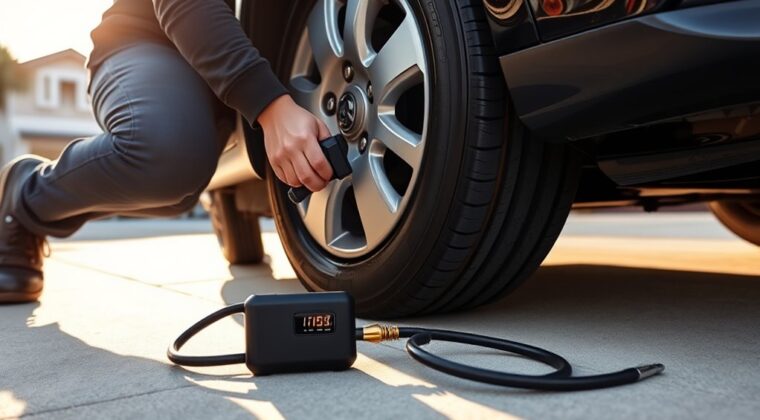
Check your tire pressure first with a reliable gauge when the tires are cold, and compare it with the PSI on the driver’s door jamb or owner’s manual. Remove the valve cap, attach the inflator securely, and set the target PSI. Inflate while watching the gauge closely, then stop at the correct pressure. Recheck each tire and release air if needed. With a few more steps, you can keep the inflator working reliably and your tires properly set.
Key Takeaways
- Check each tire’s cold pressure with a gauge and note the recommended PSI from the door jamb or owner’s manual.
- Remove the valve cap, align the inflator nozzle, and attach it securely to the tire valve stem.
- Set the inflator to the target PSI before starting, and monitor the built-in gauge while adding air.
- Stop inflating when the pressure reaches the recommended level, and release air slowly if you overinflate.
- Recheck the tire pressure with a manual gauge, then replace the valve cap and inspect the inflator for wear.
Check Your Tire Pressure First
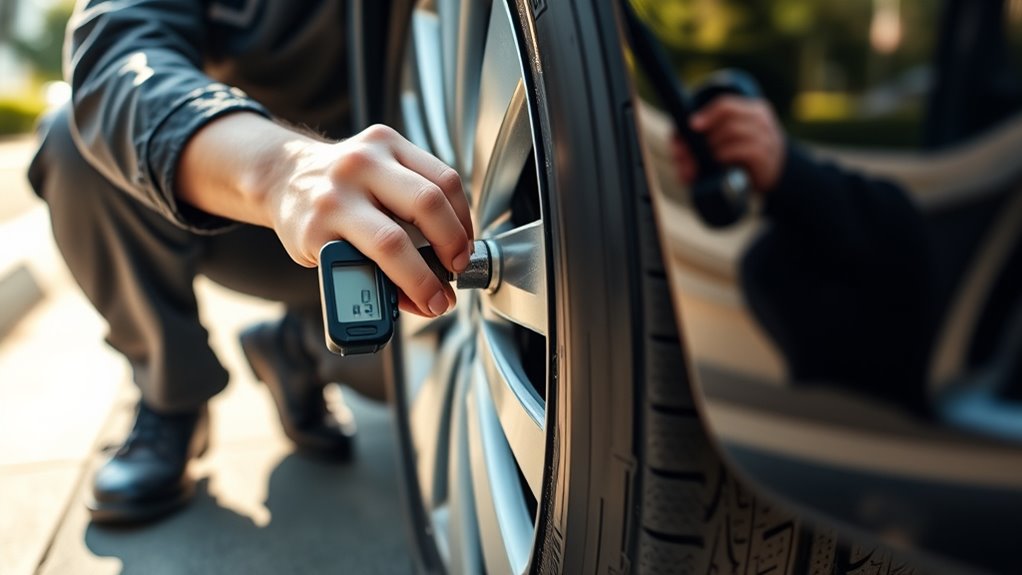
Before you use a tire inflator, check your tire pressure with a reliable gauge while the tires are cold for the most accurate reading.
You can find the recommended tire pressure in your owner manual or on the sticker in the driver’s side door jamb. Use a tire pressure gauge to measure the current tire pressure at each tire valve, and record each PSI (pounds per square inch).
Compare that reading with the specified PSI so you can see which tires need attention. Properly inflated tires reduce rolling resistance, improve fuel efficiency, and support peak tire performance.
Compare your tire pressure with the recommended PSI to spot which tires need attention and keep performance at its best.
If the pressure is low, you’ll need to maintain proper tire pressure to limit uneven wear and lower the risk of blowouts. Don’t trust visual inspection alone; a tire can look fine and still be underinflated.
Once you know the numbers, you’re ready to set up your digital tire inflator with purpose and precision, not guesswork.
Attach the Inflator Securely
Remove the valve cap from the tire’s valve stem so you can access the opening, then align the inflator’s nozzle straight with the stem before connecting. You’re preparing a clean path for airflow, and that precision matters. Attach the inflator according to its nozzle type:
| Nozzle type | Action | Result |
|---|---|---|
| Screw-on | Twist firmly onto the valve stem | Secure fit |
| Quick chuck | Push until it clicks | Locked connection |
| Any type | Tug the hose gently | Check seal |
| Any type | Keep the cap nearby | Easy reinstallation |
| Any type | Confirm no wobble | Stable inflation |
A tight connection helps you avoid leaks and protects your control. If you use a screw-on design, turn it until it feels snug; if you use a quick air chuck, press it on until it locks. Then double-check the setup with a light tug. You want an airtight seal before inflation starts, so your effort stays focused and your tire gets the air it needs.
Set the Right PSI
Find the correct PSI for your tire on the driver’s side door jamb sticker or in your owner’s manual, then set that value on the inflator before you start. This target tire pressure gives your tire inflator a clear stop point and helps you inflate your tires with control.
Use the built-in pressure gauge to check the current pressure before you proceed, especially if the tires are cold, because driving heat can raise readings. Align the desired pressure with the manufacturer spec, not a guess, so you protect handling, fuel efficiency, and tire longevity.
When you match PSI accurately, you support peak performance, reduce uneven wear, and lower the risk of blowouts. Press the inflator’s settings until the display matches your target, then verify the valve stem connection stays secure.
Your goal is precise pressure management, not excess air. Stay disciplined, trust the spec, and let the numbers guide your maintenance.
Start Inflating and Watch the Gauge
Begin inflating the tire and watch the built-in gauge closely as the pressure climbs toward your target PSI. Keep your tire inflator running only while you monitor the pressure gauge, because precise inflation protects tire safety and prevents overinflating.
If the sound of air changes or weakens, check the hose and connection to make sure the unit is working correctly. A steady pumping sound usually means the inflator is functioning normally. If your model has automatic shut-off, let it manage inflation once the desired PSI is reached.
With a manual gauge, pause briefly and recheck pressure so you stay within the recommended range. Stay alert and trust the readings, not guesswork, because control gives you freedom from unnecessary wear and risk.
As soon as you confirm the desired PSI, turn off the tire inflator promptly and disconnect it cleanly. This keeps the tire stable and ready for safe use.
Stop at the Target Pressure
Set the target PSI on the inflator before you start, so it can stop automatically when it reaches the correct pressure.
You should confirm that PSI with the vehicle’s owner’s manual or the driver-side door jamb sticker.
With auto shutoff enabled, the inflator slows near the set point and helps you avoid overinflation.
Set PSI First
Dial in the target PSI before you start inflating, since the correct pressure is critical for safety, handling, fuel efficiency, and tire life.
Use your vehicle’s manual or the driver-side door jamb sticker to set the desired tire pressure. With your Portable tire inflator, check the current PSI first, then enter the accurate pressure you need.
If you’re filling multiple tires, check your tire before each one so you don’t guess. A gauge or digital display helps you verify the reading without relying on rough estimates.
Many inflators can automatically stop at the programmed PSI, so you can work with confidence and avoid overinflation. That precise setting supports ideal tire performance, steadier grip, and longer tread life.
Double-check the desired tire pressure before you begin.
Auto Shutoff Feature
Once you’ve entered the target PSI, let the inflator’s auto shutoff do the rest. You set your desired pressure, then the device will inflate until it reaches that mark and stops automatically.
This auto shutoff feature gives you convenience and control, because you don’t need to watch the hose the entire time. The built-in gauge delivers real-time feedback with precise pressure readings, so you can trust the process.
By stopping at the set point, automatic shutoff helps protect tire health and keeps you from preventing overinflation, which can cause uneven wear or blowouts.
In this step-by-step guide, you’re using the tool to work for you, not the other way around. Just connect, set, start, and let the inflator handle the finish with precision.
Recheck Tire Pressure After Inflation
After inflation, use a reliable tire pressure gauge to verify the final PSI and confirm it matches the owner’s manual or door jamb sticker within about ±1 PSI.
If the pressure’s too high, press the valve stem to release air, then recheck until you hit the target.
If it’s too low, reconnect the inflator and add air while monitoring the gauge closely.
Verify Final PSI
With the tire inflated, use a reliable pressure gauge to verify the final PSI and confirm it matches your vehicle’s recommended setting; aim for a reading within ±1 PSI for safe, accurate operation.
You control tire pressure by checking with a reliable gauge, not guesswork. Compare the PSI to the recommended pressure on the door placard or owner’s manual.
If the reading is high, release air slowly in short bursts, then verify again. If it’s low, reconnect the tire inflator and add air until you reach target PSI.
This precise check helps you maintain peak performance, reduce uneven tire wear, and improve fuel efficiency.
Recheck each tire after inflate cycles so you keep your vehicle balanced and responsive.
When you verify final PSI, you take command of safety, efficiency, and freedom on the road.
Adjust If Needed
If the gauge shows the tire isn’t at the recommended PSI, make a small correction and check it again. You control tire pressure by comparing the tire inflator reading with the recommended level from the door jamb sticker or owner’s manual. Aim for ±1 PSI. If the pressure is high, press the valve stem briefly to release air; stop, then read the gauge. If it’s low, reconnect the tire inflator and add air until the desired pressure appears on the digital display.
| Check | Action |
|---|---|
| Read gauge | Compare to spec |
| High PSI | Release air |
| Low PSI | Add air |
| Air escaping | Pause and remeasure |
| Recheck tire | Confirm stability |
After you adjust if needed, check the tire again, especially before long trips or after temperature changes.
Read Your Tire Gauge Accurately
A reliable tire gauge gives you accurate pressure only when you use it correctly. Press the tire gauge firmly onto the valve stem until the seal stops hissing; any leak skews tire pressure and ruins the accurate measurement.
Check pressure on cold tires, before driving or after the vehicle has sat for several hours, because heat raises PSI and can trick you into overinflating when you inflate your tires. Find the recommended tire pressure in your owner’s manual or on the driver’s side door jamb sticker, then compare your reading to that target.
Read the unit carefully: your gauge may show PSI, bar, or kg/cm², and you must match the display to the specification. Use calibrated tire inflators and a reliable gauge, because precision protects safety and keeps your vehicle free to move as intended.
Recheck after each adjustment, confirm the final reading, and trust only consistent data.
Maintain Your Tire Inflator
After each use, clean your tire inflator so dirt doesn’t build up and affect performance. Wipe the body, nozzle, and chuck with a dry cloth, then inspect the unit for damage.
To maintain accuracy, check the pressure gauge regularly and calibrate it when readings drift. Store your tire inflator in a dry, cool place, away from moisture and heat, so you protect its components and preserve freedom from preventable failure.
Lubricate moving parts only as the manufacturer recommends; a light application keeps operation smooth and extends service life. Examine hoses and connections for cracks, stiffness, or loose fittings before every session.
Replace worn parts immediately to stop air leaks and keep pressure delivery stable. With consistent care, your tire inflator stays reliable, efficient, and ready to support peak performance whenever you need it.
Frequently Asked Questions
How to Properly Use a Tire Inflator?
You properly use a tire inflator by checking tire pressure, selecting compatible inflator types, and attaching the correct nozzle attachments firmly.
Set the target PSI, then inflate at a controlled inflation speed while watching the gauge.
Follow safety precautions, inspect for common issues, and consult a troubleshooting guide if pressure won’t rise.
Apply maintenance tips, consider portability options, and adjust usage frequency for reliable, emancipated vehicle care.
How to Use an Air Compressor Step by Step?
You use an air compressor by checking tire pressure, setting compressor settings, and connecting the hose tightly.
Next, choose power sources, confirm portability options, and start inflation like a controlled storm.
Watch the gauge, follow inflation tips, and stop at target PSI.
Then disconnect, replace the cap, and check for common problems, noise levels, and leaks.
Compare cost comparisons, practice maintenance advice, and observe safety precautions.
How to Properly Use an Air Pump?
You use an air pump by checking tire pressure, then attaching the correct nozzle types securely.
Set the target PSI with digital gauges, start inflation, and watch the reading closely.
Follow safety precautions, avoid common mistakes, and use inflation tips for steady airflow.
For portable options, confirm battery charge.
Afterward, do maintenance checks, troubleshoot issues like leaks, and replace the valve cap so you’re ready to roll confidently.
Where Can I Find the User Manual for My Tire Inflator?
You’ll find it like a key in a lock: check the box, then the inflator’s model label.
Search tire inflator brands on official online resources and manufacturer websites for PDF downloads, troubleshooting guides, instructional videos, product reviews, and warranty information.
If you can’t locate it, contact customer service directly for the correct user manual locations.
Your model number lets you pinpoint the exact manual fast and keep control of your repair.
Conclusion
You’ve now got the basics to use a tire inflator like a pro, and that tiny tool can save you a massive headache. Check your pressure, lock on the nozzle, set the PSI, and stop before you overfill by even a hair. Recheck the tire, read the gauge carefully, and keep your inflator in top shape. Do this, and you’ll drive with confidence, protect your tires, and avoid a blowout-sized disaster.