
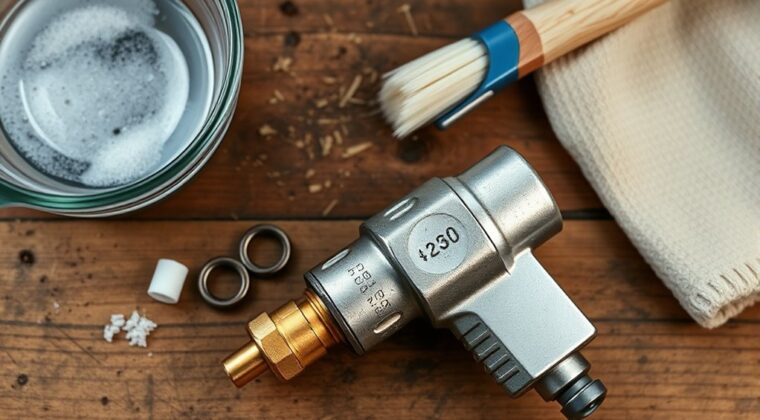
First, disconnect the inflator, release pressure, and remove the air chuck. Brush off dirt with a soft brush, then wash stubborn grime with mild soapy water. Rinse it carefully, dry it completely with a lint-free cloth or compressed air, and inspect the rubber seal for cracks or wear. Reattach the chuck firmly, then check for leaks with soapy water. Regular cleaning keeps airflow accurate, prevents wear, and helps you get better results every time.
Key Takeaways
- Disconnect the inflator, release pressure, and remove the air chuck before cleaning.
- Brush off dirt and debris with a soft brush or toothbrush.
- Use a mild soapy solution for stubborn grime, then rinse and dry completely.
- Inspect the rubber seal for cracks, wear, or debris, and replace if damaged.
- Reattach the chuck securely and check for leaks with soapy water or hissing sounds.
Gather Your Cleaning Supplies

Before you start cleaning the tire inflator air chuck, gather a soft cloth or rag, a small brush like a toothbrush, and a can of compressed air. Set your cleaning supplies within reach so you can work efficiently and clean the air chuck without interruption.
Choose a workspace with good lighting; it helps you inspect every surface for dirt, debris, and grime. Keep a soft cloth ready to wipe the exterior, and use the brush to reach grooves, threads, and other tight areas where residue can hide.
Hold the compressed air nearby to clear loose particles from internal passages and reduce contamination. If the chuck looks heavily soiled, prepare a mild detergent solution and soak the cloth lightly for a deeper clean.
Organizing your tools first gives you control, saves time, and supports precise maintenance. With the right setup, you can restore function, protect the chuck, and keep your equipment ready for independent work.
Remove the Air Chuck
First, disconnect the inflator from its power source and release any remaining chuck pressure.
Then unclip or twist the air chuck free from the valve, using the collar or locking mechanism to disengage it cleanly.
Before you set it aside, inspect the chuck seal for debris, wear, or damage.
Release Chuck Pressure
Cut the power to the air pump, then press the lever on the air chuck to release any remaining pressure until no air escapes.
Hold the fitting steady, then unscrew the air chuck counterclockwise with a secure grip. This lets you remove it cleanly without stressing the hose.
After removal, inspect the air chuck for debris or buildup that could limit performance during cleaning. Use a soft brush or cloth to clear the passage and threads.
Keep your hands clear of the opening while you release pressure, and work only on a fully depressurized tool.
Once clean, reattach the air chuck by threading it clockwise until snug. That secure fit helps prevent leaks and restores reliable operation.
Unclip From Valve
With the air flow turned off, firmly grip the air chuck, press the release lever, and gently pull it away from the valve stem to disengage the locking mechanism.
You unclip the air chuck cleanly, freeing the valve without forcing the parts. Keep steady pressure on the release lever and avoid twisting; that helps prevent damage to the chuck or valve.
If the tire still holds residual pressure, you may hear a brief hiss as the connection opens. Don’t panic—just maintain control and let the air escape naturally.
Once detached, inspect the air chuck and valve for debris or visible damage before you clean or maintain them.
This careful removal lets you inflate later with confidence and keeps your equipment ready for reliable, liberated use.
Inspect Chuck Seal
Disconnect the inflator from its power source so it can’t activate while you work, then unscrew the air chuck from the hose by turning it counterclockwise.
With the air chuck free, inspect the chuck seal on your air inflator. Look closely at the rubber seal for cuts, flattening, hardening, or deformation that could cause air leaks. Clean away debris, but don’t force parts or damage the threads.
If the seal looks compromised, replace it with a compatible part to restore airtight functionality. This small check protects your setup and keeps pressure where you want it: in the tire, not escaping.
When you finish, align the chuck carefully, secure it to the hose, and tighten it firmly enough to prevent future leaks without over-torquing.
Brush Off Dirt and Debris
Start by inspecting the air chuck for visible dirt or debris that could restrict airflow or damage the valve.
Next, use a soft brush, like a paintbrush or toothbrush, to clean the air chuck’s exterior and the area around the valve. Work with light strokes so you lift loose dirt without forcing grit deeper into the mechanism.
If grime stays put, dampen the brush with a mild soapy solution and brush again; this helps free residue without harsh abrasion.
After you brush off all debris, rinse the air chuck with clean water to remove any soap film that could affect performance.
Then dry it completely with a lint-free cloth or air dry it in a clean space. Don’t reattach it until every surface is dry, because trapped moisture can lead to rust or corrosion.
This simple maintenance step keeps the chuck responsive and ready for reliable tire inflation.
Wash the Air Chuck Safely
Before you wash the air chuck, make sure it’s disconnected from both the tire and the air compressor so it can’t inflate accidentally.
During cleaning, use a soft cloth or a small brush to remove dirt and debris from the exterior and the inner opening. For stubborn grime, dampen the cloth with mild soap and water, then wipe the surface carefully.
Don’t soak the air chuck or use harsh chemicals, because they can damage rubber seals and reduce sealing performance.
After you wash it, rinse with a barely damp cloth to lift residue, then thoroughly dry every part with a clean towel or air drying. Moisture left behind can invite rust or corrosion.
Regular cleaning and inspection help you maintain functionality and keep your tire inflator ready for independent, reliable use.
Inspect the Rubber Seal
Check the rubber seal’s surface for cracks, brittleness, or dirt that could weaken the airtight connection.
Wipe it gently with a damp cloth, then verify that it stays flexible and intact.
If you spot wear or damage, replace the seal before you continue inflation.
Check Seal Surface
Inspect the rubber seal on the air chuck for cracks, wear, dirt, or debris that could weaken its airtight fit. You’ll keep the seal effective when you:
- Clean the rubber surface with a lint-free cloth.
- Remove contaminants from the groove and edge.
- Measure thickness for signs of loss or distortion.
- Lubricate lightly with silicone to preserve performance.
Check for swelling or deformation, since heat or chemicals can change the seal’s shape and reduce grip.
A clean, intact seal lets the air chuck lock on with confidence and freedom from leaks. Keep your inspection quick but exact, because small cracks or uneven wear can compromise pressure retention and make every inflation less reliable.
Replace Worn Seal
When the rubber seal shows cracks, brittleness, or other wear, replace it before it starts leaking air and throwing off tire pressure.
Inspect the air chuck closely; a worn seal can undermine inflator performance and make maintenance harder. Choose a matching seal from hardware stores or online, and verify the size before you install it.
To replace it, disassemble the air chuck carefully, then note the seal’s exact position for accurate reassembly. Remove debris from the groove, seat the new seal evenly, and reassemble the chuck without twisting it.
Test for air leaks with a short inflation cycle. Regular seal replacement protects your inflator, preserves pressure accuracy, and keeps you free from avoidable failures.
Dry the Air Chuck Completely
After using the tire inflator, disconnect the air chuck from the tire valve immediately to keep moisture from entering the chuck. Then wipe the air chuck with a clean, dry cloth to remove debris and leave the surface clean.
- Inspect the chuck for trapped moisture.
- Blow out any remaining moisture with compressed air.
- Let it air dry completely in a well-ventilated area.
- Store it only after every component feels dry.
You need this step because leftover moisture can trigger rust and corrosion, reducing performance and shortening service life. A quick inspection helps you catch hidden wet spots before they spread.
Keep the chuck open to airflow, not sealed in a drawer, until it’s fully dry. That small act protects your equipment and keeps you free from avoidable failures.
Regularly dry the air chuck after each use, and it’ll stay reliable, responsive, and ready when you need it.
Reattach the Air Chuck
Reattach the air chuck only once it’s clean and free of debris, then align it carefully with the tire’s valve stem for a secure seal and accurate pressure readings.
Hold the air chuck straight, press it firmly onto the valve stem, and listen for the click that tells you it’s engaged. That click signals a secure connection and helps preserve proper air flow during tire inflation.
Watch the pressure gauge as you reattach and confirm the tire reaches the desired PSI. If the reading looks off, remove and reposition the chuck before continuing. Keep your grip steady so air doesn’t escape through a poor fit.
After use, inspect the air chuck for wear, cracks, or damage, because a compromised tool can limit performance and safety.
Check for Leaks After Reattaching
Once the air chuck is back on, check the connection for leaks right away. You want the air chuck securely tightened on the valve stem so tire inflation stays stable and you stay in control.
- Inspect the joint visually for any sign of air escaping.
- Spray a soapy water solution around the fitting.
- Watch for bubbles, which reveal a leak or faulty seal.
- Listen for hissing; it often confirms air escaping under pressure.
If you find a leak, stop inflation, reseat the chuck, and tighten it again before resuming. Don’t ignore small losses—they reduce pressure, waste time, and weaken performance.
Regular leak checks are essential maintenance because they protect accuracy and safety while keeping your setup ready for work. You’re not just preserving equipment; you’re keeping the system free, efficient, and responsive every time you inflate a tire.
Prevent Dirt Buildup on the Chuck
To prevent dirt buildup on the chuck, inspect it regularly for visible debris and wipe it clean after each use with a dry cloth. You keep your air chuck free of contaminants by using a clean cloth and checking for moisture around the seal. | Action | Result |
| — | — |
|---|---|
| Inspect | Catch dirt buildup early |
| Wipe | Remove dust and moisture |
| Brush | Clear tight passages |
| Blow | Dislodge trapped particles |
| Store | Limit exposure to contaminants |
Use a small brush or compressed air on hard-to-reach areas, but don’t force debris deeper. Store the inflator in a clean, dry place, and fit a protective cover over the chuck when it’s idle. These steps protect performance, reduce wear, and keep your setup ready when you need it. You’re not just maintaining gear; you’re preserving control, efficiency, and the freedom to work without avoidable failures.
Frequently Asked Questions
How to Use Tire Inflator Chuck?
You use the tire inflator chuck by aligning it with the valve stem, pressing down until it clicks, then pulling the trigger on your air compressor.
Watch the pressure gauge to reach the right tire pressure, and stop before overinflation.
Follow safety precautions, use inflator features wisely, and note inflation tips.
For DIY repairs, check troubleshooting tips and perform regular maintenance to keep the chuck sealing clean and reliable.
How to Maintain a Car Tire Inflator?
You maintain a car tire inflator by checking tire pressure, following maintenance tips, and cleaning the air compressor and chuck after use.
Apply safety precautions, inspect inflation techniques, and watch for troubleshooting issues like leaks or weak flow.
Use proper storage solutions in a dry place, and test performance checks regularly.
Choose cleaning methods from a buying guide, and keep connections tight so you stay mobile, capable, and in control.
What Are the Different Types of Air Chucks?
Anachronistically speaking, you’ll find air chuck types like slip-on, locking, and dual-head.
You can compare inflator chuck features by chuck material comparison, then weigh locking mechanism benefits against quick release chucks.
Check digital vs analog gauges, manage compatibility issues, and review performance ratings.
You’ll avoid common problems with maintenance tips, especially on seals and valves.
Choose the chuck that gives you control, flexibility, and freedom during inflation.
How to Fix a Tire Inflator?
You fix a tire inflator by checking tire pressure, then inspect inflator parts, valve stems, and compressor function for air leakage.
Clean debris, verify seals, and tighten fittings. Replace worn O-rings or hoses, and follow safety precautions before DIY repairs.
Use maintenance tips and troubleshooting issues to restore reliable inflation techniques.
If the motor still fails, test the power source, then replace damaged components to regain control and mobility.
Conclusion
By now, you’ve cleaned your tire inflator air chuck with care and precision. Keep it clear of clogs, check the seal, and dry it thoroughly to prevent corrosion and leaks. With regular rinsing, brushing, and proper reattachment, you’ll preserve performance and pressure accuracy. Stay proactive, stay practical, and keep that chuck clean so your inflator stays reliable, responsive, and ready whenever you need it.
