
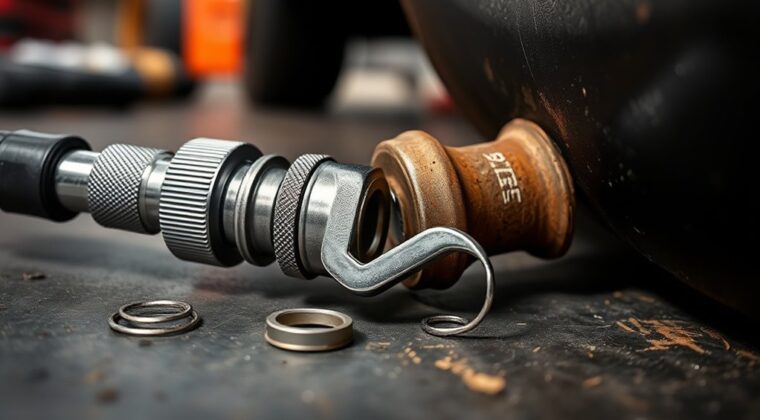
To fix a tire inflator chuck leak, first confirm the leak with a soap-and-water test and listen for hissing around the valve stem, hose, and fittings. Reattach the chuck straight, then tighten threaded connections and check the valve core. Inspect the grommet, O-rings, and internal seal for cracks, dirt, or wear, and replace damaged parts. If the chuck body is loose or distorted, swap it out. A locking chuck can seal more reliably, and more tips follow.
Key Takeaways
- Use a soap-and-water spray to find bubbles at the chuck, valve stem, hoses, and fittings.
- Reattach the chuck straight and tighten threaded connections by hand, then a light quarter-turn.
- Inspect and replace worn O-rings, grommets, seals, or damaged valve cores.
- Clean dirty components with isopropyl alcohol and retest for leaks after repairs.
- Replace cracked, loose, or distorted chucks, preferably with a locking model for a better seal.
How Do You Tell if the Chuck Is Leaking?
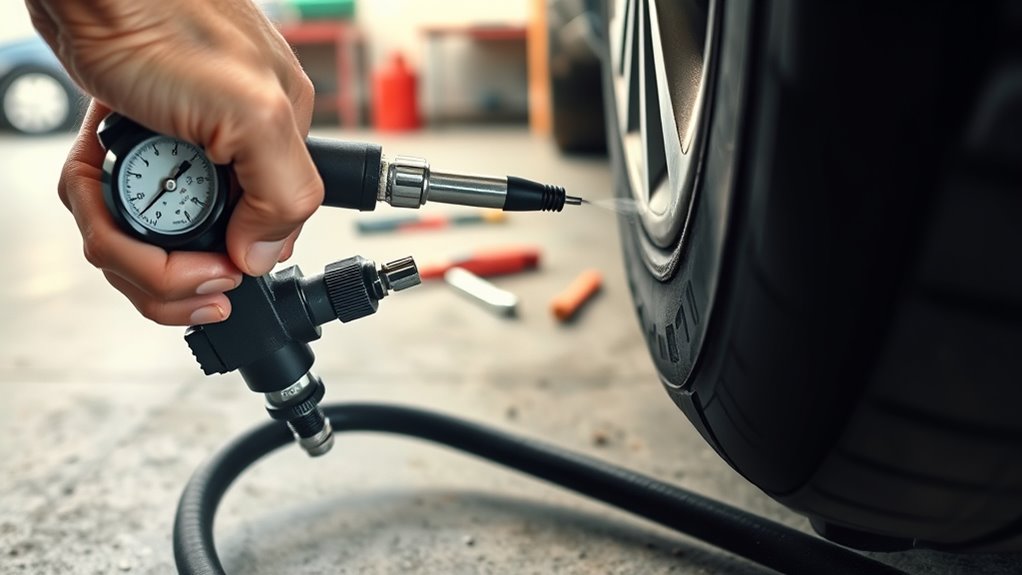
You can usually tell the chuck is leaking if you hear a constant hissing sound while inflating, since that means air’s escaping through a poor connection or damaged seal.
Check the air chuck for visible wear, cracks, or worn seals, because damage often causes leaking at the connection.
Watch the tire pressure after inflation; if it drops fast, the chuck or valve core may be losing air.
You should also pay attention to whether you can hold consistent pressure during inflation. If the reading keeps shifting, the chuck may not be sealing fully.
Use a soap and water test on the chuck and valve area; bubbles will mark the leak point. This quick check helps you separate a bad seal from another source of loss.
When you see these signs together, you can trust the chuck needs attention before you keep inflating.
Fix Tire Inflator Chuck Leaks Fast
Start with a soap bubble test so you can pinpoint the exact leak path fast.
Reattach the chuck straight onto the valve stem, then tighten the hose fittings and give threaded connections an extra quarter-turn if needed.
If air still escapes, inspect the internal seals and rubber grommets and replace any worn parts or the chuck itself.
Quick Leak Checks
If your tire inflator chuck seems to be leaking, listen first for a hissing sound, then check the connection points with a soap-and-water solution; bubbles will quickly show where air’s escaping. These quick leak checks expose a faulty seal before you waste time.
| Check | What you look for | Action |
|---|---|---|
| Hiss | Air escaping | Trace the source |
| Soap bubble test | Bubble growth | Mark the leak |
| Pressure rise | No increase in 15 seconds | Treat as major leak |
Inspect the valve core for snug fit and freedom from sticking. Then examine rubber grommets and O-rings for wear, cuts, or flattening. If air loss continues, the chuck can’t hold pressure. Tighten, clean, or replace parts as needed, and keep your setup under your control.
Seal And Valve Fixes
A confirmed hiss or bubble trail usually points to a seal or valve issue, so inspect the rubber grommets, O-rings, and valve core next.
You should clean the chuck and seals with isopropyl alcohol, then dry them fully so debris can’t open air leaks. Replace any cracked rubber grommets or flattened O-rings; a fresh seal restores contact and stops seepage.
Check that the valve core is snug and moves correctly, because a loose valve can waste inflation efficiency fast. Wrap Teflon sealing tape on threaded connections to improve the seal and lock out leaks.
Repeat the soap bubble test on every joint; new bubbles mean you still need to tighten, reseat, or replace parts.
Keep it simple, keep it precise, and take back control of your inflation setup.
Why Tire Inflator Chuck Seals Leak
Tire inflator chuck seals leak when the internal seal wears out or gets damaged from repeated use, rough handling, or harsh conditions.
When you notice an air chuck leaking, check the internal seals first, because frequent use degrades seal performance and opens a path for air escape. Loose connections at the chuck or valve stem also let pressure bleed off while you inflate tires, so even a small gap matters.
Dirt and debris can pack into the sealing surface and block full contact, making the chuck unreliable. A damaged chuck body can crack or distort, which weakens the seal and demands replacement.
Your chuck type matters too: mechanical locking chucks usually hold better than standard clip-on models, especially under higher pressure.
You need a tight, clean, undamaged connection if you want consistent inflation and fewer leaks.
Use a Soap Test to Find the Leak
Mix equal parts liquid soap and water in a spray bottle to make a soapy solution.
Spray it generously on the air chuck and valve stem while the inflator is under pressure.
Watch for bubbles, since they show you exactly where air’s escaping.
Mix Soap Solution
You can quickly pinpoint a chuck leak with a simple soap test. Mix water and dish soap 1:1 to make a soap solution; it should form a bubbly mixture that exposes air leaks fast. Apply it to your tire inflator chuck with no hesitation:
- Coat the connection points.
- Cover the valve stem.
- Wet the hose fittings.
- Run the system at operating pressure.
Watch for growing bubbles. In this soap bubble test, even tiny leaks show up clearly, so you can troubleshoot with confidence and keep control over your gear.
A regular inspection with this method supports equipment performance and helps your chuck last longer. Keep the solution handy, check the seals often, and you’ll stay free from surprise pressure loss and wasted time.
Spray Leak Points
Spritz the suspected leak points with your soap-and-water solution while the inflator is under pressure, then watch closely for bubbles.
On a tire inflator chuck, focus on the valve stem interface, hose fittings, and threaded joints. This soap bubble test reveals air leaks fast, even when the escape is tiny.
Keep the system under pressure so the leak shows; without it, you may miss the fault. Move methodically and inspect each secure connection, one at a time.
If bubbles form, you’ve found a leak point that needs repair or replacement. Don’t ignore worn seals or loose fittings during routine maintenance.
A tight, clean chuck holds pressure better and keeps your inflation work reliable, safe, and self-directed.
Watch For Bubbles
Bubbles tell the story. Mix a little liquid soap with water, then coat the tire inflator connections and fittings. Keep the unit under pressure, turned on, so the soap bubble test can expose hidden air leaks fast. If you see bubbles, you’ve found the leak and the weak seal.
- Check valve connections first.
- Inspect hose fittings next.
- Watch every joint for bubbles.
- Reapply soap and confirm the pressure drop source.
Over 80% of leaks show up at these sealing points, so don’t skip them. This quick maintenance step keeps inflation accurate and helps you stay free from wasted air and unreliable gear.
Repeat the test regularly, because prevention beats chasing problems after they spread.
Inspect the Grommet, O-Rings, and Seal
Inspect the rubber grommet and O-rings on the chuck regularly, since these parts create the airtight seal and can wear out, crack, tear, or swell over time. You need a sound grommet and intact O-rings to prevent leaks in your tire inflator.
Check every seal surface for cracks, flattening, or distortion, and replace anything that looks compromised. A small defect can let air escape during inflation and weaken performance.
Apply a thin film of silicone lubricant to keep the rubber flexible and improve sealing. Don’t use petroleum-based products; they can damage the material and speed up wear.
To verify the repair, run a soap bubble test: pressurize the system, brush soapy water on the grommet and O-rings, and watch for bubbles. If bubbles appear, you’ve found an active leak.
Replace the worn parts promptly, then retest. Keeping these components in good shape helps your tire inflator stay reliable, efficient, and ready when you need it most.
Tighten the Hose, Fittings, and Adapter
A loose hose or poorly seated fitting can bleed off a surprising amount of air, so tighten the hose connection at the inflator first and check every threaded joint for play.
Grip the hose firmly, then tighten each fitting until it seats snugly without forcing it. Match the adapter to the valve type; the wrong one won’t seal and can create air leakage.
Grip the hose firmly and tighten each fitting snugly; ensure the adapter matches the valve type.
For threaded connections, wrap Teflon sealing tape clockwise on the male threads before assembly to improve the seal.
- Inspect the hose for slack at the inflator.
- Tighten fittings by hand, then give a light final turn.
- Verify the adapter matches the valve and threads cleanly.
- Inspect for wear or damage before each use.
Don’t over-tighten; you can crack parts, distort threads, and worsen the leak.
If the joint still seeps, reset it, reapply tape, and retighten with a firm, controlled hand.
When to Replace a Worn Air Chuck
If your chuck keeps hissing or won’t hold tire pressure, it’s likely worn out and needs replacement. A worn air chuck wastes time and air, so inspect it regularly. Look for signs of wear: persistent air leakage, cracked rubber gaskets, a loose grip, or a distorted collar slider. Worn steel jaws can’t clamp the valve stem tightly, and that kills performance.
| Check point | Fault | Action |
|---|---|---|
| Gaskets/seals | Cracked or damaged | Replace |
| Jaws | Slipping or loose | Replace |
| Body parts | Bent or damaged | Replace |
If you can’t get a proper seal after tightening, don’t force it; replace the chuck and move on. In heavy-use environments, follow a replacement frequency of every 6 to 12 months to keep your system reliable. A timely inspection helps you work with precision, avoid air leakage, and keep your setup ready for the next job.
Choose a Locking Chuck That Stays Sealed
When you need a chuck that won’t bleed off pressure, choose a heavy-duty locking model with an internal locking system and integrated swivel points for a tighter, more reliable seal.
A quality locking air chuck grips the valve stem with mechanical locking force, so your tire inflators deliver an airtight seal and cut air escape. Prefer military-grade clamps or similar heavy-duty designs; they’re built to prevent leaks better than standard clip-on styles.
- Confirm the chuck locks firmly onto the valve stem.
- Check that integrated swivel points ease positioning without stressing the joint.
- Inspect seals and the locking mechanism before each inflation.
- Replace worn parts fast if you spot damage or seepage.
This setup gives you control, speeds inflation, and keeps pressure where it belongs.
With the right chuck, you’re not fighting leaks—you’re reclaiming clean, reliable air delivery every time.
Frequently Asked Questions
How to Repair a Tire Inflator?
You repair a tire inflator by tightening loose fittings, checking seals, and replacing worn grommets or O-rings.
Inspect the inflator chuck design for cracks, then test leaks with soapy water.
If needed, snug the valve core and swap damaged inflator replacement parts.
Good tire inflator maintenance protects air pressure importance, supports effective inflator usage, and improves inflator care tips, troubleshooting inflator leaks, inflator safety tips, common inflator issues, portable inflator options.
How Can I Stop My Air Compressor From Leaking?
You can stop leaks by tightening fittings, inspecting hoses, and replacing worn seals; a stitch in time saves nine.
Follow compressor maintenance tips, do air hose inspection, apply sealing leaks methods, verify compressor oil check, use pressure regulation techniques, and complete a fitting connections review.
If compressor noise issues persist, choose replacement part options.
Stick to maintenance frequency guidelines and troubleshooting common problems to keep your system liberated and airtight.
How to Fix Leaking Tire Valve Stem Seals?
Check the valve stem first, then use leak detection with soapy water to find bubbles.
If you hear hissing, tighten the core with the tools needed for DIY repairs.
For tire maintenance, inspect the seal for cracks, because worn rubber compounds fail fast.
If damage stays, do seal replacement.
Follow safety precautions, then perform pressure checks and inflation tips regularly; you’ll keep control, reduce air loss, and stay mobile.
How to Use Tire Fix Sealant and Inflator?
You inject tire sealant through the valve, then inflate immediately to spec.
Follow sealant application steps: choose tire sealant types, measure 4–8 ounces, and rotate the tire so it coats evenly.
Use inflator usage tips: check pressure, watch for leaks, and recheck after driving.
For quick sealant fixes, compare sealant effectiveness comparison.
Maintain inflator maintenance techniques, consult an inflator troubleshooting guide, practice tire puncture prevention, tire pressure monitoring, and use inflator storage solutions.
Conclusion
A leaking tire inflator chuck can drain pressure like a slow puncture in your workflow. If your soap test shows bubbles, check the grommet, O-rings, seal, hose, fittings, and adapter, then tighten or replace worn parts. Don’t keep forcing a bad chuck; a damaged seal won’t hold reliably. When the leak persists, swap in a quality locking chuck that stays secure. With a quick inspection and the right fix, you’ll restore consistent, efficient inflation.
