
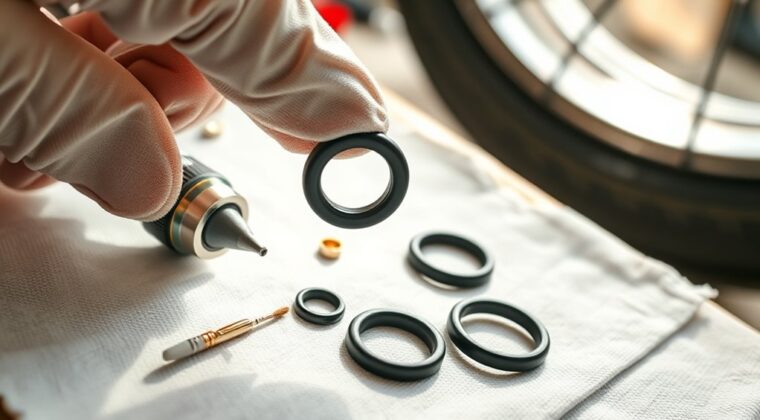
To maintain tire inflator O-rings, you should inspect the brass chuck seal regularly for cracks, flattening, hardening, or nicks. Clean the O-ring with warm soapy water and a lint-free cloth, then dry it fully. Apply a thin film of silicone-based lubricant every few months. Store the inflator in a cool, dry case and keep dust out of the seals. Bleed the hose before checking pressure, and replace any worn O-ring fast enough to prevent leaks and learn more.
Key Takeaways
- Inspect the brass chuck O-ring regularly for cracks, flattening, hardening, or other signs of wear.
- Clean O-rings with warm soapy water and a lint-free cloth, then dry them completely before use.
- Apply a thin film of silicone-based lubricant every three months to reduce friction and slow deterioration.
- Store the tire inflator in a cool, dry place with the battery charged to 50-60% and seals protected from damage.
- Replace worn O-rings immediately and verify pressure retention after installation to ensure a proper seal.
Find the Cause of O-Ring Leaks
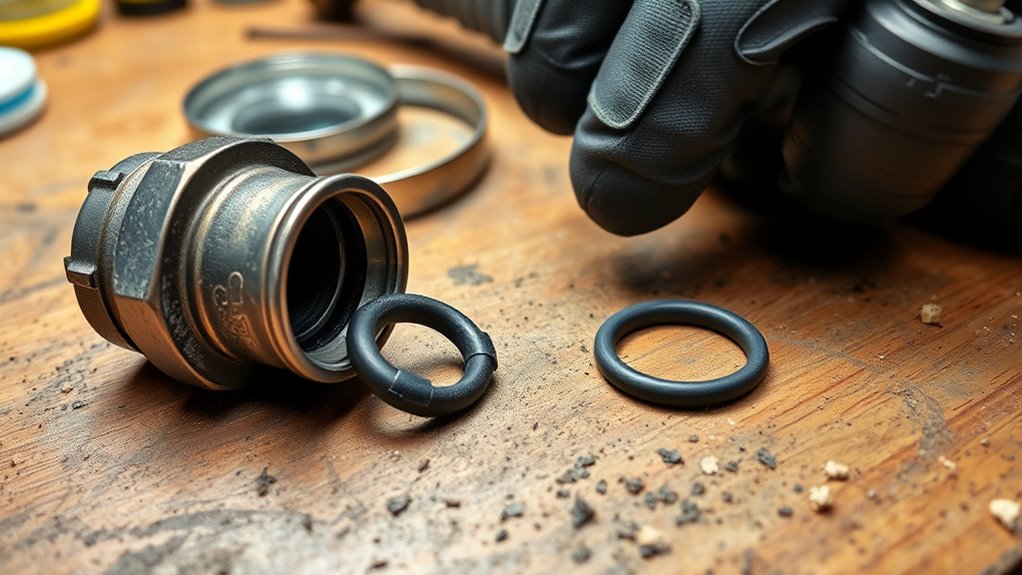
To find the cause of an O-ring leak, start by checking the brass chuck’s internal O-ring, since it’s a common failure point. Then look for wear from friction, heat, and dust buildup that can accelerate degradation. You can trace many O-ring leaks to these stressors.
If you see hardened, flattened, or nicked rubber, the seal’s lost its fit. Run the inflator and listen to the motor pitch; a change can signal strain or airflow loss. Before you trust a gauge reading, bleed the hose to atmospheric pressure so you can spot hidden leaks and measure accurately.
Clear intake vents with compressed air to reduce abrasive dust. Then apply a silicone-based lubricant to the seal surfaces to lower friction and slow heat damage.
When you inspect, work methodically and keep the system clean. That’s how you reclaim reliable pressure control and keep your equipment functioning without avoidable waste.
Inspect the Tire Inflator O-Ring
After you’ve tracked down a possible leak, inspect the tire inflator O-ring closely for wear. You should look for cracks, hardening, brittleness, swelling, or any deformation that changes its shape. A damaged O-ring won’t hold pressure, and even minor surface damage can let air escape under load.
Check its fit inside the brass chuck; it should seat evenly and seal firmly without forcing it. If you have to press hard to make it work, the O-ring may already be compromised. Remove any dust or grit around the O-ring area so abrasive particles don’t cut the elastomer during use.
Keep the O-ring lightly lubricated with a silicone-based lubricant every three months to preserve elasticity and resist degradation. Never use petroleum-based products, because they can cause swelling and failure.
If the O-ring shows visible wear or loss of shape, replace it immediately. That small part protects your air supply and supports your freedom to inflate reliably.
Clean the O-Ring Without Damage
Use a soft, lint-free cloth with warm, soapy water to clean the O-ring gently, and avoid harsh chemicals that can break down the rubber. This lets you clean the O-ring without damage and keep the seal dependable.
- Wipe away grit from the groove
- Rinse with clean water until no soap remains
- Dry fully with a soft cloth
- Check for cracks, wear, or brittleness
- Apply silicone-based lubricant sparingly every three months
Work methodically so you don’t stretch or nick the ring. Soap residue can reduce sealing performance, so rinse thoroughly.
Moisture left behind invites mold and gradual degradation, which can weaken the part and limit your freedom from leaks. After cleaning, inspect the surface under light; any damage means replacement is the safe, technical choice.
Moisture left behind can invite mold and degradation, weakening the seal; inspect carefully and replace any damaged O-ring.
Keep the process simple, repeatable, and precise, and you’ll preserve elasticity, improve sealing, and extend service life without unnecessary effort.
Lubricate the Brass Chuck O-Ring
Apply a silicone-based lubricant to the brass chuck O-ring every three months to keep it flexible and prevent air leaks.
Before you lubricate the brass chuck O-ring, wipe it clean and confirm it’s free of grit, dust, and residue. A clean surface lets the lubricant bond properly and preserves seal integrity.
Use only silicone-based product; petroleum-based oils can attack rubber compounds and shorten service life. Spread a thin, even film, then work the chuck gently so the lubricant reaches the full sealing surface.
This simple routine reduces friction and heat, so the O-ring won’t harden or crack as fast. During each maintenance check, inspect the ring for nicks, flattening, or other wear, since damage here often causes leakage.
When you lubricate the brass chuck O-ring consistently, you improve inflator reliability, reduce waste, and avoid preventable repair costs while keeping control in your hands.
Store the Tire Inflator Properly
Store your tire inflator in a cool, dry, clean case to keep dust, moisture, and heat from degrading the chuck seals and O-rings.
Before storage, charge the battery to about 50–60% so you preserve battery health without stressing the pack.
Check the seals periodically for wear or damage, and replace any compromised O-ring before you use the inflator again.
Dry, Clean Storage
Keep your tire inflator in a dry, cool place to reduce moisture buildup that can corrode components and degrade O-rings over time. Choose dry, clean storage that shields seals from dust, pressure, and contamination, so you stay in control of performance.
- Place it in a sealed protective case or bag.
- Wipe off dirt and debris before storing.
- Keep it away from damp floors and hot surfaces.
- Don’t stack tools or boxes on top of it.
- Inspect stored O-rings for cracks or drying.
This routine prevents fine particles from abrading the seal surfaces and helps you preserve reliable inflation.
When you store the unit cleanly and without compression, the O-rings keep their shape and sealing force. If you spot damage, replace the rings before the next use.
Battery Charge Level
A lithium-ion tire inflator should be stored at about 50–60% charge to help preserve battery capacity and extend service life. You should keep the battery charge level in this range because it limits chemical stress and supports long-term readiness.
Don’t let it sit at 0% or 100% in hot environments, since either extreme can degrade performance and shorten battery life. Check the battery charge level regularly so the inflator stays prepared when you need it.
During storage, handle the unit carefully and minimize vibration, because repeated shock can cause microscopic electrode damage. Smart battery care improves inflator function, reduces downtime, and helps you avoid unnecessary replacement costs.
Protect Chuck Seals
To protect the chuck seals, store your tire inflator in a cool, dry place and avoid direct sunlight or extreme temperatures, since heat and moisture can degrade the O-rings over time.
Keep the chuck connected to the hose when you’re not using it; this shields the internal seal from dust and abrasion.
Every three months, apply a thin silicone-based lubricant to the brass chuck O-ring so it stays flexible and resists leaks.
Inspect the seals regularly for cuts, flattening, or cracking.
- shaded shelf
- sealed toolbox
- coiled hose
- brass chuck
- clean, dry bench
This simple storage routine helps you protect chuck seals, maintain reliable airflow, and keep your equipment ready for independent use.
Why Air Still Leaks at the Chuck?
If air still leaks at the chuck, you likely have chuck O-ring wear from heat and friction that’s weakened the seal.
You should inspect the O-ring for cuts, flattening, or hardening, then replace it and apply a silicone-based lubricant if it’s still serviceable.
After reassembly, run a leak test and bleed any trapped pressure before you return the inflator to use.
Chuck O-Ring Wear
When the brass inflation chuck starts leaking air, the internal O-ring is often the weak point; friction and heat can wear it down, and dust or debris can speed that damage. You’re seeing O-ring wear, not mystery failure.
Inspect the seal every three months, and replace it if you spot flattening, cracks, or hardened rubber. Use silicone-based lubricant to reduce drag and extend service life.
- Clean grit from the chuck
- Check inflation speed for slowdowns
- Feel for a loose seal
- Lubricate the O-ring lightly
- Swap damaged rings fast
A worn O-ring steals control from your tool and wastes air. Keep the chuck clean, monitor performance, and maintain the seal before leakage grows into total failure.
Heat And Friction Damage
Prolonged use creates heat and friction at the chuck, and that stress can harden or swell the internal O-ring until it no longer seals tightly.
You’ll see friction damage when the chuck rubs the valve stem under load, especially during long inflation cycles. That heat can change rubber compounds, so the ring loses resilience and lets air escape.
Keep the O-ring lightly lubricated with a silicone-based product to reduce drag and slow wear.
Listen to the motor’s pitch; a strained tone can mean bearing load, rising heat, and extra stress on the seal.
During each quarterly readiness audit, inspect the chuck and O-ring for deformation, cracking, or swelling.
These checks help you keep control, reduce leaks, and protect your gear.
Leak Test And Bleed
A quick leak test tells you whether the chuck’s O-ring is still sealing or air is escaping past worn rubber. Connect the inflator to a tire, trigger it, and listen closely for a hiss at the chuck. That sound means the seal’s failing, often from friction or heat damage.
- Hose snapped onto the valve
- Gauge rising steadily
- Chuck held firmly in place
- Hissing at the connection
- Pressure bleeding down too fast
After the leak test, bleed the hose to atmospheric pressure before you read the gauge; otherwise, ghost readings can fool you.
Inspect the O-ring every three months, clean it, and apply a silicone-based lubricant. If the leak persists, replace the O-ring or consult a technician, then reclaim accurate inflation and control.
Keep Dust Out of the Inflator Seals
Fine dust can slip past filters, settle on seals, and wear down motor components, so you need to keep the inflator’s O-rings and intake path clean after every dusty use.
Blow compressed air through the intake vents and around the seals to dislodge grit before it bonds to the rubber. Wipe the O-rings with a clean, dry cloth, then inspect them for embedded debris, cuts, or flattening. If you leave dust in place, it can trigger air leaks and reduce output.
Store the inflator in a clean, dry case or cabinet, away from jobsite grit and moisture. During each maintenance check, confirm the O-rings seat evenly and the connections stay free of contamination.
Because abrasive dust drives a large share of motor failures, schedule a quarterly readiness audit and verify that airflow paths, seals, and fittings remain clean and functional. This routine protects performance and keeps you in control of your gear.
Bleed the Hose Before Checking Pressure
Before you check tire pressure, always bleed the hose to atmospheric pressure so you get an accurate reading instead of a ghost reading. You free the line by pressing the release valve or disconnecting the hose, then let the trapped air equalize before you gauge anything.
If you skip this step, the hose can hold inflated pressure and trick you into overinflating the tire, which risks damage and wastes fuel.
- A silent hose, emptied to the room
- The release valve clicked open
- The gauge needle settling cleanly
- A tire sitting at true pressure
- A road-ready machine rolling straight
When you bleed the hose, you take control of the measurement, not the leftover air. That accuracy supports tire performance, safety, and efficiency.
Make this a routine every time you inflate, and your inflator stays more reliable, longer.
Do a Quarterly O-Ring Check
Every three months, inspect your tire inflator’s O-rings for cracks, flattening, or wear, with special attention to the brass chuck’s internal seal, since friction and heat often damage that part first.
Use a bright light and rotate the chuck so you can see the full circumference. If you spot scoring, hardening, or deformation, note it immediately.
Use a bright light and rotate the chuck to inspect the full circumference for scoring, hardening, or deformation.
Apply a thin film of silicone-based lubricant to the brass chuck O-rings after the check; it keeps the seal flexible and helps prevent leaks. Don’t use petroleum-based grease, which can swell and weaken elastomers.
Reconnect the inflator to a tire and listen closely for hissing at the chuck, hose, and gauge fittings. Any air loss means the seal needs attention.
Replace the O-Ring When It Fails
When the brass chuck O-ring shows cracks, flattening, hardening, or any sign of air leakage, replace it right away with a silicone-based O-ring that matches the manufacturer’s specified size and material. You keep your inflator free from drag and leak loss by acting fast.
- Remove the chuck and inspect the O-ring groove.
- Compare the old O-ring with the new one.
- Lightly coat the new O-ring with silicone-based lubricant.
- Seat it evenly, without twisting or pinching.
- Recheck for pressure retention and quiet operation.
You should treat this as a quarterly maintenance task, not a rescue mission. A silicone-based O-ring resists swelling and degradation, so your seal stays stable under repeated use.
If the fit looks wrong, stop and verify the spec before reassembly. That precision protects your equipment, saves air, and keeps you in control.
Frequently Asked Questions
How to Maintain a Car Tire Inflator?
You maintain your car tire inflator by checking hose seals, especially O Ring Care, every few months, and lubricating the brass chuck O-ring with silicone grease.
You should inspect the internal O-ring for wear, bleed the hose before gauge readings, and clear intake vents with compressed air after dusty use.
Store lithium-ion batteries at 50-60% charge, and keep connections clean so your inflator stays reliable, accurate, and ready.
What Are the Common Problems With Car Tire Inflators?
You’ll hit a thousand tiny headaches: air leaks from worn O-rings, dust-choked motors, overheating after 10–15 minutes, and bad Inflation Accuracy when you don’t bleed the hose before checking pressure.
You can also damage the brass chuck with friction, or lose reliability by skipping lubrication and vent cleaning.
These faults cut efficiency, waste energy, and keep you dependent on a tool that should work cleanly, precisely, and on your terms.
Why Is My Ring Tyre Inflator Not Working?
Your Ring tyre inflator’s likely failing from inflator issues: a worn O-ring, dirty intake vents, or a leaking seal.
You should inspect the brass chuck O-ring for cracks, then lubricate it with silicone grease every three months.
Bleed the hose to atmospheric pressure before testing, so you don’t get ghost readings.
Clean dust from vents and check every connection.
When you maintain it, you keep control and restore reliable airflow.
How to Reset Portable Tire Inflator?
Unplug, cool, reset. You can reset your portable tire inflator by disconnecting it from power, waiting a few minutes, then pressing the reset button or the required button combo in your manual.
Recharge the battery to 50–60% before reconnecting. If it still fails, inspect seals and O-rings for leaks or damage.
This routine restores Inflator Efficiency, reduces strain, and keeps you operating with independence and control.
Conclusion
By treating your tire inflator O-rings like the tiny gates they are, you keep air where it belongs and prevent slow leaks from draining performance. Inspect them often, clean them gently, and lubricate the brass chuck O-ring before wear turns into failure. Store the tool sealed, keep dust out, and bleed the hose before checking pressure. A quick quarterly check and timely replacement will keep your inflator tight, reliable, and ready to work.
