
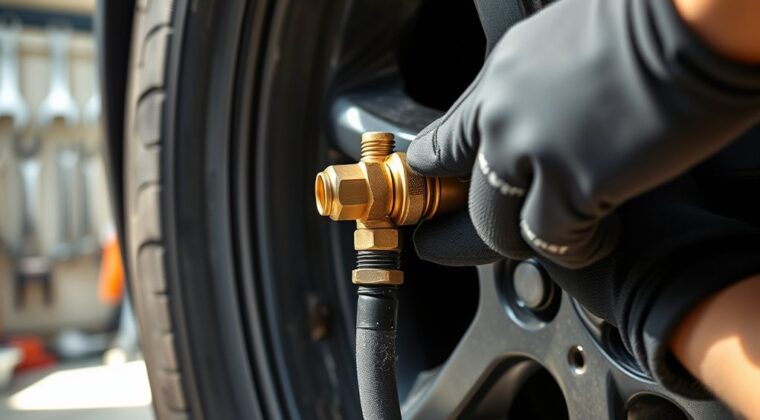
To replace a tire inflator air chuck, first disconnect the air source and release pressure. Inspect the old chuck for leaks, weak grip, cracks, or damaged jaws. Choose a replacement that matches your hose thread, valve type, and PSI rating, usually Schrader and 1/4 NPT. Wrap the new threads with seal tape, thread it on by hand, then tighten with a wrench. Test for leaks and secure fit, then you’ll be ready for the finer details.
Key Takeaways
- Identify a failing air chuck by checking for leaks, weak grip, cracks, or unstable pressure readings.
- Choose a replacement chuck that matches the valve type, thread size, PSI rating, and needed flow style.
- Turn off the compressor, disconnect the hose, and relieve pressure before removing the old chuck.
- Remove the old chuck with a wrench, using penetrating oil if needed, and inspect the hose end for damage.
- Wrap threads with seal tape, hand-thread the new chuck, then tighten securely without over-tightening.
What Is an Air Chuck?
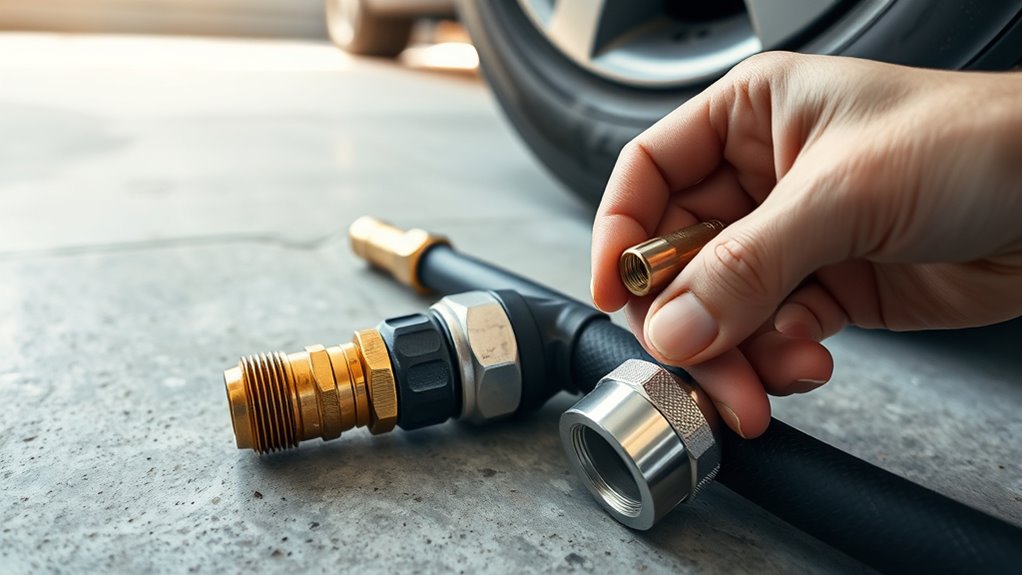
An air chuck is the fitting that lets you connect an air hose or tire inflator to a valve stem and deliver air securely into a tire. You use it to depress the valve core inside a Schrader valve, so air flow enters the tire while the chuck keeps the seal tight. That mechanical action gives you controlled inflation without wasting pressure.
An air chuck connects your inflator to the valve stem, sealing tightly while safely delivering air into the tire.
Air chuck models vary by geometry and function: straight units suit direct access, 90-degree units help in cramped spaces, and dual-wheel units reach inner stems on paired wheels.
You’ll also see open flow and closed flow designs. Open flow lets air pass continuously when connected, while closed flow holds air back until you engage it.
Choosing the right air chuck depends on your tire setup, access angle, and inflation tool, so you can work efficiently and keep control of the process.
How to Spot a Bad Air Chuck
To spot a bad air chuck, start by checking whether it leaks audibly when connected; persistent hissing usually points to worn rubber gaskets or seals.
You should also watch for slack grip at the tire valve stem: if the air chuck slips or won’t lock on, the steel jaws may be worn.
Inspect the collar sliders for distortion, since bent parts block proper engagement and let air to pass.
Run a visual check on the chuck body and internal parts for cracks, corrosion, or impact damage.
Any deformation can break the airtight seal and make inflation slow, forcing you to spend more time correcting tire pressure.
Compare the reading on pressure gauges before and after inflation; unstable numbers can indicate leakage at the connection.
If the chuck needs constant repositioning to hold pressure, it’s no longer doing its job.
You deserve equipment that works cleanly, so replace damaged components before they undermine control and safety.
Get the Right Replacement Chuck
When you choose a replacement air chuck, make sure it matches your valve type—most vehicles use Schrader valves, while heavier equipment may need a larger bore fitting.
Next, verify the PSI rating so your air chuck can handle your inflation demands; a 150 PSI model gives you solid range for shop or roadside work.
Verify the PSI rating first; a 150 PSI air chuck covers most shop and roadside inflation needs.
Check the flow type, too: Closed Flow Air chucks only pass air when engaged, giving you tighter control and cleaner pressure reading. If you prefer continuous flow during use, pick an open-flow design instead.
Inspect the thread size before you buy; 1/4 NPT is common, but your hose or tool may differ.
Look for locking jaws or rubber seals, because they improve grip and reduce leaks.
When the fit is right, you keep control, save time, and replace the chuck without giving up performance or freedom.
Choose smart, and your setup stays ready for every inflation job.
Remove the Old Air Chuck Safely
Shut off the air compressor and disconnect it before you start, so you don’t risk accidental inflation or injury.
To remove the old air chuck safely, grip the fitting with a wrench and loosen it from the air hose with controlled force. Turn slowly to avoid stripping the threads or twisting the hose. If the air chuck won’t budge, apply penetrating oil to the threads and wait a few minutes, then try again.
Keep your hands clear of sharp edges and never force the connection. Once the chuck comes free, inspect the air hose for cracks, wear, or thread damage while the end is exposed. This is your chance to catch problems before they limit your freedom on the road.
Wipe the hose threads clean with a cloth so the surface is ready for a proper seal later. A clean, undamaged hose makes the next step easier and more reliable.
Install the New Air Chuck
With the hose threads cleaned and inspected, you can install the new air chuck. First, make sure the air source is disconnected and any trapped pressure has been released from the hose.
Wrap thread seal tape on the new air chuck’s male threads, keeping the layers neat so they won’t bunch or fray. Align the chuck with the hose fitting and screw it on by hand until the threads seat properly.
Wrap thread seal tape neatly, then thread the new chuck on by hand until seated properly.
Then use a wrench to tighten it securely, but don’t force it; over-tightening can damage the fitting or hose. Hold the hose steady while you work so you keep control and protect the connection.
This step gives you a solid mechanical fit and helps create an airtight seal. A clean install lets you reclaim reliable air delivery without dependency on worn parts or sloppy joints.
Once the chuck is fully seated, stop turning and keep the assembly ready for the next check.
Check for Leaks and Proper Fit
Check the air chuck’s seal by attaching it firmly to the valve stem and confirming there’s no wobble or looseness.
Verify thread engagement by matching the chuck to the valve type, usually Schrader, and inspect the gasket and stem for wear, dirt, or damage that could break the seal.
To detect leaks, apply soapy water at the connection and look for bubbles, which indicate escaping air and a faulty fit.
Seal Integrity Check
Confirm the new air chuck seals tightly by applying soapy water around the connection point and watching for bubbles, which signal escaping air. This leak test verifies seal integrity before you trust the tool under air pressure.
If bubbles appear, stop and inspect the rubber gasket inside the air chuck for cuts, flattening, or contamination. A worn gasket won’t hold pressure and can undermine performance.
Make sure the chuck sits snugly on the valve stem; a loose fit lets air bleed out during inflation. Check the locking mechanism too, because a weak lock can break the seal even when everything looks aligned.
Replace any damaged part immediately. You’ll keep control, protect your equipment, and maintain reliable tire inflation without unnecessary risk.
Thread Engagement Test
Once the seal looks sound, secure the air chuck onto the tire valve stem and make sure the threads are fully engaged so it doesn’t leak under pressure.
Tighten it by hand until the air chuck seats evenly; don’t force it past alignment. Inspect the joint for gaps or side tilt, because misfit lets air escape.
Activate the inflator and watch for steady air flow; any interruption can mean the chuck isn’t gripping correctly or its internal parts are worn.
Listen for hissing near the valve stem, which signals leaks and wasted pressure. Check the rubber gasket and internal seals for cracking, flattening, or other wear.
When everything sits flush and the flow stays consistent, you’ve got a secure, efficient connection that keeps your inflation work free and controlled.
Leak Detection Methods
For a quick leak test, spray or brush soapy water around the air chuck-to-valve connection and watch for bubbles, which show air escaping. This leak detection step tells you whether the air chuck seats correctly.
Tighten the chuck firmly on the valve stem, because a loose fit can cause immediate air loss during inflation. Inspect rubber gaskets and seals for cracks, flattening, or wear; replace them if they’re damaged.
Then check pressure with a tire pressure gauge. If the reading drops fast, the leak may be at the chuck or valve stem. Don’t ignore small leaks; they waste pressure and undermine control.
Replace worn parts promptly so you keep a proper seal, protect performance, and stay in command of your inflation setup.
Pick the Right Chuck Type
Pick the air chuck type that matches your inflation setup, because the wrong style can make sealing, airflow, and access more difficult than they need to be.
You’ll find air chucks in straight, 90-degree, XL, dual-wheel, and gauge-equipped designs, so choose the shape that reaches your valve cleanly.
Check compatibility with valves first: most passenger tires use Schrader valves, while heavy equipment may need larger bore fittings.
Then decide on flow configuration. Open-flow chucks let air move continuously, while closed-flow models only pass air when attached, giving you tighter control.
Verify the pressure rating too; pick a chuck that meets your PSI demands, such as a 150 PSI unit for common inflation jobs.
For dually trucks or awkward stems, specialty chucks save time and reduce strain.
An easy-to-use chuck gives you faster service, fewer leaks, and more precise inflation without compromise.
Frequently Asked Questions
How to Attach Tire Chuck to Air Compressor?
You attach the tire chuck by shutting off the compressor, disconnecting power, and threading the chuck’s 1/4 NPT fitting onto the air hose clockwise until hand-tight; then snug it with a wrench.
Check compressor safety by testing for leaks with soapy water, and tighten if bubbles appear.
Restore power, verify air pressure, and test the valve for tire maintenance.
These inflator tips keep your setup secure and reliable.
How to Fix a Tire Inflator?
You fix a tire inflator like tuning a stubborn instrument: start by checking the air chuck’s fit on the valve stem.
Inspect the gasket, jaws, and internal pin for wear, then replace damaged parts. If you find air leaks, wrap the threads with seal tape.
Confirm tire pressure with a gauge, follow safety precautions, and keep up inflator maintenance.
If the chuck’s beyond repair, install a PSI-rated replacement.
How Do I Change the Attachment on an Air Compressor?
You change the attachment by unplugging the air compressor, then loosening the old fitting with a wrench.
Thread on the new 1/4 NPT attachment by hand, then tighten it securely to avoid leaks.
Reconnect power and test airflow.
This supports tire maintenance tips, air compressor care, inflation safety practices, and helps you avoid common inflator issues.
You’re keeping your tools free, functional, and ready for action.
How Does an Air Chuck Work?
An air chuck works like a gatekeeper at a city wall: you press it onto the valve stem, and its pin depresses the Schrader core, opening airflow while its seal blocks leaks.
You choose from air chuck types, open or closed flow, to control delivery.
For tire inflator maintenance, inspect seals, and for compressor safety, release pressure before swapping.
During inflator troubleshooting, check for hiss, weak flow, or misalignment.
Conclusion
Now you know how to replace your tire inflator air chuck, so don’t let a worn connector slow you down. Choose the right replacement, remove the old chuck carefully, and install the new one with a secure seal. Then test for leaks and confirm proper fit before you rely on it. A faulty chuck is a small part with a big problem, but your fix can be just as small—and just as effective.
