
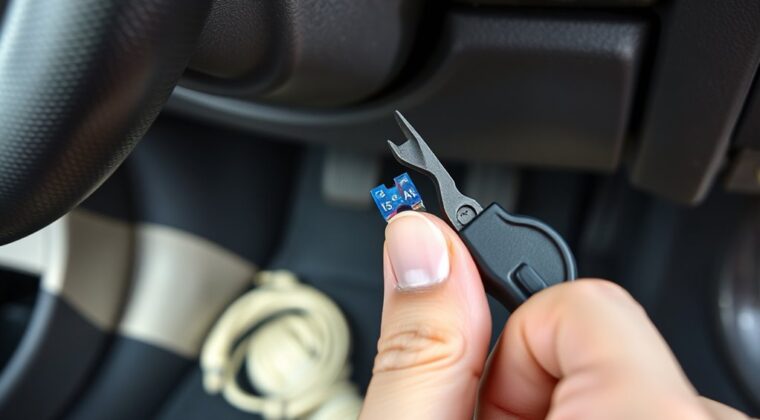
First, confirm the tire inflator’s fuse is blown by testing the 12V outlet with another device and checking the plug tip for damage. Then unplug the inflator, open the plug, and remove the old fuse. Match the new fuse’s amp rating and size exactly, usually 10A to 15A, and install it firmly. Test the inflator in a working outlet. If it blows again, inspect the cord, plug, and motor—you’ll want the full fix.
Key Takeaways
- Unplug the tire inflator and check the 12V plug fuse for a broken or darkened element.
- Test the vehicle’s 12V outlet with another device to confirm the outlet and vehicle fuse are working.
- Replace the inflator fuse with the same amp rating and size, usually 10A to 15A.
- Open the plug carefully, remove the old fuse, insert the new one firmly, and reassemble the plug.
- If the new fuse blows again, inspect the cord, plug, and motor for shorts, damage, or seizing.
Signs Your Tire Inflator Fuse Is Blown
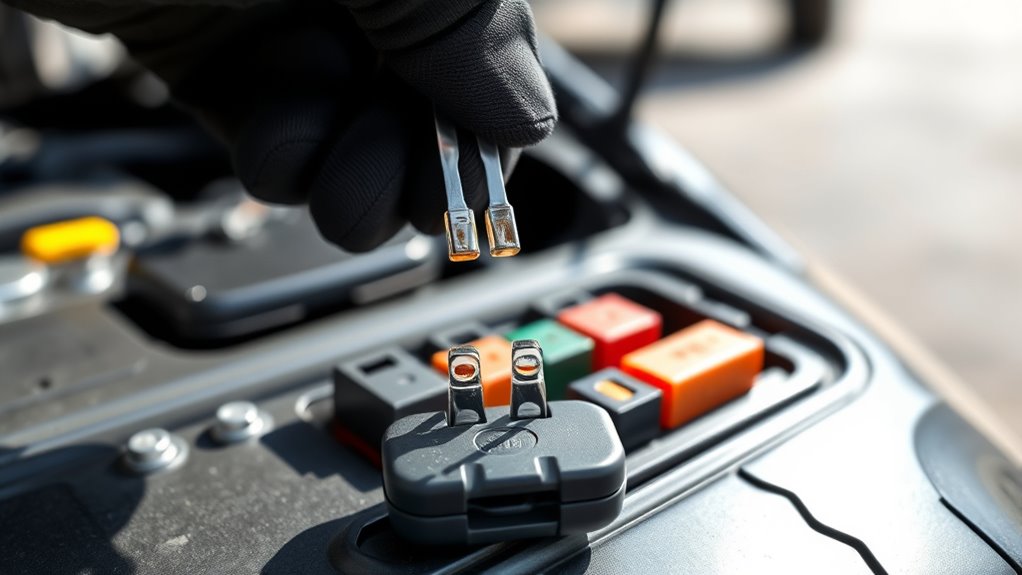
How do you know the fuse is blown? First, plug the inflator into the 12V outlet and watch for a response. If you get no lights, no sound, and no movement, the blown fuse is likely interrupting power.
If the inflator is usually reliable but suddenly quits during use, suspect the fuse before you assume the motor failed. Inspect the 12V plug tip; many models separate so you can check the fuse inside, and a darkened or broken element confirms damage.
If your inflator suddenly quits, check the fuse first; a darkened or broken element confirms damage.
If the unit powers on but won’t inflate, the fuse may still be open and starving the motor of current. When failures repeat, check your vehicle’s wiring and the inflator itself, because recurring blown fuses can point to a deeper electrical fault or a damaged component.
You deserve tools that work, so diagnose the cause precisely before replacing parts.
Test the 12V Outlet First
Before you replace the tire inflator fuse, test the 12V outlet with a known-working device like a phone charger to confirm it’s supplying power.
If the outlet doesn’t work, check the vehicle’s fuse panel for a blown fuse tied to that circuit.
Then inspect the plug, contacts, and outlet for corrosion, dirt, or loose connections that could block voltage.
Check Outlet With Another Device
Test the 12V outlet with another device, such as a phone charger or car accessory, to confirm it’s supplying power.
When you check the outlet with another device, use something you know works. If it powers on normally, the 12V outlet is active, and the problem likely sits in the tire inflator, not the power source.
If the second device doesn’t work, clean the outlet contacts with a dry cloth to remove dirt or corrosion that may block conductivity.
Then inspect the vehicle’s fuse box for a blown fuse tied to that outlet.
This quick test saves you from replacing parts blindly and keeps you focused on the real fault. You’re verifying access to power before you move on.
Verify Vehicle Fuse Panel
Next, verify the vehicle fuse panel by confirming the 12V outlet works with a known-good device. If the device powers up, the outlet is supplying current, and you can move on.
If it doesn’t, inspect the vehicle fuse panel for blown fuses that protect the 12V outlet circuit. Use a multimeter at the 12V outlet with the vehicle on; you should see about 12 volts. That reading tells you whether the vehicle’s power supply is healthy.
If voltage is absent, the fault lies in the fuse panel or upstream wiring, not the inflator. If the outlet works and voltage is correct, the problem is likely inside the inflator, meaning you’re free to focus on its fuse instead of chasing the vehicle’s electrical system.
Inspect Plug And Contacts
Start by confirming the 12V outlet works with a known-good device, because a dead outlet can mimic a failed inflator fuse.
Once you know the outlet is live, inspect plug and contacts for corrosion, dirt, or bent metal that can block current.
Push the inflator plug in firmly; a loose fit can stop power transfer even when the circuit is healthy.
Use a flashlight to check inside the plug for debris and to locate the fuse inside the housing.
If you see damage, clean only what’s safe to clean, then retest the inflator.
If it still won’t run, the fault may be in the 12V outlet, not the inflator.
Test before replacing parts so you act with precision and keep control.
Get the Right Replacement Fuse
To keep your tire inflator operating safely and efficiently, you need a replacement fuse that matches the original in both amp rating and physical size. Check your inflator’s label or manual before you buy; most portable units use 10A to 15A, but your model may differ. Choose a glass fuse when the spec calls for one, because it handles inflator loads reliably. If you’re replacing the plug assembly, a 12V cigarette lighter plug with a built-in fuse can simplify the setup and improve dependability. Keep spare fuses ready so you can stay mobile and avoid delays.
| Fuse spec | Why it matters | What to verify |
|---|---|---|
| Amp rating | Prevents overload | Match the original |
| Physical size | Guarantees fit | Compare length and diameter |
| Fuse type | Supports load | Use glass fuse when specified |
Buying the exact part protects the inflator, preserves performance, and keeps you in control.
How to Replace a Tire Inflator Fuse
Unplug the inflator and let it cool before you inspect the 12V plug for a blown fuse, which often looks broken or discolored.
To replace a tire inflator fuse, use a small screwdriver to unscrew the metal tip of the plug and expose the internal fuse. Remove the old fuse, then compare the replacement with it for exact size and amp rating; most models use about 15A, but you should match your unit.
Insert the new fuse firmly, then tighten the plug so it closes securely. Don’t use a higher-amp fuse or bypass the fuse, because that can overheat the inflator and the vehicle circuit.
After reassembly, test the inflator in a known-working 12V outlet. If it powers on normally, you’ve restored safe function without surrendering control to a tiny failed part.
If it still doesn’t run, stop and inspect further before forcing current through the system.
What to Do If the Plug Is Damaged
If the plug is damaged, disconnect the inflator from the power source first to eliminate electrical risk. Then inspect the housing for cracks, melted plastic, or broken contacts that could cause poor connection or a short.
With a Portable Tire Inflator, you need a sound connection at the cigarette lighter socket or you’ll lose reliable power. If you see severe damage, stop using the unit and install a replacement plug instead of trying to force a failing part back into service.
Choose a 12V replacement plug with a built-in plug fuse, and match the original amp rating and size so the circuit stays protected and the inflator can operate as designed.
When you fit the new plug, use crimp connectors or solder the leads securely, then seal every exposed conductor with heat-shrink tubing. That keeps the assembly tight, reduces wear, and helps you regain control over your equipment safely.
Check the Plug Wiring and Connections
Inspect the plug wiring for fraying, breaks, or other visible damage that could interrupt power to the inflator. You’re checking for clean electrical flow, so move methodically and don’t assume the plug is sound just because it fits.
- Examine the plug wiring along its length for cuts, crushed insulation, or exposed conductors.
- Verify that all connections are tight and free of corrosion, because loose connections can cause intermittent power.
- Use a multimeter to confirm continuity through the wiring and confirm the circuit isn’t open.
- Inspect solder joints or crimp points for heat discoloration, brittleness, or wear that signals faulty connections.
If you replace the plug, match the original wiring layout exactly. Correct alignment preserves electrical flow and prevents damage from incorrect connections.
Don’t Bypass the Fuse
Don’t bypass the fuse, because it’s the component that protects your tire inflator and vehicle wiring from electrical overload.
If you replace it with foil, wire, or a higher-amp fuse, you can cause overheating, damage, or even a fire.
If the fuse keeps blowing, you’ll need to find and fix the underlying fault instead of removing the protection.
Fuse Safety Purpose
The fuse is a built-in safety barrier that protects your tire inflator from overcurrent, overheating, and electrical fire. You rely on it to break the circuit when current rises past safe limits, preserving safety and keeping the inflator responsive.
If you ignore a blown fuse, you invite malfunctions and costly damage.
- Inspect the fuse before each use.
- Replace it with the exact amperage rating.
- Keep spare fuses in your kit.
- Test the inflator after replacement.
Why Not Bypass
Bypassing the fuse removes the inflator’s built-in overcurrent protection, so excess current can overheat internal parts, damage the vehicle’s electrical system, or start a fire.
Don’t defeat this safety mechanism with foil or wire; those makeshift fixes can trigger short circuits and electrical fires. If you install a higher amp fuse, you’re not solving the problem—you’re just allowing too much current and risking component failure or even battery damage.
Instead, inspect the inflator, cord, and socket for the root cause of the fuse blowout. Look for pinched wires, moisture, or a seized motor.
Replace damaged parts, then fit the correct fuse rating. You keep control when you respect the circuit’s design and restore protection rather than bypassing it.
Frequently Asked Questions
How to Change Fuse in Air Compressor?
You change the fuse in your air compressor by unplugging it, letting it cool, then unscrewing the 12V plug cap to access the fuse.
Remove the blown fuse, match the exact fuse types and amp rating, and install the new one.
Reassemble the plug tightly, then test it in a working outlet.
This air compressor maintenance step protects electrical safety; if it fails again, use these troubleshooting tips.
Can I Replace a Fuse by Myself?
Yes—you can replace a fuse by yourself; studies show many simple electrical fixes save you a costly service call. You’ll need fuse safety, the correct replacement, and basic DIY repairs skills.
Unplug the inflator, let it cool, open the plug, and inspect the blown fuse. Match the amp rating exactly, then reassemble and test.
This practical inflator maintenance and electrical troubleshooting frees you to keep control.
Why Is My Portable Tire Inflator Not Working?
Your portable tire inflator likely isn’t working because of a blown fuse, weak power source, clogged hose, or motor failure.
Start with power supply checks: test the 12V outlet with another device and inspect the cord, connector, and fuse.
If it turns on but won’t inflate, you’re facing common inflator issues like battery weakness or airflow blockage.
Use inflator troubleshooting tips and consistent maintenance practices to keep it reliable.
How Do I Replace the Fuse in My Husky 12 Volt Inflator?
Out of the blue, you replace it by unplugging the Husky 12-volt inflator, letting it cool, then unscrewing the metal tip of the 12V plug.
Check the glass fuse for damage, match the amp rating exactly, and swap it in.
Reassemble tightly, then test it.
For inflator maintenance tips, note common fuse issues, follow safety precautions, and keep troubleshooting inflator faults simple, direct, and under your control.
Conclusion
By replacing your tire inflator fuse carefully, you keep your compressor working and your car’s circuits protected. Check the plug, confirm the connections, and use the correct fuse rating every time. If the plug is damaged, repair it before retrying. Don’t bypass the fuse; it’s there to prevent bigger breakdowns. With a quick, correct fix, you’ll restore reliable inflation and keep your roadside readiness strong, safe, and simple.
