
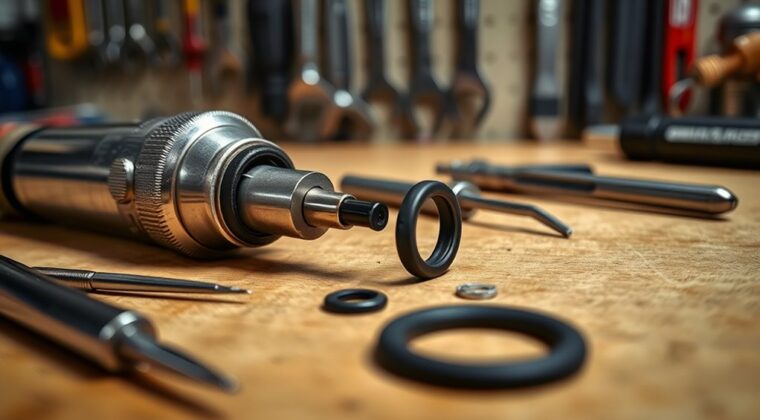
To replace a tire inflator O ring, first turn off the inflator, remove the hose and chuck, and clean the seal seat. Inspect the old ring for cracks, stiffness, or leaks, then match the new O ring to the model and size. Lightly lubricate it with silicone grease, install it evenly, and reassemble the fittings. Test with soapy water and pressure to confirm a tight seal. A few more steps can help you prevent repeat wear.
Key Takeaways
- Inspect the O-ring for cracks, brittleness, leaks, or poor sealing before replacing it.
- Gather the right tools, a matching replacement O-ring, and wear safety glasses.
- Turn off the inflator, detach the hose and chuck, then remove the old O-ring carefully.
- Clean and dry the O-ring seat, then lightly lubricate and install the new O-ring evenly.
- Reassemble the inflator and test for leaks using air, sound, soapy water, and pressure checks.
How to Spot a Worn Tire Inflator O Ring
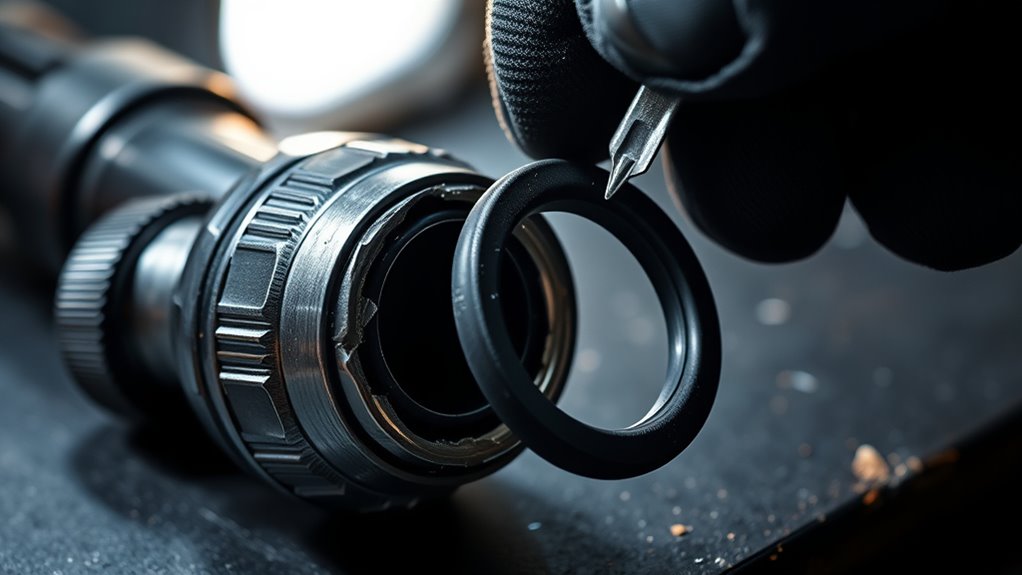
To spot a worn tire inflator O-ring, inspect it for visible cracks, brittleness, or discoloration, since these often signal heat or chemical damage.
You should also check for air leaks during inflation, because a damaged O-ring can let pressure escape and weaken performance.
Listen for unusual sounds while the inflator runs; friction inside the unit often points to a compromised seal.
Confirm that the O-ring fits evenly and supports proper sealing at every contact point.
If you feel roughness, stiffness, or see swelling, the ring’s surface has likely degraded.
Keep a maintenance schedule that includes cleaning, light lubrication, and periodic checks so you can catch failure early.
When inspection shows persistent damage or poor sealing, replace the O-ring before it undermines reliability.
Tools for Tire Inflator O Ring Replacement
You’ll need a small flathead screwdriver, a wrench, and needle nose pliers to remove and reinstall the inflator O-ring and fittings.
Set up a clean workspace before you start so you don’t contaminate the new seal or damage small parts.
Choose a replacement kit with O-rings that match your inflator model, and check the manual for the correct size and type.
Essential Tools Needed
A few basic tools make tire inflator O-ring replacement straightforward: keep a small flat-head screwdriver handy to lift out the old O-rings, a wrench to loosen and tighten fittings, and needle nose pliers for working in tight spots.
Choose new O-rings matched to your inflator, with Viton or EPDM if your setup sees chemical exposure. Before you fit them, apply lubrication with a silicone-based compound so the seal stays supple and resists wear.
Use the wrench only to snug components to spec, then inspect the O-rings for even seating. Keep your parts on a clean workspace so grit can’t compromise the proper seal.
With these essentials, you can replace worn hardware cleanly, maintain control over the job, and free your inflator from leaks.
Safety And Prep
Before you open the inflator, set up a safe, organized workspace and gather the replacement parts and tools you’ll need. Wear safety glasses, because disassembly can release debris.
Use a clean workspace with a clean surface so you can lay out parts in order and keep small hardware from disappearing. Keep your tools close: needle nose pliers, a small flathead screwdriver, and the new O-rings.
Before you begin, review the manufacturer’s guidelines for O-ring specifications and fit. That step protects compatibility and helps you avoid weak sealing during assembly.
Work methodically, remove components one at a time, and track each piece as you go. This prep keeps the process controlled, efficient, and lets you restore the inflator without wasting time or parts.
Replacement Kit Options
Choose a replacement kit that matches your inflator’s O-ring size and material requirements, and pair it with the right tools for the job.
A quality replacement kit should include compatible O-rings, such as Viton or EPDM, plus a pump-up repair kit if your model uses one.
Keep a wrench ready for loosening fittings and a small flat-head screwdriver for lifting old O-rings without damaging grooves. Use a recommended lubricant, like Molykote 111, to support sealing and reduce friction wear.
Work in a clean workspace so dirt and debris don’t ruin the fit. Inspect every part and make sure no old O-rings remain before reassembly.
Then follow the manufacturer’s instructions for any model-specific tools, torque steps, or seal checks.
Remove the Hose and Chuck
Turn off the inflator, then detach the hose assembly from the unit so you don’t trigger it accidentally.
Check the hose and chuck for any extra fittings, and remove them with the right tools.
Once the hose is free, release the chuck seal carefully so you can continue with the O-ring replacement.
Detach Hose Assembly
Start by removing the hose from its holder so you have a clear workspace and don’t lose any parts.
Grip the hose, then use a small flathead screwdriver to pry the chuck free without nicking the O-ring. Pull the hose assembly apart slowly so you keep control of each piece.
Inspect the O-ring for cracks, flattening, or wear; a damaged ring can cause air leaks and weaken inflator output.
Clean the chuck area before you install a new O-ring so the seal stays clean and reliable.
Then align the chuck and attach it firmly to the hose, making sure it seats tight. A secure fit protects performance and helps you keep your equipment ready for independent use.
Release Chuck Seal
With the inflator powered off and the hose fully depressurized, carefully disconnect the hose from the unit to release the chuck seal. Use controlled force, because trapped pressure can’t fight your hands when you’re working cleanly.
Inspect the chuck for wear, cracks, or other damage before you remove the O-ring. If the brass surface looks scored, stop and correct it before fitting a new seal.
- Hold the chuck steady and pull the hose straight off.
- Pry the O-ring free with a small flat-head screwdriver.
- Clean the chuck and hose end to remove dust or debris.
Keep the surface smooth so the new O-ring seats tight and the seal holds. This simple, disciplined step gives you the freedom to restore reliable airflow without leaks or wasted effort.
Take Out the Old O Ring
Carefully pry the old O-ring out of its seat using a small flat-head screwdriver, taking care not to nick the surrounding components or deform the groove. You’ll take out the old O-ring by easing it free, then inspect for signs of wear such as cracks, flattening, or distortion that may explain leakage.
Keep your clean workspace clear so no grit falls into the opening. Wipe the groove to remove residual lubricant and dirt; any film can block a proper seal. Once the channel is clean, discard old O-ring material instead of saving it for later. That worn part can’t serve your tool or your freedom from leaks.
At this stage, you’re preparing for new O-ring installation, and precision here helps guarantee proper seal performance when you continue. Check the seat once more for debris before moving on.
Choose the Right O Ring Size and Material
Now that the old O-ring is out, measure the inner diameter and cross-sectional thickness of the replacement so it matches the manufacturer’s spec exactly. If you’re unsure, check the owner’s manual or compare caliper readings to the original part. A wrong size can break seal integrity and stall performance, so keep your focus tight.
- Match the diameter and thickness to the inflator’s spec.
- Choose a material: Nitrile for general use, Viton or EPDM for heat or chemical exposure.
- Verify a hardness rating of 70-90 Shore A for flexibility and durability.
You want compatibility, not compromise. Nitrile usually works for routine air service, while Viton and EPDM handle oils, ozone, and higher temperatures better.
Pick the O-ring that suits your operating conditions, because the right material resists wear and keeps the system ready. That’s how you keep control, reduce failures, and move forward with confidence.
Clean the O Ring Seat
Remove all debris from the O-ring seat with a clean cloth or compressed air before you install the new seal.
Inspect the seat surface for wear, scratches, or damage that could prevent a proper seal.
Make sure the area’s dry and free of residue before reassembly.
Remove Debris First
Before you fit the new O-ring, clear the seat completely so nothing interferes with the seal. You’re removing hidden debris to protect seal integrity and keep the installation precise.
Blow compressed air through the seat to lift out fine dust and dirt, then wipe the area with a clean, lint-free cloth. This also strips residual contaminants and old lubricant that could block a clean fit.
- Aim air into every groove and edge.
- Wipe until the surface feels dry and clean.
- Check for wear or damage that may call for maintenance.
A clean, dry seat helps the new O-ring sit evenly and reduces leak risk. Don’t rush this step; careful prep gives you a reliable seal and keeps your tire inflator ready when you need freedom to move.
Inspect Seat Surface
With the debris cleared, inspect the O-ring seat surface for any residue, wear, or damage that could keep the new seal from seating properly.
Clean the seat surface with a soft cloth or brush, and remove old sealant or stubborn debris without using abrasive tools that can score the metal.
If contaminants remain, apply a mild solvent sparingly, then let it fully clear so the surface stays ready for installation.
Check closely for pitting, scratches, or deformation; even minor wear can cause air leaks after reassembly.
Make this part of routine maintenance so you catch problems early and protect seal life.
A clean, sound seat gives you control, improves reliability, and helps the new O-ring perform as intended.
Dry Before Reassembly
Dry the O-ring seat completely before reassembly so trapped moisture doesn’t weaken the new seal.
Wipe the O-ring seat with a clean, lint-free cloth until it’s dry and clear of debris. Inspect the surface for scratches, nicks, or chemical residue, because any flaw can create air leaks and cut sealing capability.
Let any solvent evaporate fully before you move on. The seat should feel smooth and even, with no rough spots that can distort the O-ring during reassembly.
- Wipe away moisture.
- Inspect for damage.
- Confirm the seat is smooth.
When you keep the seat dry and clean, you protect performance and reclaim reliable pressure without unnecessary failure.
Install the New O Ring
Select the replacement O-ring that matches the repair kit’s size and chemical compatibility requirements, then coat it lightly with a silicone-based lubricant. This helps the O-ring install smoothly, reduces friction, and supports a lasting seal.
Place it into the groove with steady pressure, keeping it centered so you don’t twist or over-stretch it. Check the alignment from every angle before you move on. A shifted O-ring can create uneven contact and invite air leaks under pressure.
Once it sits flush, reassemble the parts in the correct order and tighten each connection securely. You want firm contact, not brute force; over-tightening can distort the seal you just built.
Before you finish, inspect the fit again. The O-ring should stay seated in its groove, with no pinching, gaps, or visible distortion. When everything lines up cleanly, you’ve restored the system’s barrier against leaks and kept the repair kit working as intended.
Reattach the Hose and Chuck
Once the O-ring is seated and lightly lubricated, line up the hose threads with the chuck and turn the connection clockwise by hand. You’re reattaching the hose to secure a clean seal, so keep the parts straight and let the threads start smoothly. If the chuck binds, back off and realign it.
- Hold the hose steady and feel for even thread engagement.
- Use a wrench to snug the chuck only until firm; don’t overtighten and crush the O-ring.
- Inspect the connection, hose, and chuck for visible wear, cracks, or distortion before you move on.
A properly lubricated O-ring helps prevent leaks and keeps the joint tight under pressure. After tightening, give the assembly a quick listen for hissing around the connection. If you hear airflow, recheck the fit and retighten gently.
Regularly inspect the hose and chuck so you can replace worn O-rings early and keep your inflator ready.
Test for Leaks
Inspect the reassembled inflator for leaks before you put it back into service. Start with a visual inspection of the O-ring, hose, chuck, and other connections. Look for cuts, pinch marks, misalignment, or debris that could break the seal.
Next, run a sound test: power the inflator and listen for hissing. Any steady hiss means air’s escaping and you need to reseat the parts.
Power the inflator and listen for hissing; any steady hiss means air’s escaping and the parts need reseating.
Then perform a soapy water test by applying a dilute soap solution around the O-ring and connections. Bubble formation confirms a leak at that point.
Finish with a pressure check by inflating the tire to the recommended pressure and watching the gauge for rapid loss. If pressure drops quickly, stop and inspect again. A brief blast of low-pressure air around the seal can clear dust before retesting.
Don’t return a leaking inflator to service; fix the fault first, then verify the seal holds under real operating pressure and restores control.
Prevent O Ring Wear on Your Inflator
To keep the inflator O-ring in good shape, lubricate the brass chuck O-ring with a silicone-based lubricant every three months and keep dust out of the unit after use, especially in dirty conditions. This maintenance helps prevent air leaks, slows wear, and extends the lifespan of your inflate setup.
- Blow compressed air through the intake vents after dusty jobs.
- Bleed the hose to atmospheric pressure before you read the gauge.
- Store the lithium-ion battery at 50-60% charge to avoid damage.
Don’t run the inflator continuously for more than 10-15 minutes; heat can degrade the O-ring and other parts. If you ignore gauge error, you may over-inflate tires and punish the seal.
Keep your tools clean, cool, and ready, and you’ll protect performance without extra effort. Small habits preserve freedom from roadside failure and keep your system reliable.
Frequently Asked Questions
How to Fix a Tire Inflator?
You fix a tire inflator by checking the hose, barrel, and O-rings, then replacing worn seals and lubricating them with silicone.
Follow tire inflator maintenance, proper usage, and inflator safety precautions while verifying inflator pressure settings and air hose compatibility.
Use troubleshooting tips to spot leaks, and reap frequent usage benefits through routine care.
Finish with inflator storage solutions and a test on a tire to confirm a tight seal.
What Are the Common Problems With Car Tire Inflators?
You’ll commonly see tire inflator leaks, inflator motor issues, pressure gauge malfunction, hose cracks, power supply failures, valve stem problems, nozzle compatibility, and overheating concerns.
You can prevent many failures by checking seals, cleaning vents, matching attachments, and limiting runtime. If you ignore these faults, you’ll lose pressure accuracy and reliability.
Maintain your inflator like a tool of autonomy: inspect, test, and replace worn parts before they trap your mobility.
What Are the Replacement Parts for a Slime Tire Inflator?
You’ll replace worn Slime inflator O-rings—plunger, upper bump stop, and lower bump stop parts—plus any model-specific seals in a kit.
By chance, the right O Ring types often restore a leak you just noticed.
Check Inflator brands for compatibility, follow Maintenance tips and Safety precautions, and add Inflator accessories as needed.
Use Troubleshooting techniques, track Replacement frequency, and handle DIY repairs with silicone lube for smooth, liberated performance.
How to Fix Tire Inflator Hose?
You fix a tire inflator hose by inspecting cracks, then doing an air hose repair with a hose compatibility check and secure fittings.
Replace damaged sections, perform sealing ring replacement, and add silicone lubricant.
Check valve stem issues, then test pressure gauge calibration during compressor troubleshooting.
For tire inflator maintenance, run a leak test, watch for air loss, and follow inflator safety tips so you keep control and move with confidence.
Conclusion
Replacing your tire inflator O-ring is a small fix that pays off fast. You’ve removed the worn seal, matched the right size and material, and installed the new one with care. Now your inflator should hold air better and work more reliably. Why keep losing pressure over a cheap, failed O-ring? Test for leaks, stay ahead of wear, and you’ll extend your tool’s life with simple maintenance.
