
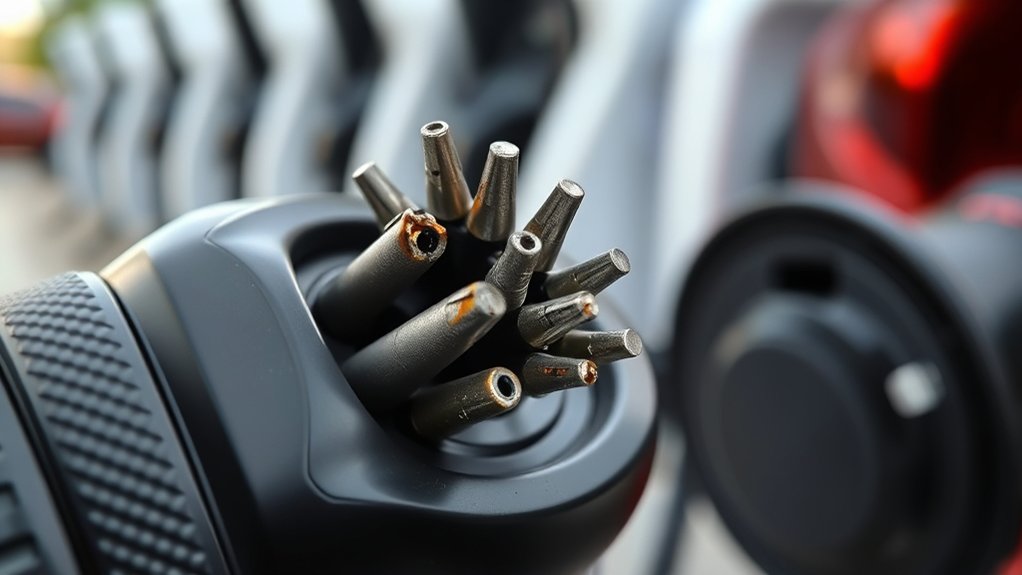
Damaged EV charging pins can turn a normal charging session into a safety problem. Bent contacts, corrosion, heat marks, loose fit, or repeated charging errors can point to a damaged connector or vehicle charge port. The safest fix is not to force, bend, file, or probe the pins. Stop using the damaged equipment, inspect it carefully, clean only loose dry debris, and arrange proper replacement or service.
Quick Answer
If EV charging pins look bent, burned, corroded, loose, or broken, stop using that charger or port. You can safely do a visual check and remove loose dry debris while everything is unplugged, but do not straighten pins, test vehicle battery circuits, or disassemble the connector unless you are qualified.
Key Takeaways
- Bent, pitted, burned, loose, or corroded pins are stop-use warning signs.
- Do not force a connector into place or try to bend charging pins back with pliers.
- Safe DIY work is limited to visual inspection, checking for error messages, and removing loose dry debris from disconnected equipment.
- Sparks, flames, or active smoke are an emergency, not a troubleshooting step — cut power at the breaker only if safe, evacuate, and call the fire department.
- A damaged portable charger, wall connector, public charger handle, or vehicle inlet usually needs replacement or professional service.
At a Glance
| Time Required | 5–15 minutes for a safe visual inspection; longer if a technician needs to replace a cable, connector, EVSE, or vehicle charge inlet. |
| Difficulty | Easy for inspection; professional for pin repair, connector replacement, internal EVSE work, or vehicle charge-port service. |
| Tools Needed | Flashlight, phone camera, dry lint-free cloth, vehicle manual, charger manual, and charger-network app if using a public station. |
| Cost | Inspection may cost nothing. Replacement cost depends on whether the damaged part is a portable cordset, wall connector, public charger handle, adapter, or vehicle inlet. |
Warning: Do not charge through a connector or vehicle port with bent, broken, burned, melted, loose, or badly corroded contacts. Do not insert tools into the charge port, probe battery circuits, sand the pins, add grease, or force the plug to fit.
Common Causes of Damaged EV Charging Pins
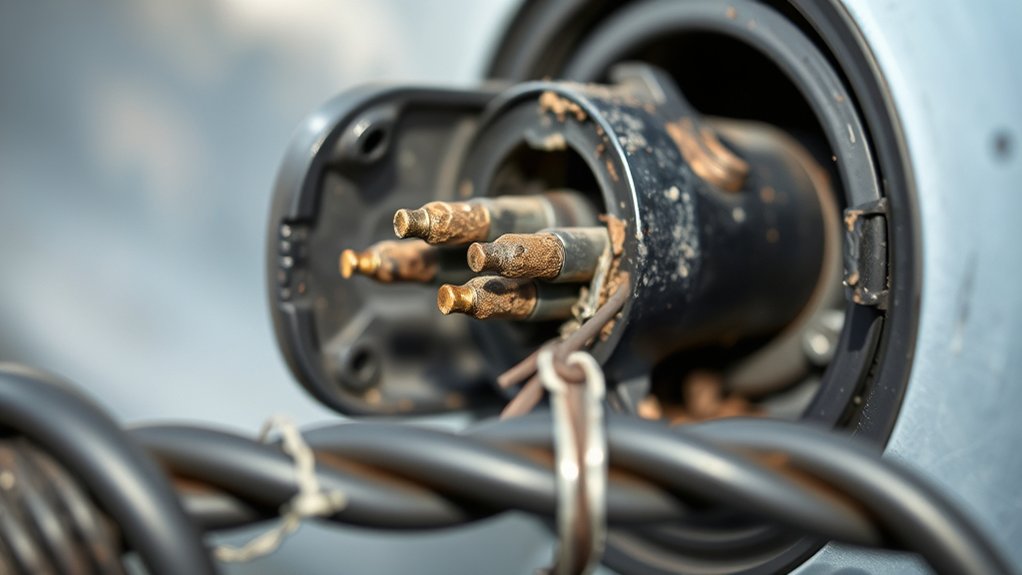
EV charging pins and contacts can be damaged by rough handling, poor alignment, contamination, heat, or incompatible adapters. The connector is the part that plugs into the vehicle, while the charge port or inlet is the socket on the vehicle. The U.S. Department of Energy Alternative Fuels Data Center uses this same connector and port terminology for EV charging equipment.
Rough Handling and Misalignment
The most common causes include yanking the cable, dropping the connector, letting the cable hang with too much side load, forcing the plug when it is not aligned, or using an adapter that does not lock firmly. Dirt, road salt, water, and metal particles can also interfere with the contact surface and make heat buildup more likely.
Heat and Electrical Stress
Heat damage is especially important. A weak contact can create higher resistance, and higher resistance can create more heat during charging. That can leave brown marks, pitting, melted plastic, a hot handle, or a burned smell. If you notice any of those signs, stop the session and do not try to “push through” another charge.
Know Which Connector You Are Checking
The right next step depends on the hardware. A home Level 1 cordset, Level 2 wall connector, public DC fast charger, adapter, and vehicle charge inlet are not repaired the same way.
- J1772: Common for Level 1 and Level 2 AC charging on non-Tesla EVs and plug-in hybrids in North America.
- CCS: Adds two larger DC fast-charging contacts below the J1772-style section. The DOE explains that CCS uses the same vehicle charge port for Level 1, Level 2, and DC fast charging.
- CHAdeMO: A legacy DC fast-charging connector found on older Japanese-brand EVs. Several major public charging networks have been actively phasing CHAdeMO out of new installations and, in some cases, existing sites, as fewer vehicles on the road still use it.
- J3400 / NACS: Originally Tesla’s proprietary design, now standardized by SAE as J3400. By 2026 it has become the native connector on most new EVs sold in North America, with automakers that previously used CCS now shipping NACS ports and offering CCS adapters during the transition.
Note: Pins, sleeves, latches, and communication contacts vary by connector type. Do not assume a fix that works on one cable is safe for another connector or for the vehicle inlet.
Identifying Warning Signs of Charging Pin Damage
Look for warning signs before you plug in, especially if the charger was dropped, left outside, dragged across the ground, or recently used with an adapter. A small visual clue can prevent a failed charge or a damaged vehicle inlet.
Visual and Tactile Signs
- Bent or uneven contacts: Pins or sleeves do not sit straight, look pushed in, or appear off-center.
- Corrosion or residue: Green, white, black, or rusty deposits appear on or near the contacts.
- Burning or heat marks: Brown stains, pitting, melted plastic, a hot handle, or a scorched smell appears after charging.
- Loose connection: The plug wiggles more than normal, will not latch, or falls out too easily.
- Unusual resistance: The connector does not slide in smoothly with normal hand pressure.
Charging Performance Signs
- Charging errors: The car or charger shows “charging interrupted,” “check connection,” “charging fault,” or similar warnings.
- Intermittent charging: Charging starts, stops, restarts, or drops power without a clear reason.
- Repeated breaker or GFCI trips: If a wall connector’s circuit keeps tripping the breaker, the fault may be in the home wiring rather than the connector itself — this calls for a licensed electrician, not more troubleshooting at the plug.
If one charger causes repeated errors but another known-good charger works normally, the charger connector or adapter may be the problem. If several chargers fail on the same vehicle, the vehicle charge port should be inspected by a qualified EV technician.
What to Do First if You See Damaged Charging Pins
Warning: If you see sparks, flames, or active smoke, or smell burning plastic while a vehicle is connected, do not touch the connector or vehicle. Move away, and if it is safe to reach, cut power at the breaker or the charger’s disconnect switch. Call the fire department for an active electrical fire — never use water on it.
- Stop the charging session. End the session in the charger app, vehicle screen, or charger display before unplugging when possible.
- Unplug safely. Use the release button or normal unlock method. Do not twist, pry, or yank the connector.
- Check for heat. If the handle, adapter, or charge-port area is unusually hot, let it cool before touching nearby surfaces.
- Inspect without tools inside the port. Use a flashlight and take photos. Do not insert metal picks, screwdrivers, test probes, or pliers.
- Try a known-good option only if nothing looks damaged. If the pins look normal and your vehicle manual allows it, try another charger or cable to isolate the issue.
- Report public charger damage. Use the charging-network app, station phone number, or charger ID so the operator can remove the connector from service.
Pro Tip: Take clear photos of the connector, vehicle inlet, charger screen, error message, and station ID before you leave. Those photos can help with warranty claims, charger-network reports, and repair quotes.
How to Inspect and Clean EV Charging Pins Safely
You can do a basic safety check, but keep it simple. EV charging equipment is designed around standards such as IEC 61851-1 for electric vehicle conductive charging systems, which covers EV supply equipment, connection requirements, and electrical safety. That is why damaged contacts should be treated as service parts, not as casual DIY repair parts.
- Make sure everything is disconnected. Do not inspect the contacts while charging is active.
- Use a flashlight. Look for bent contacts, missing pieces, corrosion, melted plastic, black marks, and debris.
- Remove only loose dry debris. If dust or lint is sitting at the edge, wipe the outside with a dry lint-free cloth. Do not spray cleaner into the vehicle inlet.
- Do not scrape the contacts. Scraping can remove plating, change contact pressure, and make overheating more likely.
- Check the latch and cable strain. A loose latch or cable pulling sideways can stress the pins even when the pins look clean.
- Stop if anything looks damaged. Replace or service the affected part instead of trying to reshape it.
Can You Repair Bent EV Charging Pins Yourself?
In most cases, no. You should not straighten EV charging pins yourself. A bent contact can have hidden damage, weakened spring tension, damaged plating, or heat stress. Even if you bend it back, the connector may no longer maintain a safe low-resistance connection during charging.
Do not use a multimeter to test continuity between charge-port pins and the vehicle battery. That is not a safe consumer test. EV battery systems can involve high voltage, and the charging interface also uses communication and safety-control circuits. Testing should follow the vehicle maker’s service procedure and be done by a qualified EV technician.
If the damaged part is a portable charging cord, contact the manufacturer about replacement. If it is a wall-mounted EVSE, contact the EVSE manufacturer or a licensed electrician. If it is the vehicle inlet, contact the dealer or an EV-qualified repair shop. If it is a public charger, report the station and use another connector.
When Replacement Is the Right Fix
Replacement is usually the right fix when you see broken plastic, missing contact material, severe corrosion, discoloration from heat, melted areas, a loose latch, or repeated charging faults. Public charging reliability research has found that broken connectors are among several causes of non-functioning DC fast chargers, alongside issues like unresponsive screens and payment failures, which is why operators need damage reports quickly.
Costs vary widely. A simple portable cordset replacement may be very different from replacing a vehicle charge inlet or a liquid-cooled DC fast-charging connector. Warranty coverage, labor rate, vehicle model, charger brand, and part availability all matter. As more vehicles ship with native NACS/J3400 ports, some owners are also budgeting for a CCS or J1772 adapter rather than a full connector swap — check with the vehicle or charger manufacturer on which adapters they officially support before buying one. Avoid any shop or seller that promises a universal pin repair without checking the connector type and manufacturer guidance.
Safety Tips for Handling Damaged EV Charging Pins
Damaged pins can create poor contact, heat, charging interruptions, or equipment faults. Treat the connector as safety-critical hardware, even if the damage looks small.
A charging connector that feels hot, smells burned, fits loosely, or shows visible pin damage should be removed from service until the affected part is inspected or replaced.
- Inspect before connecting: Look for bending, corrosion, melted plastic, debris, and loose parts.
- Use normal hand pressure only: If the plug does not align smoothly, stop and check the angle. Do not force it.
- Avoid damaged adapters: Do not use adapters with loose fit, heat marks, worn contacts, or broken latch points.
- Keep the cable supported: Avoid letting a heavy cable pull sideways on the vehicle inlet.
- Do not charge through damage: Continuing to use damaged hardware can make the repair more expensive.
Effective Strategies to Prevent Charging Pin Damage
Good habits can prevent most charging-pin damage. Start by lining up the connector before you push it in. The plug should slide in with steady pressure. If it catches, back out and realign it instead of pushing harder.
Keep connectors off the ground when possible. Store portable cables in a dry case or clean trunk area, and place wall-connector handles back in their holster after each use. Use the dust cap if your vehicle or charger includes one, especially in areas with road salt, sand, or heavy rain.
Be careful with adapters. Use only adapters approved by the vehicle maker, charger maker, or charging network for your vehicle and charger type. Make sure the adapter seats fully, locks securely, and stays cool during charging. If an adapter is hot to the touch, discolored, loose, or cracked, stop using it.
At public chargers, avoid handles that are lying in water, packed with dirt, visibly cracked, or missing latch parts. Check the connector before you plug in, and report damaged hardware in the app. The DOE’s guidance on charging infrastructure operation and maintenance also encourages regular upkeep and prompt reporting to keep charging equipment reliable.
Frequently Asked Questions
How do I know if an EV charging pin is damaged?
Look for bent contacts, corrosion, black marks, pitting, melted plastic, a loose latch, unusual resistance when plugging in, heat after charging, or repeated charging errors. If the same vehicle charges normally on another known-good charger, the first connector may be damaged.
Can I fix bent pins in a charger port with pliers?
No, not as normal owner maintenance. Bending a pin back can hide damage, weaken the contact, or create a hot spot during charging. Stop using the damaged connector or inlet and have the affected part inspected or replaced by the manufacturer, a licensed electrician, or an EV-qualified technician.
What should I do if my charger pin is broken?
Stop using it immediately. If it is your portable charger or wall connector, contact the charger manufacturer and check warranty coverage. If the broken part is inside the vehicle charge port, schedule service with the dealer or an EV-qualified repair shop. If it is a public charger, report the station and use another connector.
What should I do if I see sparks or smoke while charging?
Treat it as an emergency, not a troubleshooting step. Do not touch the connector or vehicle. Move to a safe distance, and if you can safely reach it, cut power at the breaker or the charger’s disconnect switch. Call the fire department for an active electrical fire — never use water on it.
Can damaged charging pins cause slow or intermittent charging?
Yes. Damaged, dirty, loose, or overheated contacts can cause poor connection, charging interruptions, lower charging power, or fault messages. The vehicle or charger may reduce power or stop charging to protect the system.
Will rain damage EV charging pins?
EV charging connectors are designed for outdoor use when intact and used correctly. The bigger concern is damage, contamination, trapped water, corrosion, or a connector lying in standing water. If the connector or vehicle port looks wet inside, dirty, corroded, cracked, or burned, do not use it.
Should I put dielectric grease or contact cleaner on EV charging pins?
Do not apply grease, oil, spray cleaner, or abrasive products unless the vehicle or charger manufacturer specifically says to use that product. Added chemicals can attract dirt, affect contact resistance, or damage plastics and seals.
Should I use an adapter if my connector or charge port is damaged?
No. An adapter cannot compensate for bent, corroded, or heat-damaged contacts on either side of the connection, and stacking an adapter onto damaged hardware adds another point of failure. Get the damaged part inspected or replaced first, then use only adapters approved by the vehicle or charger manufacturer.
How much does it cost to fix a damaged EV charging port?
The cost depends on what is damaged. A portable cordset, wall connector handle, public charger cable, adapter, and vehicle charge inlet are different parts with different labor needs. Check warranty coverage first, document the damage, and get a quote from the charger maker, vehicle dealer, licensed electrician, or EV repair shop.
Conclusion
Damaged EV charging pins are not something to ignore or force back into shape. Small contact problems can cause heat, charging faults, and damage to the connector or vehicle inlet — and in rare cases, sparking or fire. Your safest move is to stop using the affected equipment, document what you see, clean only loose dry debris, and get the right part inspected or replaced. With careful handling, clean storage, proper adapter use, and regular visual checks, you can keep your EV charging setup safer and more reliable as connector standards continue to evolve.
Sources
- U.S. Department of Energy Alternative Fuels Data Center: Electric Vehicle Charging Stations — supports EV charging terminology, connector types, charging levels, and current J3400/NACS adoption context.
- DOE AFDC: Charging Infrastructure Operation and Maintenance — supports the guidance on ongoing upkeep and reporting damaged charging equipment.
- IEC 61851-1:2017 Electric Vehicle Conductive Charging System — supports the need to treat EVSE connections as safety-critical electrical equipment.
- SAE J1772 Electric Vehicle and Plug-In Hybrid Electric Vehicle Conductive Charge Coupler — supports J1772 connector standard context.
- SAE J3400 North American Charging System Recommended Practice — supports J3400/NACS connector standard context.
- Reliability of Open Public Electric Vehicle Direct Current Fast Chargers — supports the note that public fast-charger failures can include broken connectors among other causes.

