
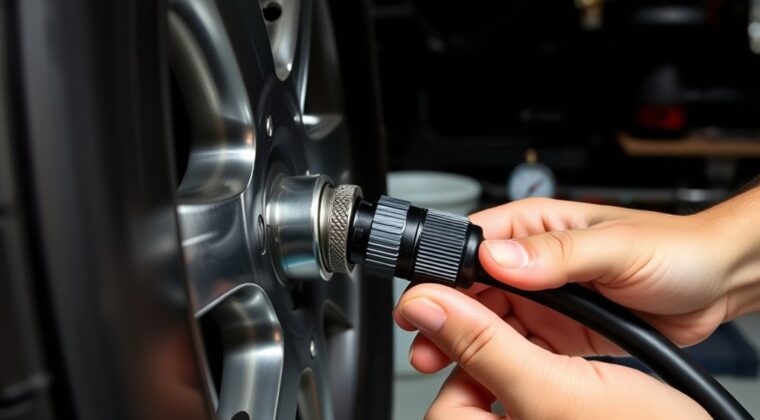
Check the inflator connection for a faint hiss, visible gaps, or worn O-rings, then clean the valve area and dry it fully. Tighten the plug clockwise with a wrench or pliers if it’s loose, but stop if threads are rounded or damaged. Reinflate to the recommended PSI and spray soapy water on the joint; bubbles mean a leak. If it still loosens, replace the valve plug or get a shop inspection for a more secure fix.
Key Takeaways
- Check the inflator plug for leaks, loose fit, or worn O-rings, then tighten it clockwise and test with soapy water.
- Clean the valve area thoroughly before reinstalling the plug to ensure dirt or corrosion is not causing the looseness.
- Use proper repair tools, including pliers, a wrench, a pressure gauge, and a replacement plug if needed.
- Inflate the tire to the recommended PSI and check again for bubbles to confirm the leak is fixed.
- Seek professional help if the plug keeps loosening or the tire loses pressure rapidly.
Diagnose the Loose Inflator Plug
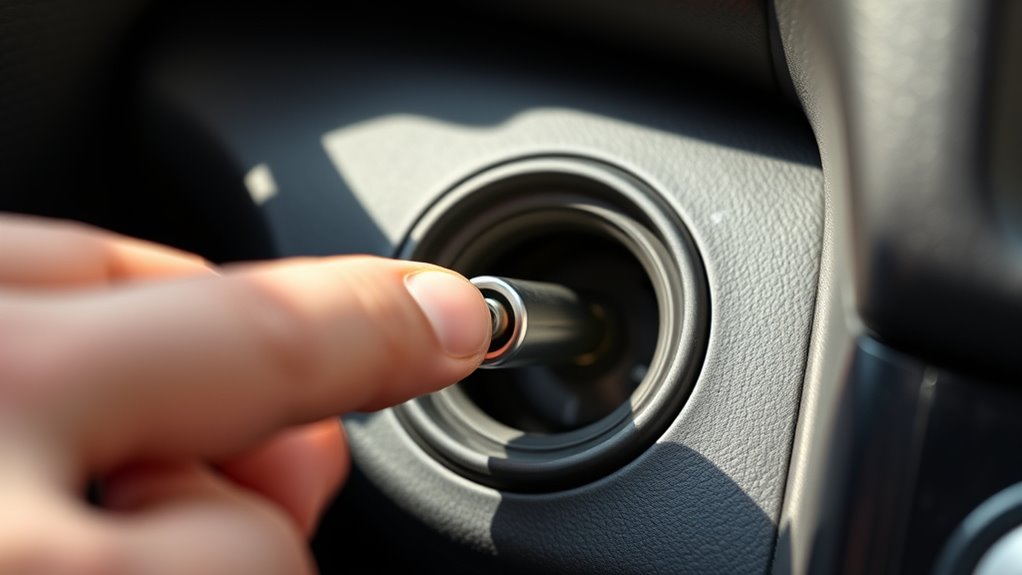
Start by checking for a leak at the inflator connection: if you hear a faint hiss when the inflator is attached to the tire valve, the plug may not be sealing properly.
You can diagnose the issue by listening closely for air leaks and then inspecting the fit by hand. Look for visible gaps between the plug and valve; a loose plug won’t sit snugly. If the plug seems loose but shows no damage, turn it clockwise until it’s secure. Use a wrench only if you need extra grip, and stop when it feels firm.
Next, examine the O-ring or sealing washer for wear, flattening, or cracks, because a damaged seal can let air escape and make the connection feel unstable.
Inspect the O-ring or sealing washer for wear, flattening, or cracks—damage here can cause leaks and an unstable connection.
After each adjustment, test the inflator with soapy water. If bubbles form, air is still escaping, and you haven’t fully solved the problem.
Gather the Right Repair Tools
Before you begin the repair, gather a tire inflator plug kit with a rubber plug, insertion tool, and reamer so you can clean and seal the puncture properly. This is the first step if you want to make it work without wasting time or compromising the repair.
Make sure you also have pliers for gripping stubborn parts, scissors for trimming excess rubber, and a tire pressure gauge to verify inflation after you finish. Keep a small air compressor or portable inflator nearby so you can reinflate the tire immediately after plugging.
If you need a temporary backup, a can of tire sealant can add support until a professional repair is possible. Wear safety gloves to protect your hands while you handle sharp tools and pressurized components.
When you organize every tool before starting, you work with control, reduce errors, and keep the repair process efficient and independent.
Clean the Valve Area Safely
First, gather a soft brush, clean cloth, and any safe cleaner before you work on the valve area.
With the tire deflated, you can remove dirt and debris around the valve stem carefully so you don’t damage the seal or valve core.
Wipe the area dry completely, then check that no residue remains before you reinstall the inflator plug.
Gather Cleaning Supplies
Gather the cleaning supplies you’ll need and make sure the tire is fully deflated before you work on the valve area. Use deliberate cleaning techniques that protect valve maintenance and prevent common mistakes.
| Supply | Purpose |
|---|---|
| Soft cloth | Lift loose dust |
| Soft brush | Clear tight spots |
| Mild soap solution | Dissolve grime |
| Clean water | Rinse residue |
Dampen the cloth or brush lightly, then wipe the valve stem and surrounding surface. Keep pressure controlled so you don’t scratch the metal. A mild soap mix works well on stubborn film without attacking components. Avoid sharp tools; they can damage the seal and invite air loss. Once the area looks clean, inspect the valve for wear, cracking, or distortion before you move on.
Remove Debris Carefully
With the valve area exposed, remove any dirt or debris carefully so you don’t contaminate the seal or damage the stem.
Use a soft brush, lint-free cloth, or other debris removal tools to clear particles from around the valve stem. Keep your motions light and controlled, and never pry with sharp objects that could scratch the metal or nick the rubber seal.
If grime hides the leak point, apply a small amount of soapy water to the area, then inspect for bubbles before continuing. These cleaning techniques let you restore access without compromising the valve.
Consistent valve maintenance tips matter: check the area regularly, clean it after exposure to road dust, and keep the stem free of buildup so your tire inflator plug can hold firm and perform reliably.
Dry Valve Thoroughly
Once you’ve cleared away the loose debris, dry the valve area thoroughly before reconnecting anything.
First, unplug the tire inflator and disconnect it from power so you don’t create a shock or short risk. Use a soft cloth or brush to remove remaining moisture and grit with proper cleaning techniques, then let the area air-dry completely.
If stubborn grime remains, apply a mild soap solution sparingly, wipe it clean, and dry again until no residue stays.
Inspect the valve for wear, cracks, or deformation; common valve issues often start with neglected surfaces and can cause air leaks.
These valve maintenance tips help you preserve a tight seal, maintain correct tire pressure, and extend inflator life.
Clean, dry hardware gives you control and keeps the system working free of avoidable failure.
Tighten the Inflator Plug
Before tightening the inflator plug, unplug the tire inflator and disconnect it from any power source to prevent accidental activation. Use a wrench or pliers to grip the plug gently, then turn it clockwise until it seats firmly. Don’t crush the threads; precision keeps you in control and preserves performance. Inspect the plug and hose for wear, since loose fit often tracks with common inflator issues.
| Check | Action | Result |
|---|---|---|
| Plug fit | Turn clockwise | Secure connection |
| Threads | Inspect for wear | Smooth engagement |
| Hose joint | Look for damage | Stable pressure |
These plug maintenance tips help you lock in reliability without surrendering to sloppy inflation. After tightening, connect the inflator to a tire and verify there’s no air leak around the plug. If needed, apply soapy water and watch for bubbles. Use these tightening techniques regularly, and you’ll keep the inflator functional, efficient, and ready when freedom demands swift tire service.
Replace a Damaged Valve Plug
If you spot air leaks or visible damage at the valve, you’ll need to replace the valve plug.
First, deflate the tire, remove it from the wheel, and use a valve core removal tool to take out the faulty plug without damaging the valve stem.
Then install a new plug securely, reinflate the tire to the recommended pressure, and check for leaks with soapy water.
Spot Valve Damage
Inspect the tire inflator plug for cracks, wear, or deformation, because visible damage to the valve itself can cause air leaks and poor sealing.
Use valve inspection techniques to check the stem, core, and seating surface for common wear indicators like splits, flattened edges, or distortion. If you spot damage, match the replacement plug to your tire’s specifications so you get a secure fit.
A damaged valve plug often swaps out without removing the tire from the rim, which saves time and keeps you moving. Use a valve core removal tool to extract the faulty part cleanly, protecting nearby components.
After installation, apply soapy water around the area. Bubbles show leaks, so you can correct them and restore effective sealing methods with confidence.
Remove Faulty Plug
Deflate the tire completely, then use pliers to grip the damaged valve plug and twist it counterclockwise until it unscrews from the valve stem. You’re removing pressure so the repair stays controlled and your hands stay free.
As you work, note the valve types you’re dealing with, because stems and caps can differ in shape and fit. Check the plug materials, too; brittle rubber or stripped plastic often signals failure.
Once the plug’s out, inspect the valve stem for debris, corrosion, or cuts that could compromise sealing. Keep the opening clear and dry. Use this step to reclaim reliable inflation techniques by exposing the true condition of the stem before any replacement.
Don’t force anything. Precision now prevents leaks later and keeps your tire system ready for clean, confident service.
Install Replacement Plug
With the old plug out and the valve stem clear, install the replacement using the correct valve core tool.
Choose a plug that matches your valve types, usually Schrader or Presta, and confirm it fits your inflator. If the tire isn’t fully deflated, stop and release remaining air pressure first.
Add a small amount of thread sealant, or wrap the threads with Teflon tape, to improve the seal without clogging the core.
Thread the plug in by hand, then tighten it with the tool until it’s snug. Don’t overtighten; you can damage the valve.
Reinflate the tire to the recommended air pressure, then brush soapy water around the plug. If you see bubbles, loosen, reseat, and retighten for a clean, leak-free repair.
Inflate the Tire and Test for Leaks
Once the inflator plug is securely attached to the valve stem, connect the air compressor and inflate the tire while watching the pressure gauge closely. Target the PSI listed on the driver’s door jamb or in your owner’s manual. Keep the flow steady; don’t overfill, and pause often to read tire pressure accurately. This step supports inflator maintenance and protects your freedom to drive without avoidable failure.
| Check | Action |
|---|---|
| Pressure gauge | Compare readings to the recommended PSI |
| Connection point | Inspect plug-to-stem fit during inflation |
| Soapy water test | Apply after inflation for leak detection |
| Bubble response | Tighten or replace the plug if needed |
After you reach spec, brush soapy water around the plug and stem. If bubbles appear, you’ve found a leak. Address it immediately so the tire holds pressure and performs as intended. Regular checks keep your setup reliable, efficient, and safe.
Know When a Plug Fix Isn’t Enough
If tightening the inflator plug still doesn’t stop the leak, the fix probably isn’t enough on its own.
Check the plug closely for cracks, splits, or worn threads; a damaged part can’t make an airtight seal, and forcing it is one of the common mistakes that wastes time.
You should treat persistent leaks as a warning sign, because gradual deflation reduces handling, braking, and tire life.
Follow basic safety precautions: don’t keep driving on a tire that’s losing pressure fast, and don’t ignore hissing or repeated pressure loss.
If the plug still fails after tightening, use a tire sealant only as a temporary measure until you can make a proper repair.
Regular inspection is one of the best maintenance tips, since prolonged use can weaken the plug’s integrity.
If the leak keeps returning, get a professional assessment; the real problem may be tire damage, not the plug itself, and you deserve a system that works.
Prevent the Plug From Loosening Again
To keep the inflator plug from loosening again, check its tightness before each use so you can catch any movement early. Build preventive maintenance into your routine: inspect the plug, confirm the threads seat cleanly, and stop before damage starts.
Check the inflator plug before each use, inspect the threads, and stop wear before it starts.
Use a small amount of thread sealant or Teflon tape as sealant application to improve grip and support vibration damping during transport and inflation cycles.
- Hold the plug steady, then tighten only until it seals; don’t force it.
- Store the inflator upright or secured so it won’t rattle against tools.
- Replace the plug if you see rounded threads, cracks, or repeated loosening.
These steps help you stay self-reliant and keep the connection reliable without overworking the hardware. When you protect the threads and limit motion, you reduce wear and keep the inflator ready for the next job.
Get Professional Help if Needed
When a loose tire inflator plug is still leaking air, get a professional inspection so the problem can be diagnosed and repaired safely. A technician can perform a professional assessment with specialized gauges, leak-detection tools, and fitting wrenches that you may not have. This helps identify damaged threads, worn seals, or valve-body faults that aren’t obvious during a quick check.
If you’re unsure how to disassemble the inflator or you don’t have the correct parts, let a tire shop handle it. Many shops offer free inspections, and they can often fix the issue right away, saving you time and hassle.
Compare repair costs before authorizing work, but don’t let a cheap shortcut override safety considerations. An improper repair can worsen the leak, damage the tire, or leave you stranded.
Professional help gives you a clean, reliable fix and lets you stay in control of your vehicle’s readiness.
Frequently Asked Questions
How to Fix a Tire Inflator?
You fix a tire inflator by inspecting the valve, tightening the connection with pliers, and replacing any worn O-ring or gasket.
You should add Teflon tape to the threads, then test for leaks while inflating.
Follow tire maintenance tips, inflator safety precautions, and choose inflator accessories that fit securely.
If you hear hissing, you’ve got a leak to address.
Keep your setup reliable, practical, and free from needless dependence.
How to Fix a Failed Tire Plug?
A roadside nail hit your tread, and the plug slipped out, leaving you stranded.
You should inspect the tire for added damage, remove the failed plug, ream the hole, and install a fresh rubber plug with firm pressure.
Then inflate to spec and test with soapy water.
This tire puncture repair keeps you moving, while inflator maintenance tips and emergency tire solutions help you stay independent and prepared.
What Are the Common Problems With Car Tire Inflators?
Car tire inflators often suffer from damaged hoses, faulty pressure gauges, and weak connectors.
You’ll also see leaks from worn seals, clogged valves, and loose plugs that won’t hold pressure.
Temperature swings can shrink or expand fittings, worsening air loss.
For reliable tire inflator maintenance, inspect parts regularly, match fittings correctly, and test output.
With troubleshooting inflators, you can isolate common inflator malfunctions fast and keep your tires ready.
How Do You Screw in Tire Plugs?
You screw in tire plugs like you’re sealing a tiny wound in a battle-worn tire. Clean the puncture with a reamer, choose the right tire plug types, and insert the plug in your preferred insertion tool.
Push it until two-thirds stays inside, then pull straight out. Trim excess, inflate to spec, and test with soapy water.
These installation techniques and maintenance tips keep you moving freely, safely.
Conclusion
If you’ve tightened the inflator plug, cleaned the valve, and still hear that stubborn hiss, the tire is reminding you that “simple” repairs rarely stay simple. A loose plug may hold for now, but a worn valve core, cracked stem, or damaged seal can undo your work fast. Recheck the seal after inflation, monitor pressure, and don’t force a fix that won’t hold. When in doubt, let a professional finish the job.
